Hestiaコントロールパネルは、強力で無料のオープンソースのWebホスティングコントロールパネルであり、中央の場所からWebサイト、メールサーバー、DNS、およびその他のWebホスティング機能をホストするために使用できます。速度、セキュリティ、安定性を考慮して設計されており、リソースの少ないサーバーで実行できます。 Hestiaコントロールパネルには、ユーザーフレンドリーなWebおよびコマンドラインインターフェイスが付属しており、Webドメイン、メールアカウント、およびDNSゾーンの展開と管理を簡単に行うことができます。
このチュートリアルでは、Debian10にHestiaコントロールパネルをインストールする方法を紹介します。
前提条件
- 4GBRAMを搭載した新しいDebian10.3.064ビットAtlantic.NetVPS。
- サーバーのIPが指す有効なドメイン名。
- サーバーで構成されているrootパスワード。
ステップ1–Atlantic.Netクラウドサーバーを作成する
まず、Atlantic.Netクラウドサーバーにログインします。少なくとも1GBのRAMを搭載したオペレーティングシステムとしてDebian10を選択して、新しいサーバーを作成します。 SSH経由でクラウドサーバーに接続し、ページの上部で強調表示されているクレデンシャルを使用してログインします。
Debian 10サーバーにログインしたら、次のコマンドを実行して、ベースシステムを最新の利用可能なパッケージで更新します。
apt-get update -y
ステップ2–Hestiaインストールスクリプトをダウンロードする
開始する前に、サーバーに必要な依存関係をインストールする必要があります。次のコマンドですべてをインストールできます:
apt-get install ca-certificates gnupg2 curl wget unzip -y
すべてのパッケージをインストールした後、Hestiaインストールスクリプトをダウンロードする必要があります。次のコマンドでダウンロードできます:
wget https://raw.githubusercontent.com/hestiacp/hestiacp/release/install/hst-install.sh
ダウンロードしたら、次のコマンドを使用して、ダウンロードしたスクリプトに適切な権限を付与します。
chmod 755 hst-install.sh
ステップ3–Hestiaをインストールする
次に、ダウンロードしたインストールスクリプトを実行して、次のコマンドでインストールを開始します。
bash hst-install.sh
次の出力が表示されます。
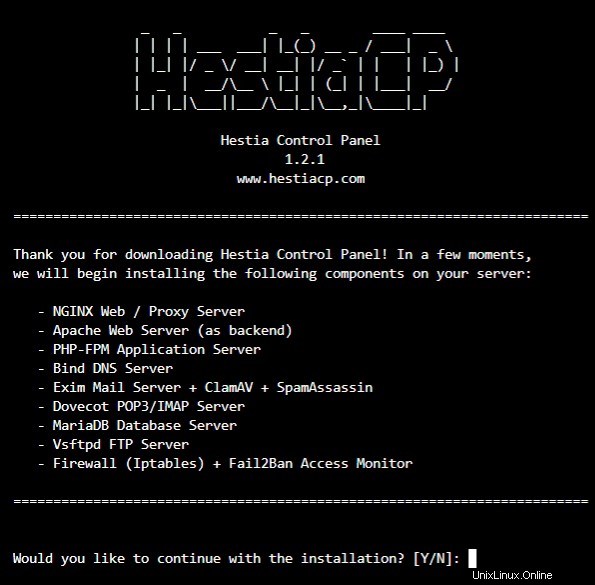
Press Y to continue the installation
Please enter admin email address: example@unixlinux.online
Please enter FQDN hostname [debian10]: hestia.example.com
メールアドレスと有効なドメイン名を入力し、 Enterを押します インストールを開始します。インストールが正常に完了すると、次の出力が表示されます。
Congratulations!

You have successfully installed Hestia Control Panel on your server.

Ready to get started? Log in using the following credentials:

    Admin URL:  https://hestia.example.com:8083
    Username:   admin
    Password:   pa28TDlnRdr6yCf5


Thank you for choosing Hestia Control Panel to power your full stack web server,
we hope that you enjoy using it as much as we do!

Please feel free to contact us at any time if you have any questions,
or if you encounter any bugs or problems:

E-mail:  example@unixlinux.online
Web:     https://www.hestiacp.com/
Forum:   https://forum.hestiacp.com/
GitHub:  https://www.github.com/hestiacp/hestiacp

Note: Automatic updates are enabled by default. If you would like to disable them,
please log in and navigate to Server > Updates to turn them off.

Help support the Hestia Contol Panel project by donating via PayPal: https://www.hestiacp.com/donate
--
Sincerely yours,
The Hestia Control Panel development team

Made with love & pride by the open-source community around the world.

[ ! ] IMPORTANT: You must logout or restart the server before continuing.

Do you want to reboot now? [Y/N] Y
Yと入力します Enterを押します サーバーを再起動します。
注 :上記の出力に示されているように、HestiaのログインURLとクレデンシャルを覚えておいてください。
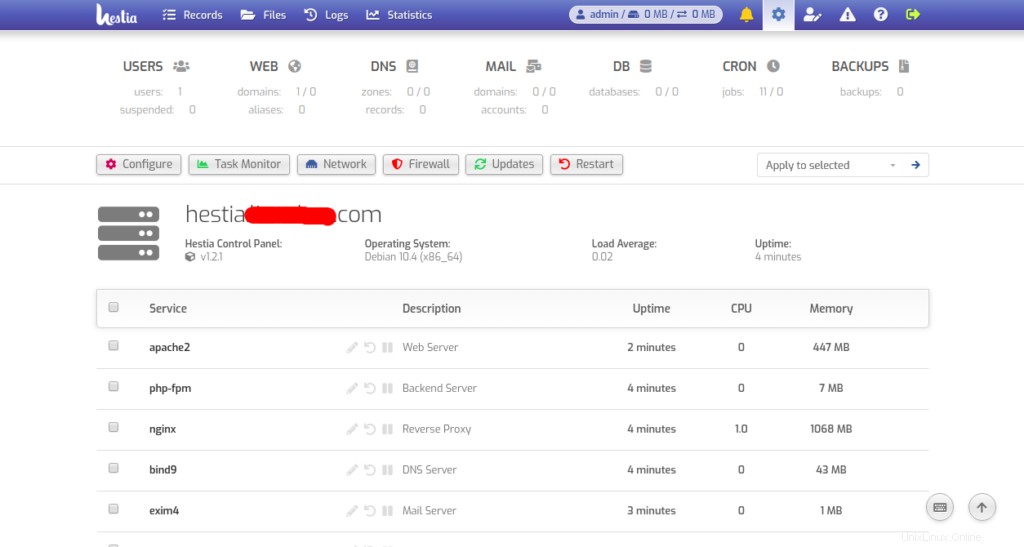
ステップ4–Hestiaサービスの管理
systemdユーティリティを使用してHestiaサービスを簡単に管理できます。
たとえば、次のコマンドを使用してHestiaサービスを開始および停止できます。
systemctl start hestia
systemctl stop hestia
次のコマンドを使用して、Hestiaサービスのステータスを確認することもできます。
systemctl status hestia
次の出力が表示されます。
● hestia.service - LSB: starts the hestia control panel
   Loaded: loaded (/etc/init.d/hestia; generated)
   Active: active (running) since Tue 2020-07-28 06:30:33 UTC; 1min 27s ago
     Docs: man:systemd-sysv-generator(8)
  Process: 416 ExecStart=/etc/init.d/hestia start (code=exited, status=0/SUCCESS)
    Tasks: 3 (limit: 2359)
   Memory: 20.9M
   CGroup: /system.slice/hestia.service
           ├─601 nginx: master process /usr/local/hestia/nginx/sbin/hestia-nginx
           ├─604 nginx: worker process
           └─650 php-fpm: master process (/usr/local/hestia/php/etc/php-fpm.conf)

Jul 28 06:30:32 hestia.example.com systemd[1]: Starting LSB: starts the hestia control panel...
Jul 28 06:30:33 hestia.example.com hestia[416]: Starting hestia-nginx: hestia-nginxnginx: [warn] "ssl_stapling" ignored, issuer certificate no
Jul 28 06:30:33 hestia.example.com hestia[416]: .
Jul 28 06:30:33 hestia.example.com hestia[416]: Starting hestia-php: hestia-php.
Jul 28 06:30:33 hestia.example.com systemd[1]: Started LSB: starts the hestia control panel.
ステップ5– Let'sEncryptSSLでHestiaを保護する
Let’s Encryptは、Internet SecurityResearchGroupが運営する無料の非営利認証局です。その目的は、HTTPSの普及を促進することにより、より安全でプライバシーを尊重するWebを作成することです。
次のコマンドを実行するだけで、Let’sEncryptの無料SSLを使用してHestiaを保護できます。
v-add-letsencrypt-host
成功すると、画面には何も表示されません。
ステップ6–Hestiaコントロールパネルにアクセスする
次に、Webブラウザーを開き、URLhttps://hestia.example.com:8083を入力します。 Hestiaのログイン画面にリダイレクトされます:
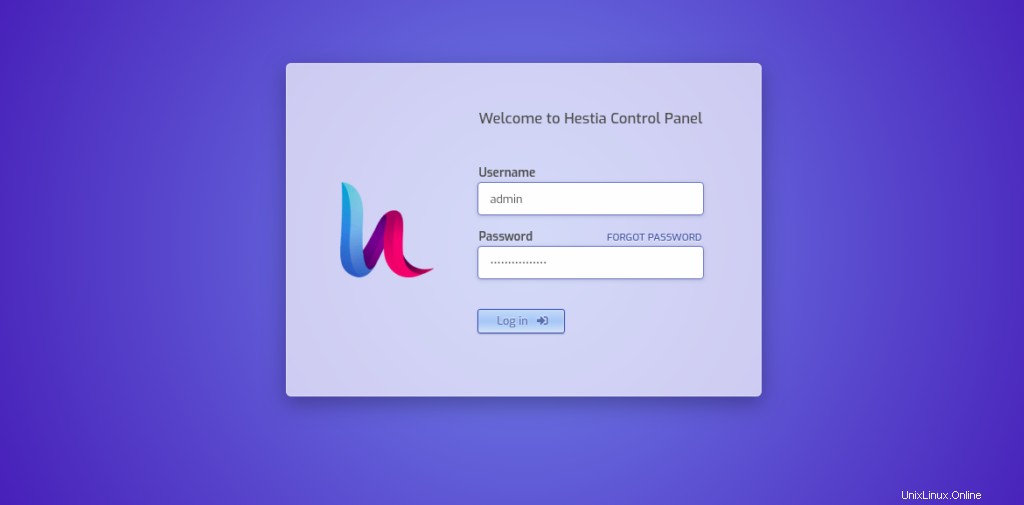
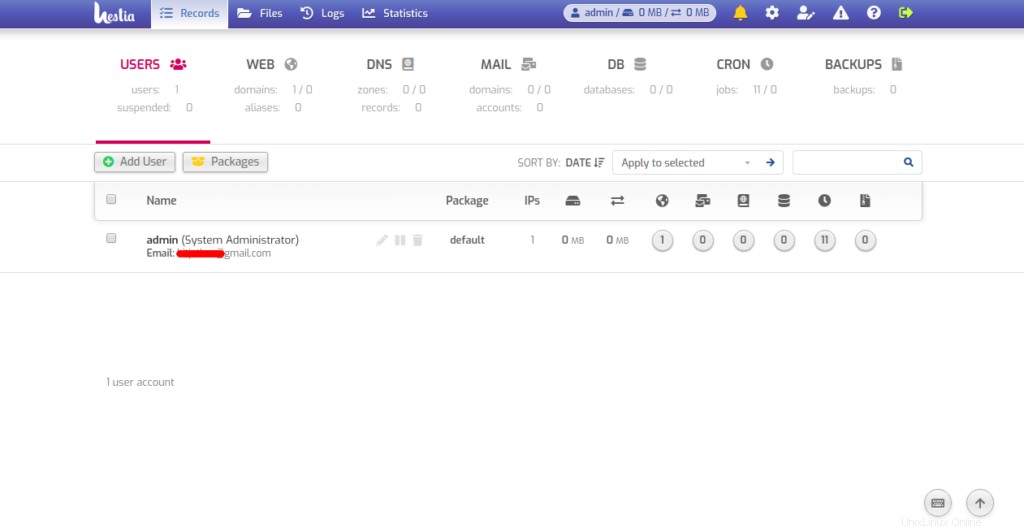
管理者のユーザー名とパスワードを入力し、ログインをクリックします ボタン。 Hestiaコントロールパネルのデフォルトのダッシュボードが表示されます。
結論
おめでとう!これで、Hestiaコントロールパネルが正常にインストールされ、Debian 10にLet’s Encrypt SSLを使用して保護されました。これで、バックエンドパネルにログオンした後、ホスト環境やその他の設定のセットアップを開始できます。 Atlantic.NetのVPSホスティングアカウントで今すぐ始めましょう!