はじめに
Siegeは、オープンソースの回帰テストおよびベンチマークユーティリティです。ユーザー定義の数のシミュレートされたユーザーを使用して単一のURLのストレステストを行うことも、多数のURLをメモリに読み込んで同時にストレスをかけることもできます。プログラムは、記録されたヒットの総数、転送されたバイト数、応答時間、同時実行性、および戻りステータスを報告します。 Siegeは、HTTP / 1.0および1.1プロトコル、GETおよびPOSTディレクティブ、Cookie、トランザクションログ、および基本認証をサポートしています。その機能は、ユーザーごとに構成できます。
ほとんどの機能は、プログラムの呼び出しの複雑さを最小限に抑えるためのデフォルト値も含むコマンドラインオプションで構成できます。したがって、Siegeを使用すると、n個のユーザーがt回あるWebサーバーにストレスをかけることができます。ここで、nとtはユーザーによって定義されます。テストの継続時間と各単一トランザクションの継続時間を記録します。トランザクション数、経過時間、転送されたバイト数、応答時間、トランザクションレート、同時実行性、およびサーバーがOKと応答した回数(ステータスコード200)を報告します。
また、包囲 所有しているサーバーに対してのみ実行するか、テストする明示的な権限があるサーバーでのみ実行する必要があります。一部の国では、許可されていないWebサイトで包囲攻撃を使用することは犯罪と見なされる可能性があります。
インストール
SiegeはGNUautoconfで構築されました。 GNUソフトウェアに精通している場合は、siegeのインストールに慣れているはずです。詳細については、INSTALLファイルを参照してください。
Siegeをインストールするには Debin / Ubuntuの下 、コマンドでこれを行うことができます:
$ sudo apt install siegeCentOS / RHELの場合 、 epelをインストールして有効にします 包囲をインストールするためのリポジトリ:
# yum install epel-release
# yum install siegeまた、包囲を構築することもできます ソースから。そのためには、ビルドエッセンシャルが必要です。 および開発パッケージがインストールされています。
For Debian/Ubuntu
$ sudo apt install build-essential

For CentOS/RHEL
# yum groupinstall 'Development Tools'
次に、 Siegeをダウンロードします 図のようにソースからインストールします。
[root@unixcop ~]# wget http://download.joedog.org/siege/siege-latest.tar.gz
--2021-08-24 07:12:17--  http://download.joedog.org/siege/siege-latest.tar.gz
Resolving download.joedog.org (download.joedog.org)... 52.24.24.107
Connecting to download.joedog.org (download.joedog.org)|52.24.24.107|:80... connected.
HTTP request sent, awaiting response... 200 OK
Length: 543378 (531K) [application/x-gzip]
Saving to: ‘siege-latest.tar.gz’

100%[============================================================================================================>] 543,378     --.-K/s   in 0.1s

2021-08-24 07:12:18 (4.57 MB/s) - ‘siege-latest.tar.gz’ saved [543378/543378]

[root@unixcop ~]#
次にそれを抽出します:
$ tar -zxvf siege-latest.tar.gzまた、抽出したディレクトリに移動し、次のコマンドを使用してインストールします。
$ cd siege-*/
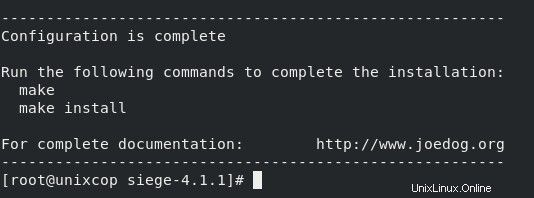
$ sudo ./configure --prefix=/usr/local --with-ssl=/usr/bin/openssl
$ sudo make && make install
包囲の構成
インストールが完了したら、包囲を調整できます 構成ファイル。 / etc / siege / siegercにあります 。ソースからパッケージをビルドすることにした場合は、以下を実行する必要があります:
$ siege.configさらに、これにより siege.confが生成されます ユーザーの自宅にあるファイル〜/ .siege / siege.conf 。
ファイルの内容は次のようになります。 ログファイルのコメントを外していることに注意してください および時間 ディレクティブ:
[root@unixcop siege]# cat siegerc |egrep -v "^$|#"
verbose = true
color = on
quiet = false
json_output = false
show-logfile = true
logging = false
logfile = ${HOME}/siege.log
gmethod = HEAD
parser = true
nofollow = ad.doubleclick.net
nofollow = pagead2.googlesyndication.com
nofollow = ads.pubsqrd.com
nofollow = ib.adnxs.com
limit = 255
protocol = HTTP/1.1
chunked = true
cache = false
connection = close
concurrent = 25
delay = 0.0
internet = false
benchmark = false
accept-encoding = gzip, deflate
url-escaping = true
unique = true

[root@unixcop siege]#また、現在の構成では、包囲 1分間で25人の同時ユーザーを模倣します。
これで、包囲を実行する準備が整いました。
Siegeを使用したWebサイトの読み込みのテスト
テストするWebサイトを次のように指定するだけです:
# siege example.com
[root@unixcop .siege]# siege 192.168.13.133/unixcop
[alert] Zip encoding disabled; siege requires zlib support to enable it
** SIEGE 4.1.1
** Preparing 25 concurrent users for battle.
The server is now under siege...
Lifting the server siege...
Transactions:		         6457 hits
Availability:		      100.00 %
Elapsed time:		        1.45 secs
Data transferred:	       11.51 MB
Response time:		        0.05 secs
Transaction rate:	      453.10 trans/sec
Throughput:		        7.94 MB/sec
Concurrency:		       24.20
Successful transactions:         672
Failed transactions:	           0
Longest transaction:	        0.24
Shortest transaction:	        0.02

[root@unixcop .siege]# 可用性が100%のままである場合 接続に失敗することはなく、システムは正常に機能し、問題はありませんでした。応答時間にも注意を払う必要があります。
複数のウェブサイトでSiegeを実行する
siege を設定すると、複数のURLをテストできます ファイルからそれらを読み取るため。 URLは/usr/local/etc/urls.txtで説明できます このように:
[root@unixcop ~]# cd /usr/local/etc/
[root@unixcop etc]# cat urls.txt
# URLS file for siege
# --
# Format the url entries in any of the following formats:
# http://www.whoohoo.com/index.html
# http://www/index.html
# www/index.html
# http://www.whoohoo.com/cgi-bin/howto/display.cgi?1013
# Use the POST directive for pages that require it:
# http://www.whoohoo.com/cgi-bin/haha.cgi POST ha=1&ho=2
#      or POST content from a file:
# http://www.whoohoo.com/melvin.jsp POST </home/jeff/haha
# http://www.whoohoo.com/melvin.jsp POST <./haha
#
# You may also assign and reference variables inside this file:
# HOST=www.joedog.org
# PROT=https  # Secure protocol
# PORT=443    # Default https port
#
# $(PROT)://$(HOST):$(PORT)/siege/jsoner.php?haha=papa
# $(PROT)://$(HOST)/siege/jsoner.php?day=%2332
# $(PROT)://$(HOST)/siege/jsoner.php POST {haha:papa}
#
# Since $ is used to prefix scalar variables, you have to escape
# them if you want to pass them to the server:
# $(PROT)://$(HOST)/siege/jsoner.php?amount=\$10.00&cost=\$12.99
# -------------------------------------------------------

[root@unixcop etc]#包囲を伝えるためにも ファイルからURLをテストするには、 -fを使用します このようなオプション:
# siege -f /usr/local/etc/urls.txtコマンドラインオプションを使用することもできます:
Options:
-V,     --version VERSION, prints the version number.
-h,     --help HELP, prints this section.
-C,     --config CONFIGURATION, show the current config.
-v,     --verbose VERBOSE, prints notification to screen.
-q,     --quiet QUIET turns verbose off and suppresses output.
-g,     --get GET, pull down HTTP headers and display the transaction. Great for application debugging.
-p,     --print PRINT, like GET only it prints the entire page.
-c,      --concurrent=NUM CONCURRENT users, default is 10
-r,      --reps=NUM REPS, number of times to run the test.
-t,     --time=NUMm TIMED testing where "m" is modifier S, M, or H
ex:   --time=1H, one hour test.
-d,    --delay=NUM Time DELAY, random delay before each request
-b,    --benchmark BENCHMARK: no delays between requests.
-i,      --internet INTERNET user simulation, hits URLs randomly.
-f,      --file=FILE FILE, select a specific URLS FILE.
-R,     --rc=FILE RC, specify an siegerc file
-l,      --log[=FILE] LOG to FILE. If FILE is not specified, the default is used: PREFIX/var/siege.log
-m,    --mark="text" MARK, mark the log file with a string. between .001 and NUM. (NOT COUNTED IN STATS)
-H,    --header="text" Add a header to request (can be many)
-A,    --user-agent="text" Sets User-Agent in request
-T,     --content-type="text" Sets Content-Type in request
-j,      --json-output JSON OUTPUT, print final stats to stdout as JSON
         --no-parser NO PARSER, turn off the HTML page parser
        --no-follow NO FOLLOW, do not follow HTTP redirects
結論
包囲 は、高負荷時にシステムの信頼性を測定するための強力なツールです。評価中にテスト対象のサーバーにアクセスできなくなる可能性があるため、常に注意してテストを実行する必要があります。タグ