開発者のグループにLinuxとは何かを尋ねると、ほとんどの開発者はおそらくそれがオープンソースのオペレーティングシステムだと言うでしょう。より技術的な知識を持っている人は、おそらくそれをカーネルと呼ぶでしょう。
しかし、私にとってLinuxは単なるオペレーティングシステムやカーネルではありません。私にとって、それは自由です。私のニーズに応じてオペレーティングシステムを組み立てる自由。それがArchLinuxの出番です。
彼らのウィキによると、
Arch Linuxは、独自に開発されたx86-64汎用GNU / Linuxディストリビューションであり、ローリングリリースモデルに従って、ほとんどのソフトウェアの最新の安定したバージョンを提供するよう努めています。
デフォルトのインストールは最小限の基本システムであり、意図的に必要なものだけを追加するようにユーザーが構成します。
言い換えれば、Arch Linuxは、経験豊富なLinuxユーザーを対象としたx86-64アーキテクチャ用に最適化されたディストリビューションです。それはあなたがあなたのシステムに対して完全な責任とコントロールを持つことを可能にします。
必要なパッケージ、カーネル(はい、複数あります)、ブートローダー、デスクトップ環境などを選択できます。
誰かが言うのを聞いたことがありますか
ああ–ちなみに、私はArch Linuxを使用しています!
これは、Arch Linuxをマシンにインストールするには、Linuxディストリビューションのさまざまな部分がどのように機能するかについて適切な知識が必要なためです。したがって、システムでArch Linuxを実行することは、Linuxを理解していることの証です。
経験から言えば、Arch Linuxのインストールは、FedoraやUbuntuのようなもののインストールと大差ありません。インストーラーに代わって作業を行わせるのではなく、手動で個々の手順を実行する必要があるだけです。ただし、プロセスを完了すると、他のディストリビューションが一般的にどのように機能するかを理解できるようになります。
この記事では、ArchLinuxをマシンにインストールして構成するプロセス全体を説明します。また、いくつかの一般的なタスクとトラブルシューティングのヒントについても最後に説明します。
だから私と一緒に来て、ウサギの穴がどれだけ深くなるかをお見せします。
- 私が行っているいくつかの仮定
- 起動可能なArchLinuxUSBドライブを作成する方法
- ArchLinuxをインストールするためにコンピューターを準備する方法
- ArchLinuxをインストールする方法
- コンソールのキーボードレイアウトとフォントを設定する方法
- 起動モードを確認する方法
- インターネットに接続する方法
- システム時計を更新する方法
- ディスクをパーティション分割する方法
- パーティションをフォーマットする方法
- ファイルシステムをマウントする方法
- ミラーを構成する方法
- ArchLinuxベースシステムをインストールする方法
- ArchLinuxを設定する方法
- Fstabファイルを生成する方法
- Arch-Chrootを使用して新しくインストールされたシステムにログインする方法
- タイムゾーンを設定する方法
- ローカリゼーションを構成する方法
- ネットワークを構成する方法
- ルートパスワードを設定する方法
- root以外のユーザーを作成する方法
- マイクロコードのインストール方法
- ブートローダーをインストールして構成する方法
- Xorgのインストール方法
- グラフィックドライバのインストール方法
- デスクトップ環境をインストールする方法
- GNOMEのインストール方法
- プラズマのインストール方法
- インストールを完了する方法
- デスクトップ環境を切り替える方法
- Pacmanを使用してパッケージを管理する方法
- Pacmanを使用してパッケージをインストールする方法
- Pacmanを使用してパッケージを削除する方法
- Pacmanを使用してパッケージをアップグレードする方法
- Pacmanを使用してパッケージを検索する方法
- ArchLinuxでAURを使用する方法
- ヘルパーを使用してパッケージをインストールする方法
- パッケージを手動でインストールする方法
- 一般的な問題のトラブルシューティング方法
- LiveArchISOをレスキューメディアとして使用する方法
- 参考資料
- 結論
チュートリアルのコアに飛び込む前に、いくつかのことを明確にしたいと思います。この記事全体を親しみやすいものにするために、私はあなたとあなたのシステムについて次のことを前提としています。
- 基本的なレベルでArchLinuxについて知っています
- Arch Linux
- よくある質問
- 他のディストリビューションと比較したアーチ
- コンピュータはBIOSではなくUEFIを使用しています
- Linuxを起動するのに十分な大きさ(4GB)のUSBドライブがあります
- Linux(Ubuntu / Fedora)のインストールの経験があります
- HDDまたはSSDにLinuxをインストールするのに十分なスペースがあります
それはほとんどそれです。上記のすべてが揃っていれば、準備は完了です。
Arch Linuxをダウンロードするには、https://archlinux.org/download/にアクセスして、最新リリース(この記事の執筆時点では2022.01.01)をダウンロードしてください。 ISOのサイズは約870メガバイトである必要があります。
ダウンロードしたら、USBに入れる必要があります。これを行うには、FedoraMediaWriterプログラムを使用できます。アプリケーションをダウンロードしてシステムにインストールします。次に、USBドライブを接続して、アプリケーションを開きます。
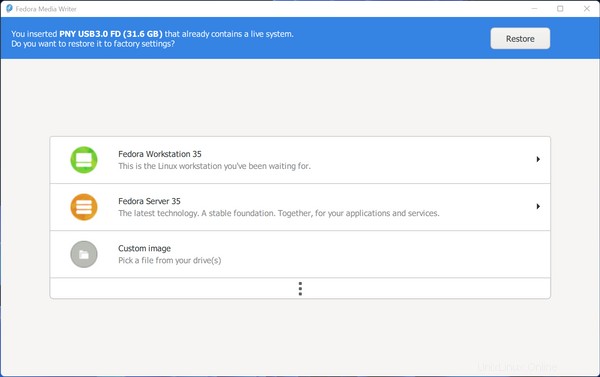
「カスタムイメージ」をクリックし、ファイルブラウザを使用してダウンロードしたArchLinuxISOファイルを選択します。
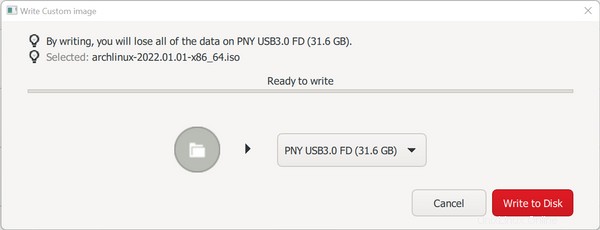
これで、アプリケーションで接続されているUSBドライブの1つを選択できるようになります。マシンに複数のUSBドライブが接続されている場合は、適切なものを選択する際に十分に注意してください。次に、[ディスクに書き込む]ボタンを押して、プロセスが完了するまで待ちます。
ArchLinuxをインストールするためにコンピューターを準備する方法
このステップでは、システムにいくつかの変更を加える必要があります。そうしないと、ArchLinuxが起動または正常に実行されない可能性があります。
最初に行う必要がある変更は、UEFI構成でセキュアブートを無効にすることです。この機能は、起動中のマルウェア攻撃を防ぐのに役立ちますが、ArchLinuxインストーラーの起動も防ぎます。
これを無効にする方法の詳細な手順は、マザーボードまたはラップトップのブランドによって異なります。今回は正しい方法を見つけるために自分でインターネットを検索する必要があります。
2番目に無効にする必要があるのは、Windowsと一緒にArchLinuxをインストールする場合にのみ関係します。部分的に休止状態にすることでコンピュータの起動時間を短縮する、高速起動と呼ばれるWindowsの機能があります。
これは一般的に便利な機能ですが、デュアルブート構成の他のオペレーティングシステムがプロセス中にハードディスクにアクセスするのを防ぎます。
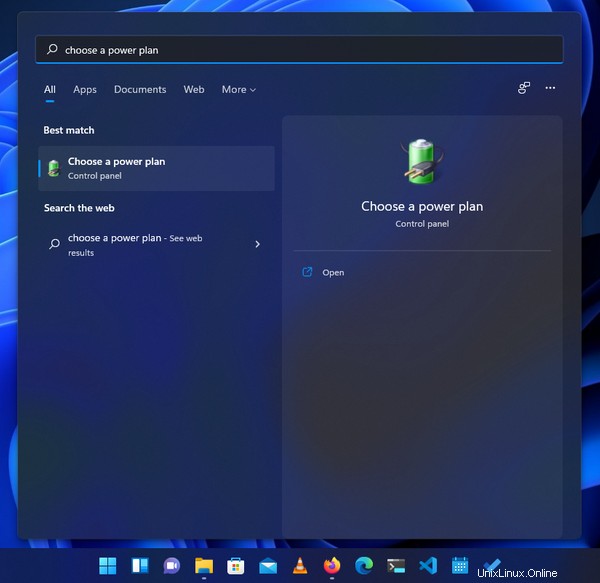
この機能を無効にするには、スタートメニューを開き、次のように「電源プランの選択」を検索します。
次に、次のウィンドウで、左側のサイドバーから[電源ボタンの機能を選択してください]をクリックします。

次に、次のウィンドウに[シャットダウン設定]のリストが表示され、[高速起動をオンにする(推奨)]オプションが読み取り専用として表示されます。
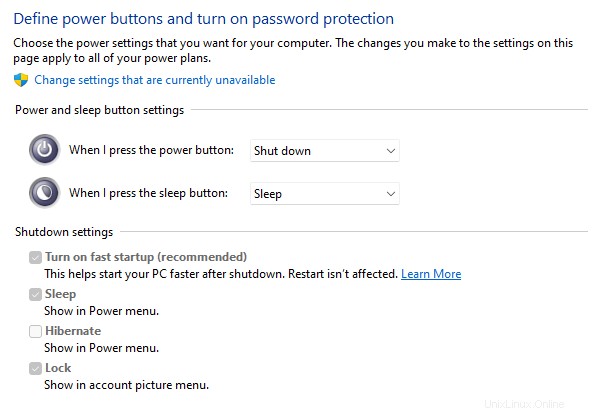
上部にある[現在利用できない設定を変更する]をクリックすると、設定を変更できるようになります。
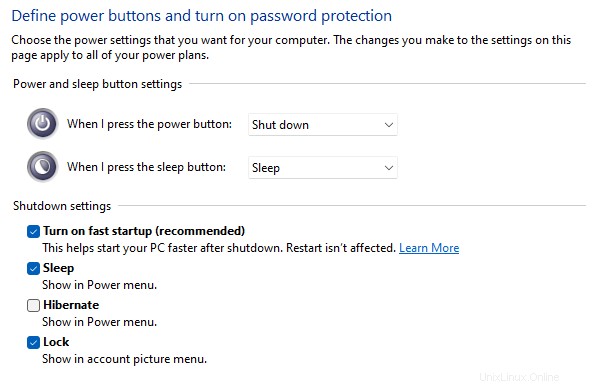
[高速起動をオンにする(推奨)]オプションのチェックを外し、下部にある[変更を保存]ボタンを押します。今後、起動プロセスには少し時間がかかる場合がありますが、それだけの価値はあります。
この記事では、デフォルトのオペレーティングシステムとしてArchLinuxをインストールします。そこで、ディスク領域全体を割り当てます。
ただし、Windowsと一緒にインストールしようとしている場合は、このトピックに関する専用の記事があります。そして、その記事には、パーティショニングプロセスについて詳しく説明しているセクションがあります。
起動可能なUSBドライブがあり、コンピューターが適切に構成されていると仮定すると、USBドライブから起動する必要があります。 USBドライブから起動するプロセスは、マシンごとに異なります。
私のマシンでは、起動中にF12キーを押すと、起動可能なデバイスのリストが表示されます。そこから、起動可能なUSBドライブを選択できます。あなたはすでにあなたのコンピュータに適切な技術を知っているかもしれません、あるいはあなたは少し研究しなければならないかもしれません。
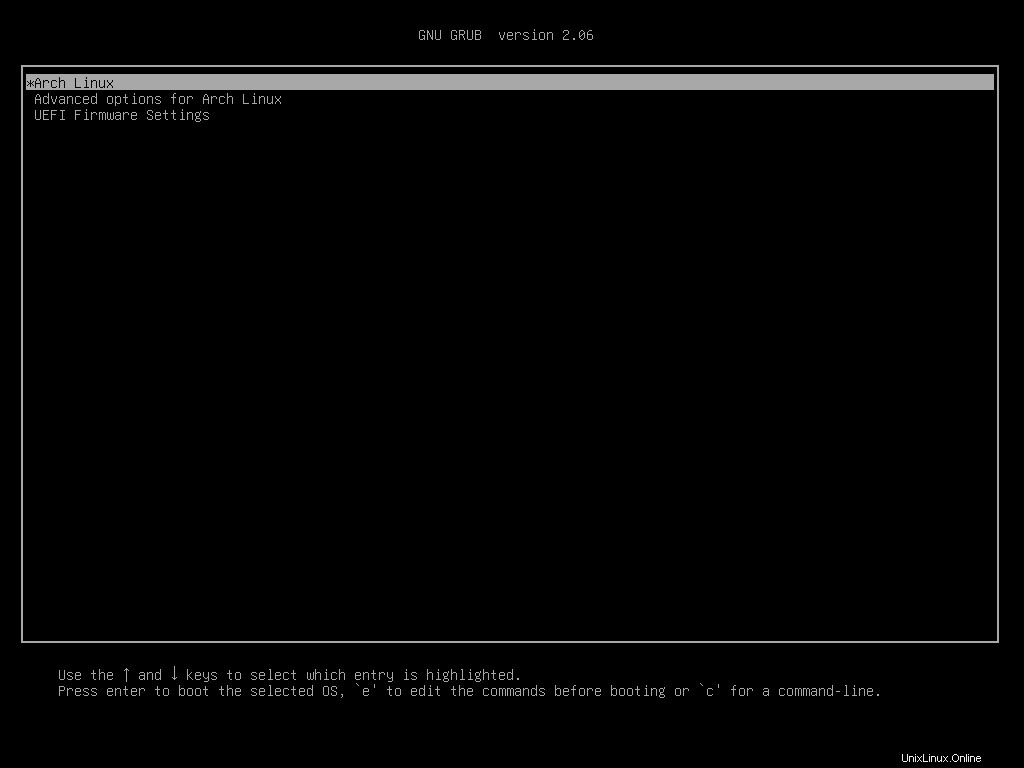
接続されている起動可能なデバイスのリストにたどり着いたら、起動するUSBドライブを選択すると、次のメニューが表示されます。
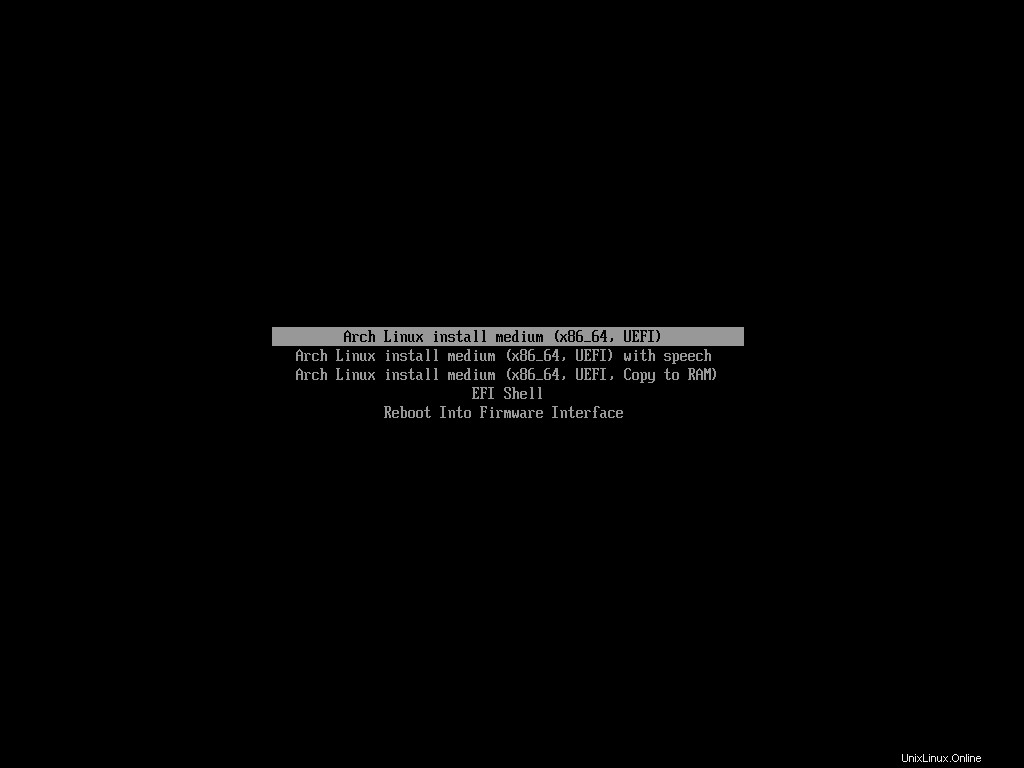
リストから最初のものを選択し、Archインストーラーの起動が完了するまで待ちます。完全に起動すると、次のように表示されます。
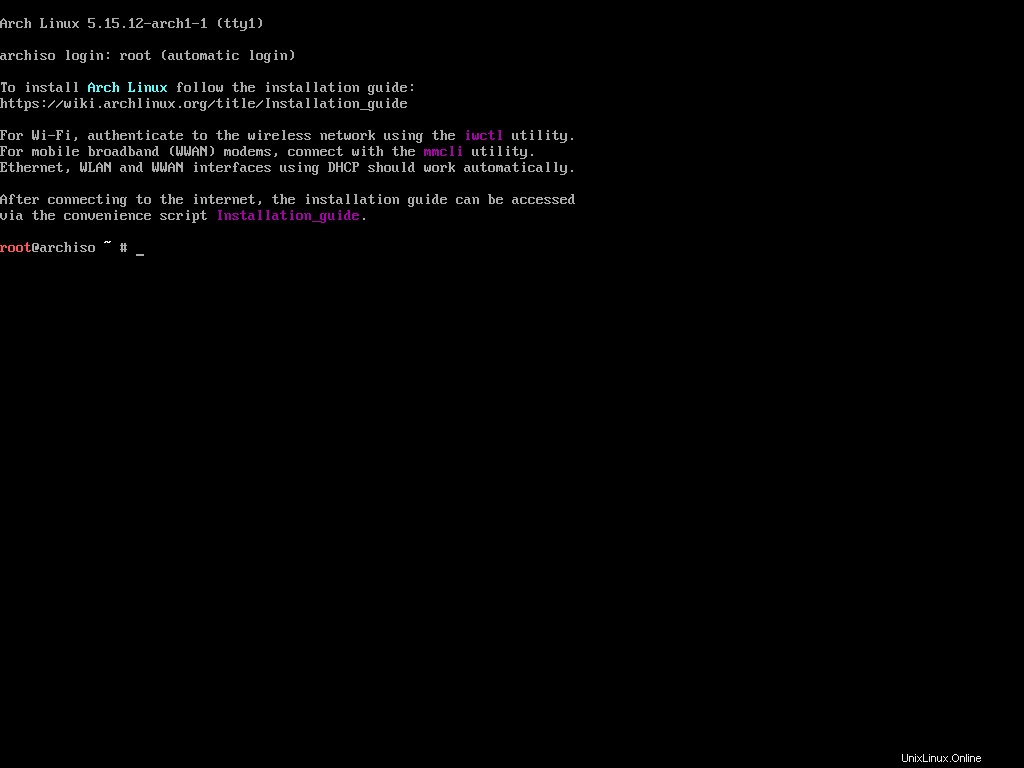
それでおしまい。それがあなたが得るすべてです。使い慣れている他のオペレーティングシステムとは異なり、Archインストーラーにはインストールを自動化するためのグラフィカルユーザーインターフェイスがありません。
むしろ、時間と労力を費やして、配布の各部分を1つずつ構成する必要があります。気が遠くなるように聞こえるかもしれませんが、正直なところ、自分が何をしているのかを理解していれば、ArchLinuxのインストールはとても楽しいです。
すでに述べたように、Archインストーラーにはグラフィカルユーザーインターフェイスがないため、多くの入力が必要になります。キーボードレイアウトと見栄えの良いフォントを構成することで、インストールプロセスの煩わしさを大幅に軽減できます。
デフォルトでは、コンソールは標準のUSキーボードレイアウトを想定しています。これはほとんどの人にとっては問題ないはずですが、万が一別のものを持っている場合に備えて、それに変更することができます。
使用可能なすべてのキーマップは通常、/usr/share/kbd/keymaps内に保持されます map.gzの形式のディレクトリ ファイル。 lsを使用すると、それらのリストを表示できます。 コマンド:
ls /usr/share/kbd/keymaps/**/*.map.gz
これにより、利用可能なすべてのキーマップが一覧表示されます:
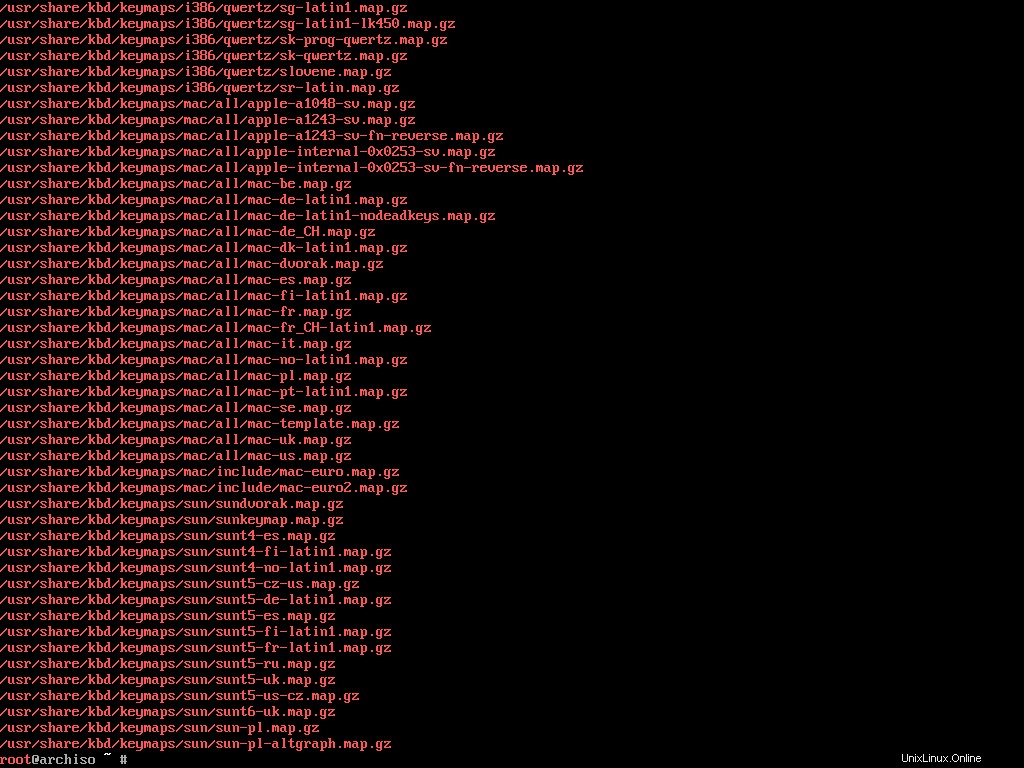
たとえば、Mac-USキーボードレイアウトを使用している場合は、対応するmap.gzを見つけます。 mac-us.map.gzであるこのリストのファイル 1つ。
loadkeysを使用できます 目的のキーマップをロードするコマンド。 mac-us.map.gzを設定するには デフォルトでは、次のコマンドを実行します。
loadkeys mac-us
デフォルトのフォントが気に入らない場合は、コンソールフォントを変更することもできます。キーマップと同様に、コンソールフォントは/usr/share/kbd/consolefonts内に保持されます lsを使用して一覧表示できます コマンド:
ls /usr/share/kbd/consolefontsこれにより、使用可能なすべてのフォントが一覧表示されます:

これで、setfontを使用できます これらのいずれかを設定するためのコマンド。たとえば、drdos8x16を設定する場合 デフォルトでは、次のコマンドを実行します。
setfont drdos8x16
両方のloadkeys およびsetfont コマンドはkbdの一部です 必須のLinuxキーボードツールを含むパッケージ。優れたドキュメントが用意されているので、詳細を知りたい場合は、お気軽にチェックしてください。
コンソールを構成したので、次のステップは、BIOSモードではなくUEFIモードで起動したことを確認することです。
正直なところ、この手順は文字通りx86_64 UEFIと書かれているので、私には不要のようです。 ライブブートメニューで。ただし、Archの公式インストールガイドのためにやってみましょう。
起動モードを確認するには、次のコマンドを実行します。
ls /sys/firmware/efi/efivarsUEFIモードの場合は、画面に多数のファイルが一覧表示されます。
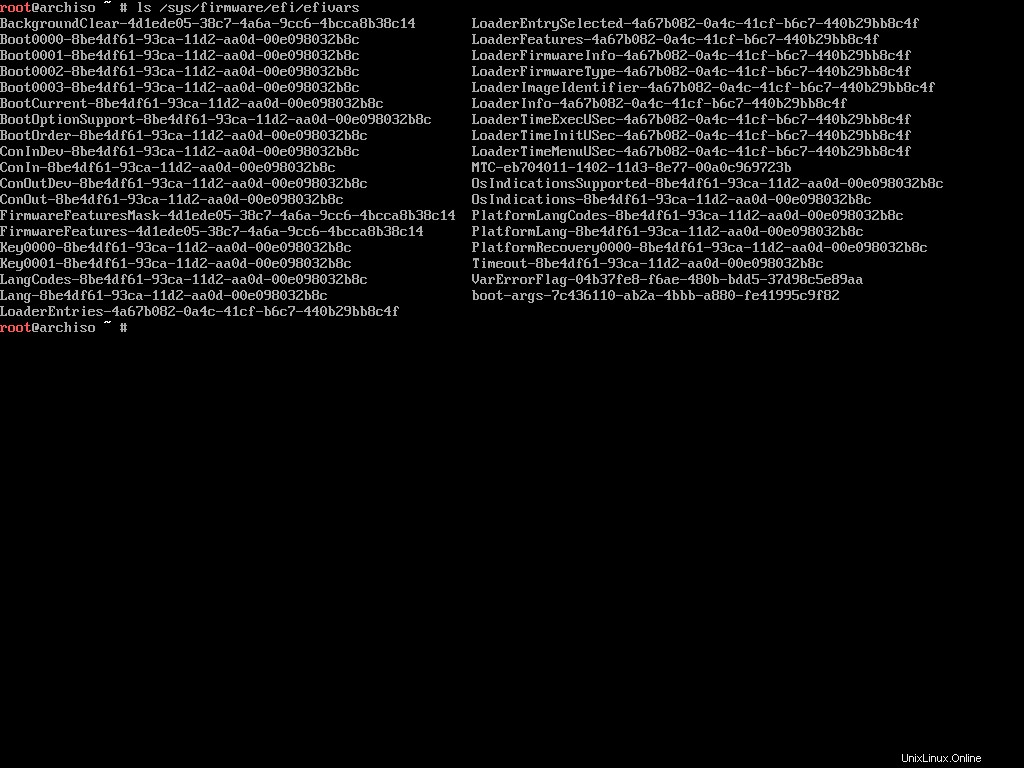
BIOSブートの場合、efi ディレクトリは/sys/firmware内にも存在しません ディレクトリ。 UEFIモードの場合(すべてを正しく実行した場合はそうなるはずです)、次の手順に進みます。
他の多くのライブディストリビューションとは異なり、Archライブ環境には必要なすべてのパッケージが組み込まれているわけではありません。これには、システムの残りの部分をインストールするために使用できる最低限のパッケージがいくつか含まれています。したがって、インターネット接続が機能している必要があります。
有線ネットワークを使用している場合は、最初からインターネット接続が機能している必要があります。テストするには、公開アドレスのいずれかにpingを実行します:
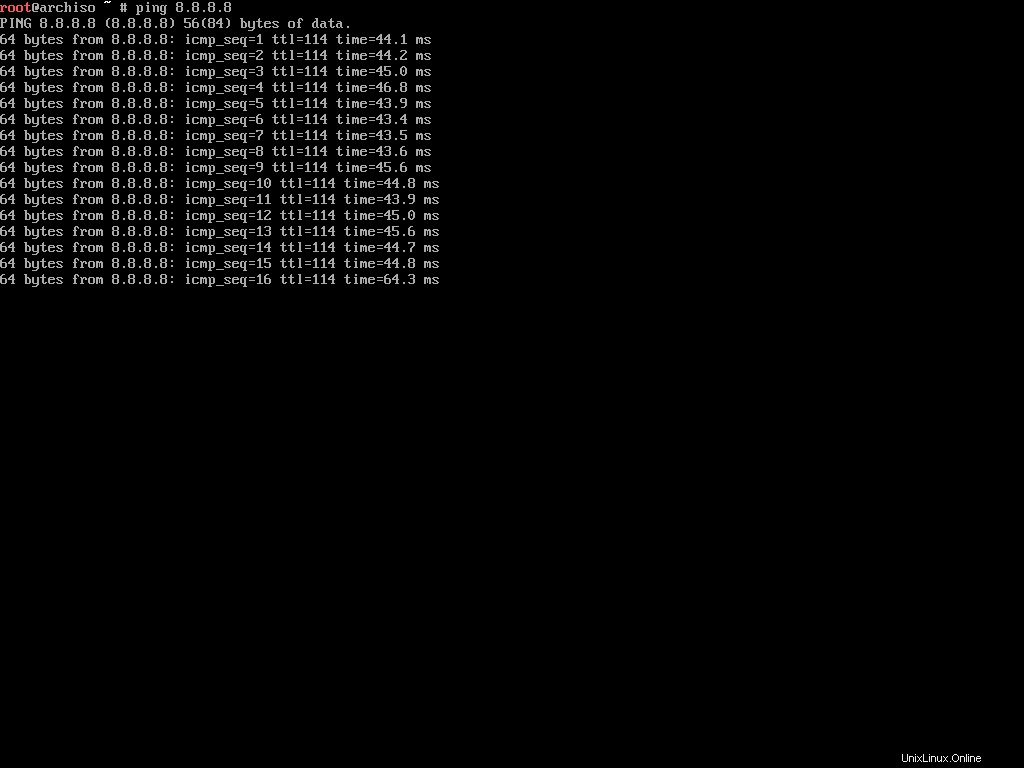
これらのスクリーンショットはVirtualBoxを使用して作成しているため、インターネット接続は有線接続で完全に機能します。ただし、ワイヤレス接続を使用している場合は、少し注意が必要です。
ライブ環境にはiwdが付属しています またはiNetワイヤレスデーモンパッケージ。このパッケージを使用して、近くのワイヤレスネットワークに接続できます。
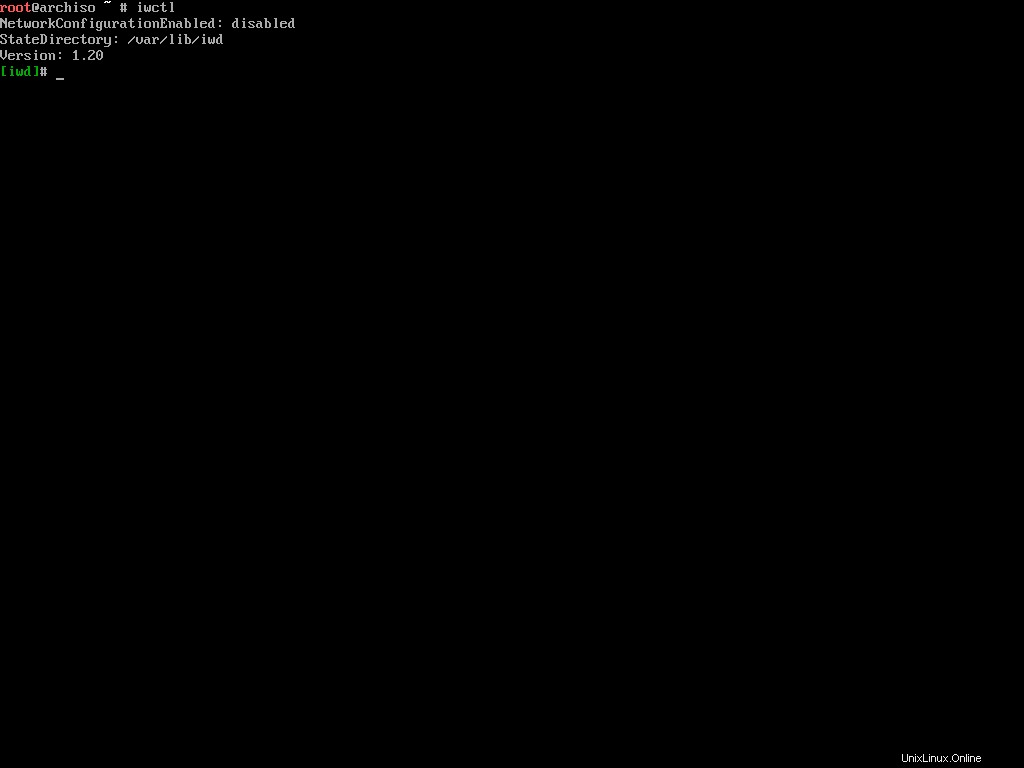
まず、次のコマンドを実行します。
iwctlこれにより、次のようにインタラクティブプロンプトが開始されます。
次に、次のコマンドを実行して、使用可能なワイヤレスデバイスのリストを表示します。
device list
これにより、利用可能なワイヤレスデバイスのリストが表示されます。ワイヤレスデバイスとは、コンピューターに接続されているワイヤレスアダプターを意味します。 wlan0と仮定しましょう はデバイス名です。
見つかったデバイスを使用して近くのワイヤレスネットワークをスキャンするには、次のコマンドを実行します。
# station <device> scan

station wlan0 scan
このコマンドは近くのすべてのネットワークのリストを出力すると思うかもしれませんが、そうではありません。ネットワークのリストを表示するには、次のコマンドを実行します。
# station <device> get-networks

station wlan0 get-networks
ここで、ホームネットワークの名前がSkynetと呼ばれていると仮定します。 、次のコマンドを実行して接続できます:
# station <device> connect <SSID>

station wlan0 connect Skynet
iwctl プログラムはwi-fiパスワードの入力を求めます。慎重に入れ、ネットワークに接続したら、exitと記述してプログラムを終了します。 Enterキーを押します。もう一度パブリックアドレスにpingを実行して、インターネットが正常に機能していることを確認してください。
Linuxでは、NTPまたはネットワークタイムプロトコルを使用して、ネットワークを介してコンピュータシステムのクロックを同期します。 timedatectlを使用できます Archライブ環境でNTPを有効にするコマンド:
timedatectl set-ntp trueこのコマンドは、数秒後に出力の出力を開始します。コマンドカーソルが再び表示されない場合は、Enterキーを押してみてください。私は過去に何度かこの不便に直面しました。
これはおそらく、インストールプロセス全体の中で最も機密性の高いステップです。パーティションを台無しにすると、貴重なデータが失われるためです。したがって、私のアドバイスは、このセクションにすぐに従わないことです。代わりに、最初にセクション全体を読んでから、それに従ってください。
パーティショニングプロセスを開始するには、まず、コンピューターに接続されているさまざまなディスクについて知る必要があります。 fdiskを使用できます これは、パーティションテーブルを作成および操作するためのダイアログ駆動型プログラムです。
fdisk -lこのコマンドは、コンピュータで使用可能なすべてのデバイスのパーティションテーブルを一覧表示します。
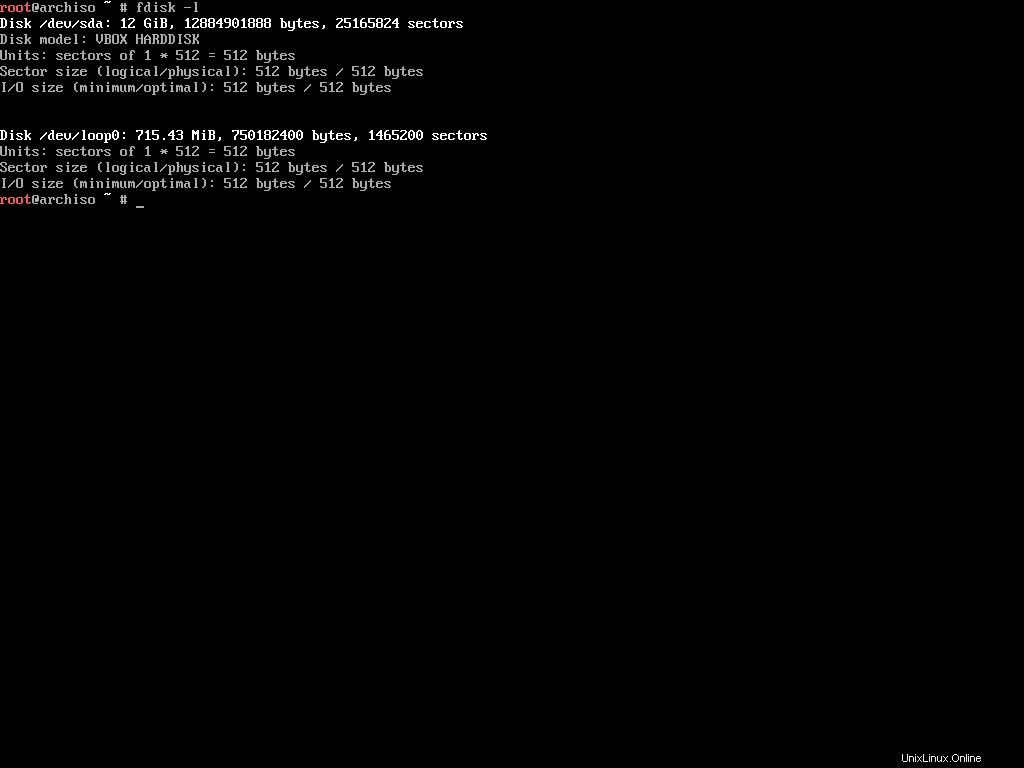
ご覧のとおり、私のコンピューター(実際には仮想マシン)に接続されているデバイスは2つあります。使用しているデバイスの数によっては、このリストが長くなる可能性があるため、romで終わるデバイスは無視してください。 、loop 、またはairoot リストを確認するとき。これらのデバイスをインストールに使用することはできません。
これで、/dev/sdaが残ります。 端末。これは、マシンによっては完全に異なる可能性があることに注意してください。たとえば、NVMEドライブを使用している場合は、/dev/nvme0n1と表示される場合があります。 代わりに。
使用するデバイスを決定したら、そのデバイス内に既存のパーティションがあるかどうかを確認することをお勧めします。これを行うには、同じfdiskの次のバリエーションを使用できます。 コマンド:
fdisk /dev/sda -l
/dev/sdaを忘れずに置き換えてください あなたが持っているもので。このコマンドは、指定されたデバイス内のすべてのパーティションを一覧表示します。
このデバイスにはパーティションはありませんが、実際の状況では、以前にパーティションを作成したことがあるかもしれません。これらのパーティションは、/dev/sda1として表示されます。 、/dev/sda2 またはNVMEドライブの場合/dev/nvme0n1p1 、/dev/nvme0n1p2 など。
fdisk プログラムは、パーティションを一覧表示するだけではありません。このプログラムを使用して実行できるタスクについては、対応するArchWikiページを参照してください。
別のプログラムcfdiskがあります これは、Linux用のcurses-(プログラミングライブラリ)ベースのディスクパーティションテーブルマニピュレータです。 fdiskと機能が似ています しかし、cursesベースであるということは、操作を容易にするインターフェースを備えていることを意味します。
次のコマンドを実行して、cfdiskを起動します。 お好みのデバイスで:
cfdisk /dev/sda
/dev/sdaを忘れずに置き換えてください あなたが持っているもので。デバイスに以前に作成されたパーティションテーブルがある場合は、cfdisk パーティションのリストが直接表示されます。それ以外の場合は、最初にパーティションテーブルタイプを選択できます:
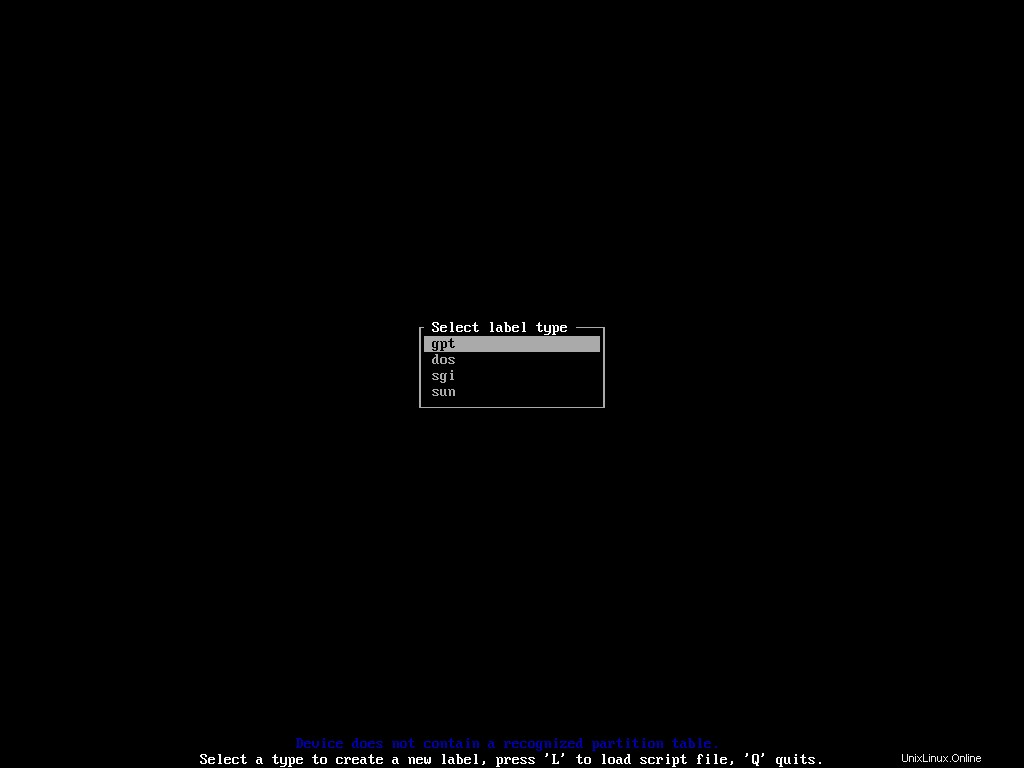
gptを選択します UEFIベースのシステム用。次に、デバイスのパーティションと空き領域のリストに移動します。
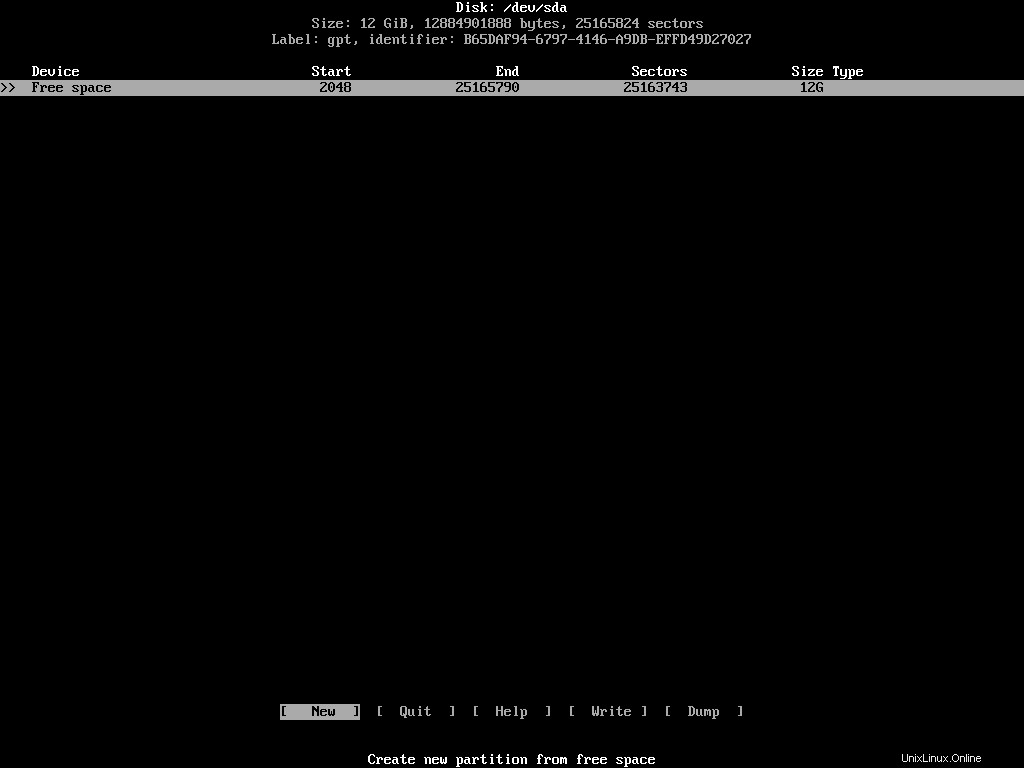
上/下矢印キーを使用してデバイスのリストに沿って垂直方向に移動し、左/右矢印キーを使用してさまざまなアクションに沿って水平方向に移動できます。
Archまたはその他のLinuxディストリビューションをインストールするには、3つの別々のパーティションが必要です。それらは次のとおりです:
- EFIシステムパーティション–UEFIファームウェアに必要なファイルを保存するため。
- ROOT –ディストリビューション自体をインストールするため。
- SWAP –RAMのオーバーフロースペースとして機能します。
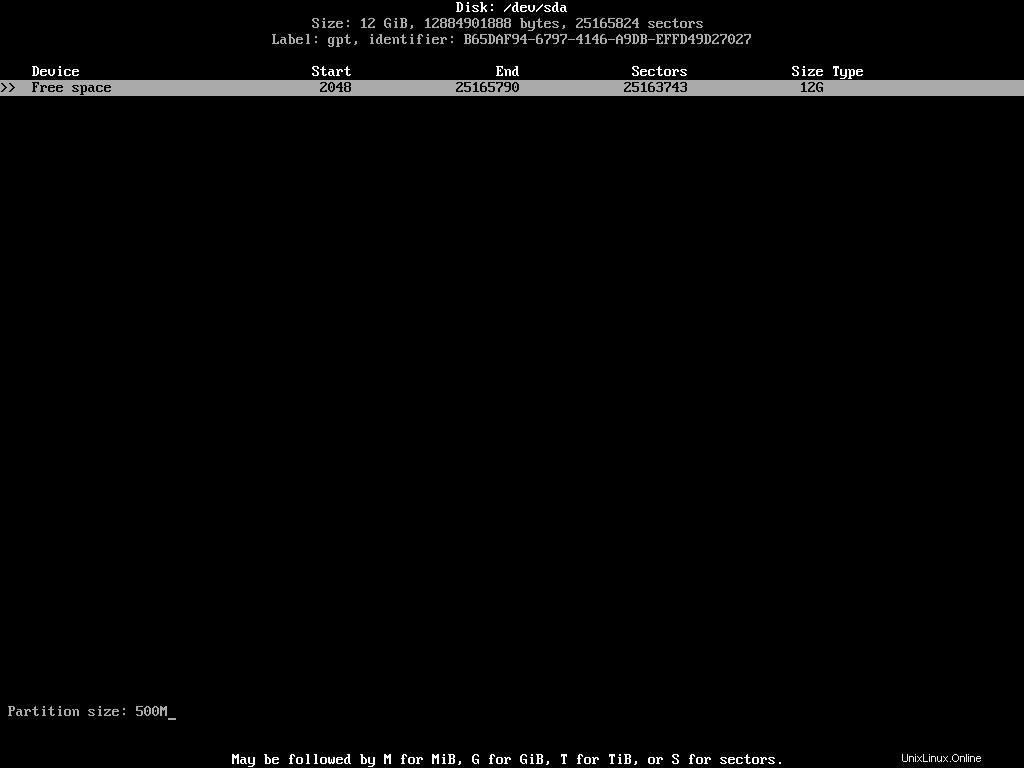
リストで適切なパーティション/空き領域が強調表示されていることを確認し、[ New ]を選択します アクション。
希望のパーティションサイズを入力します。 Mはメガバイト、Gはギガバイト、Tはテラバイトを表すことができます。
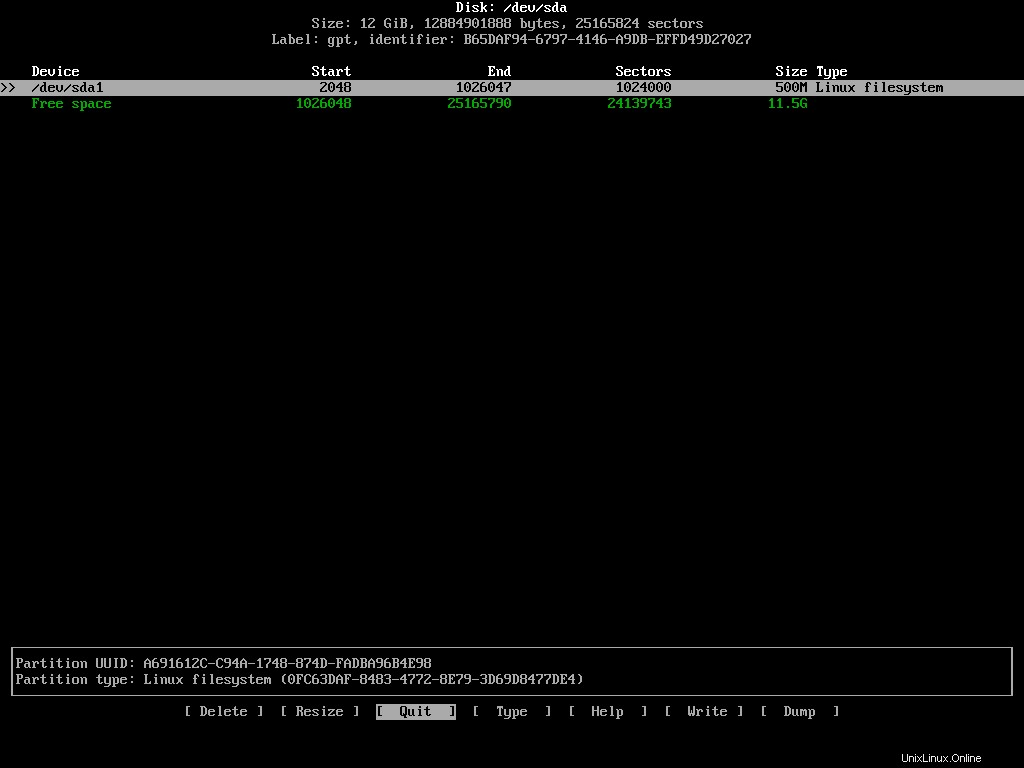
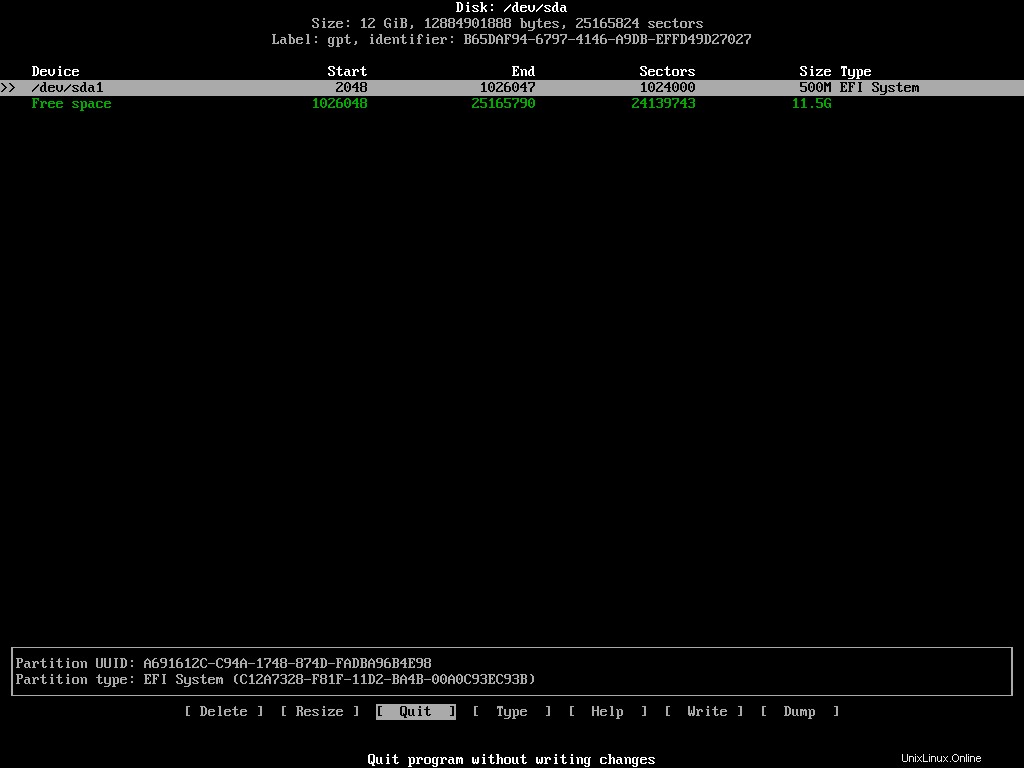
EFIシステムパーティションの場合、少なくとも500MBを割り当てる必要があります。希望のサイズを入力したら、Enterキーを押して確定します。更新されたパーティションのリストは次のようになります。
EFIシステムパーティションは特殊なタイプのパーティションです。特定のタイプと形式である必要があります。デフォルトのタイプを変更するには、新しく作成したパーティションを強調表示したままにして、[ Type ]を選択します アクションのリストから。
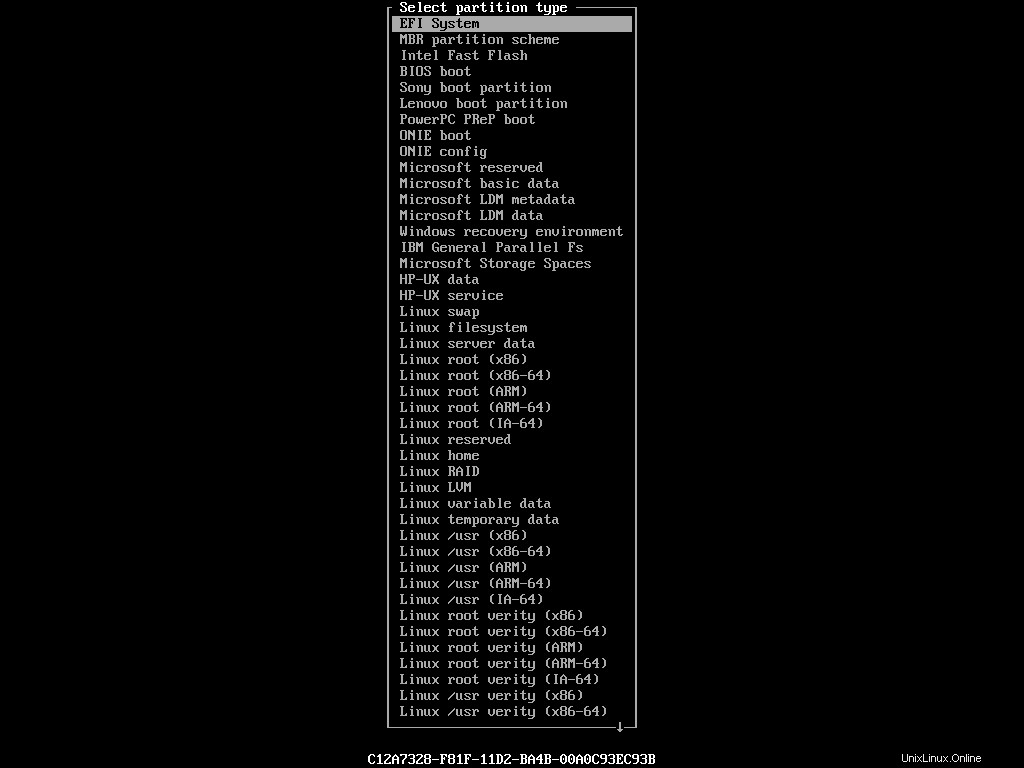
この長いタイプのリストから、EFI Systemを強調表示します Enterキーを押します。リスト内のパーティションのタイプは、それに応じて更新する必要があります:
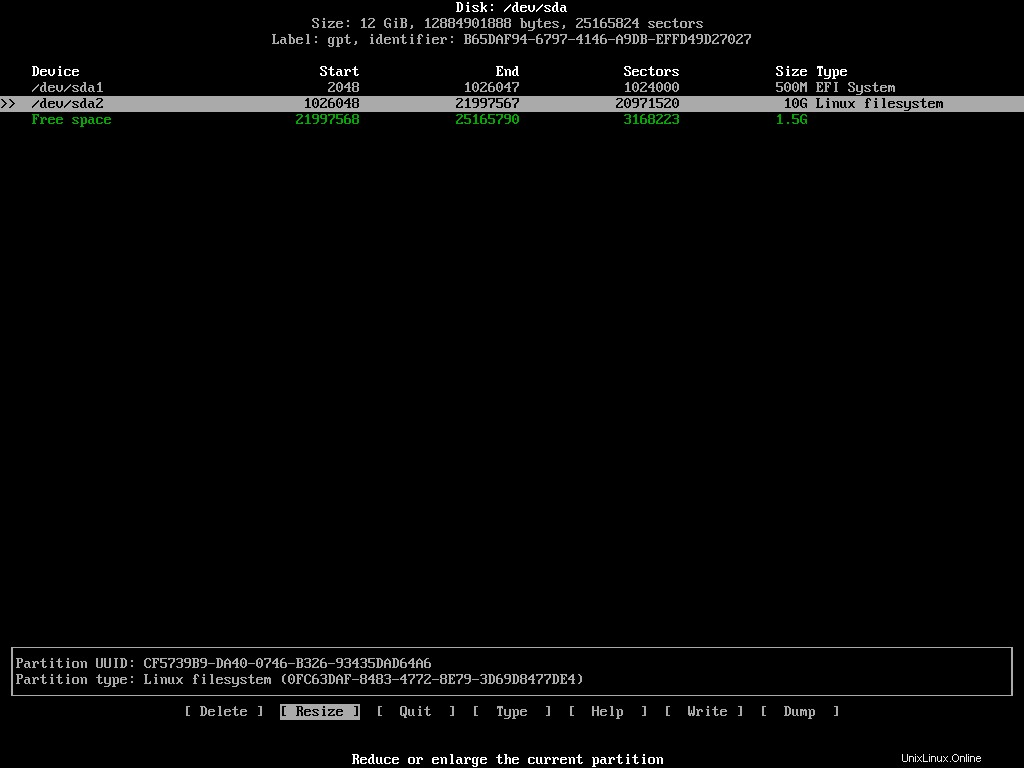
次はルートパーティションです。残りの空き容量を強調表示して、[ New ]を選択します もう一度。今回は、このパーティションに10GBを割り当てます。ルートパーティションの理想的なサイズは、必要に応じて異なります。個人的には、すべてのLinuxインストールのルートパーティションに少なくとも100GBを割り当てています。
このパーティションのタイプを変更する必要はありません。デフォルトのLinux filesystem します。
残りのスペースで最後のパーティションを1つ作成し、そのタイプをLinux swapに変更します メニューから:
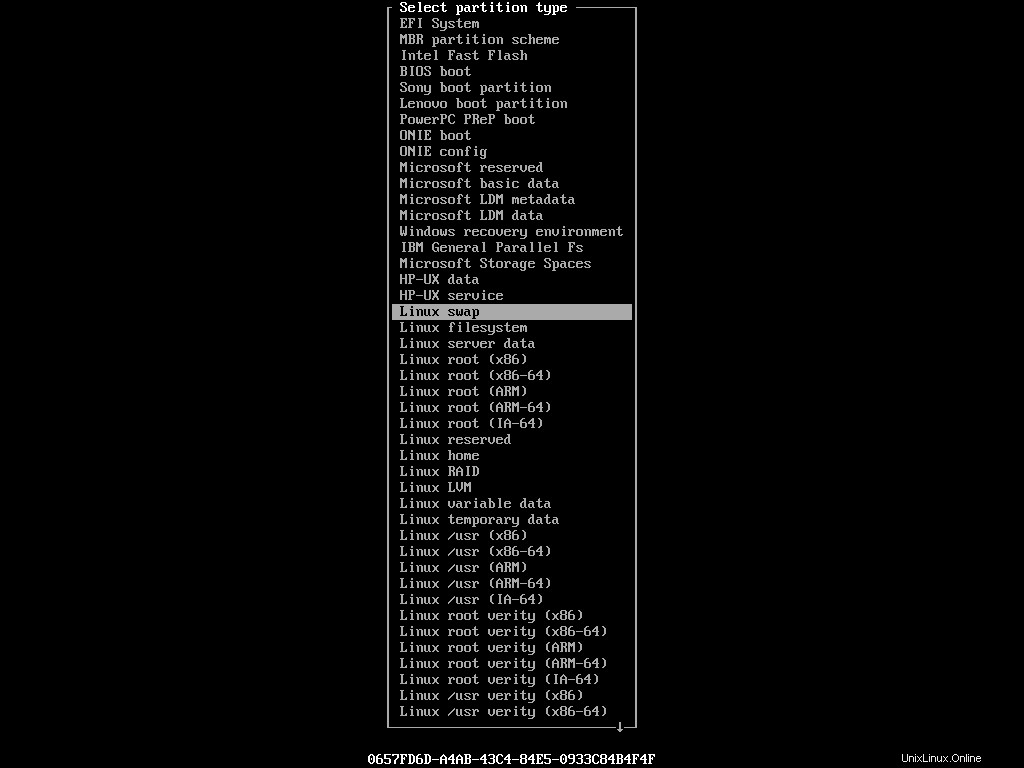
スワップパーティションの理想的なサイズは議論の余地があります。個人的には、自分のマシンにスワップパーティションがありません。私が持っている物理RAMの量は十分すぎるほどです。ただし、後で必要になった場合は、swapfileを使用します。 代わりは。とにかく、デバイスの最終的な状態は次のようになります。
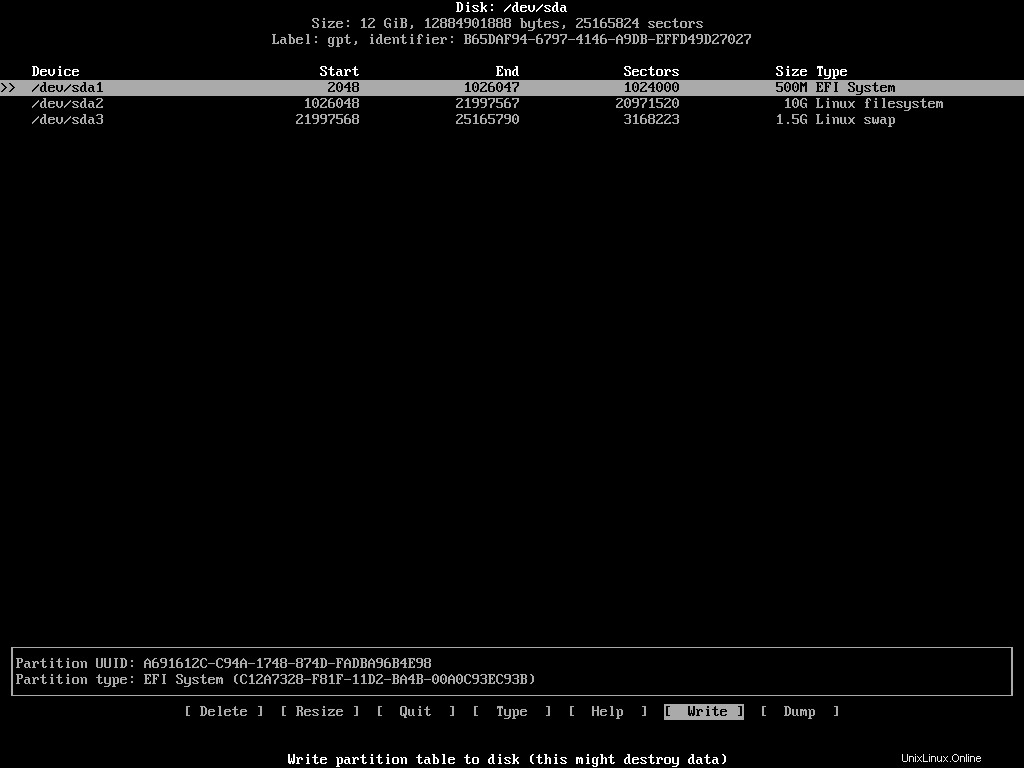
設定に満足している場合は、[ Write ]を強調表示します アクションリストからEnterキーを押します。プログラムは、これらの変更を永続化するかどうかを尋ねます。 yesと書く必要があります 同意する場合はEnterキーを押します。パーティションテーブルが変更されたら、[ Quit ]を選択します プログラムを終了します。
Windowsと一緒にArchLinuxをインストールしようとしている人たちのために私が言及したいことの一つは、その場合、EFIシステムパーティションがあなたのデバイスにすでに存在しているはずです。だからそれに触れないでください。他のパーティションを作成して次に進みます。
必要なパーティションを作成したので、それに応じてフォーマットする必要があります。 mkfsを使用できます およびmkswap それを行うためのプログラム。フォーマットする前に、次のコマンドを実行して、パーティションリストを最終的に確認してください。
fdisk /dev/sda -l今回は、新しく作成された3つのパーティションとその詳細が表示されます。
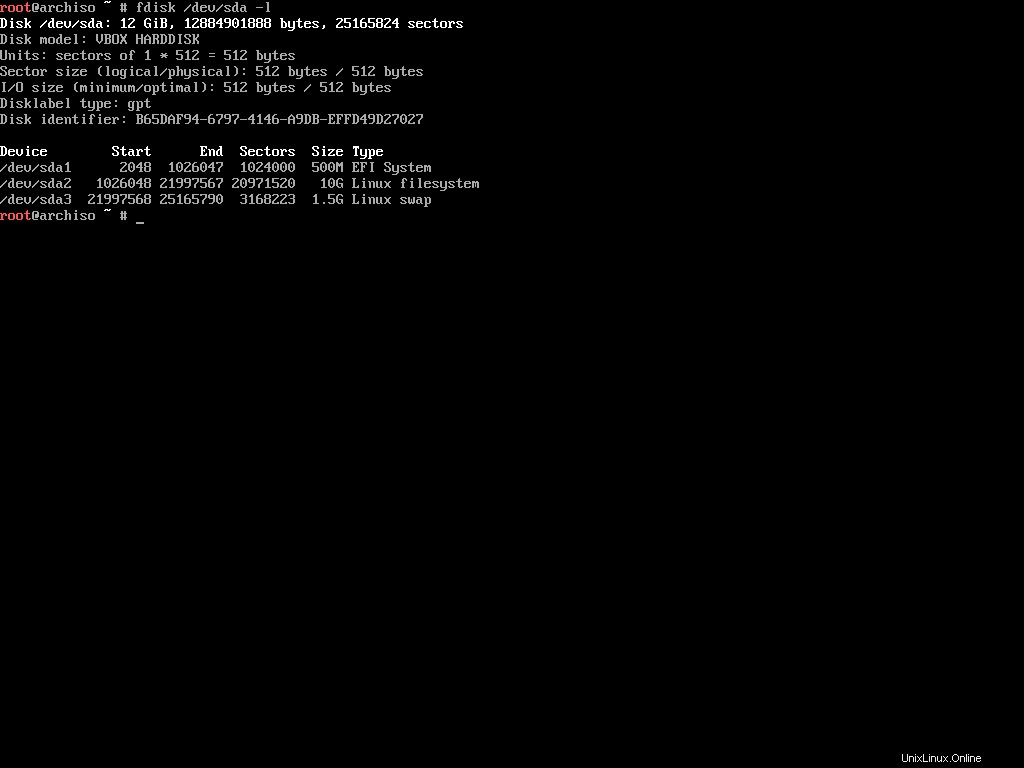
/dev/sda1などのデバイス名をメモします 、/dev/sda2 、/dev/sda3 等々。 EFIシステムパーティションはFAT32形式である必要があります。次のコマンドを実行して、パーティションをFAT32形式でフォーマットします。
mkfs.fat -F32 /dev/sda1次はルートパーティションです。さまざまな形式にすることができますが、すべてのLinuxファイルシステムにEXT4を使用することをお勧めします。次のコマンドを使用して、EXT4でパーティションをフォーマットします。
mkfs.ext4 /dev/sda2パーティションのサイズによっては、この操作が完了するまでに少し時間がかかる場合があります。最後に、スワップパーティション。次のコマンドを使用してフォーマットします。
mkswap /dev/sda3これで、インストール用のパーティションの準備プロセスが完了しました。
パーティションを作成してフォーマットしたので、パーティションをマウントする準備が整いました。 mountを使用できます 任意のパーティションをマウントするための適切なマウントポイントを指定したコマンド:
# mount <device> <mount point>

mount /dev/sda2 /mnt
/dev/sda2を覚えておいてください パーティションはルートパーティションとして作成されました。 /mnt Linuxのマウントポイントは、ストレージデバイスを一時的にマウントするためのものです。 Arch Linuxをインストールするためにパーティションをマウントするだけでよいので、/mnt マウントポイントは完璧です。
スワップパーティションの場合、他のパーティションのようにマウントすることはできません。このパーティションをスワップとして明示的に使用するようにLinuxに指示する必要があります。これを行うには、次のコマンドを実行します。
swapon /dev/sda3
ご想像のとおり、swapon コマンドは、このデバイスでスワップするようにシステムに指示します。後のセクションでEFIシステムパーティションを操作します。今のところ、これら2つのパーティションをマウントするだけで十分です。
マシンにArchLinuxをインストールする前に、最後の1つのステップがあります。それは、ミラーの構成です。ミラーは、世界中のさまざまな場所に配置され、近くの人々にサービスを提供するサーバーです。
インストーラーには、最新のミラーリストを取得するために作成されたPythonスクリプトであるReflectorが付属しています。ArchLinuxミラーステータスページ。最新のミラーリストを印刷するには、次のコマンドを実行するだけです。
reflectorインターネット接続が遅い場合は、次のようなエラーメッセージが表示されることがあります。
failed to rate http(s) download (https://arch.jensgutermuth.de/community/os/x86_64/community.db): Download timed out after 5 second(s).これは、デフォルトのタイムアウト(5秒)が情報のダウンロードにかかる実際の時間よりも短い場合に発生します。
--download-timeoutを使用すると、この問題を解決できます。 オプション:
reflector --download-timeout 60これで、リフレクターは1分間待ってから、叫び始めます。ミラーの長いリストが画面に表示されます:
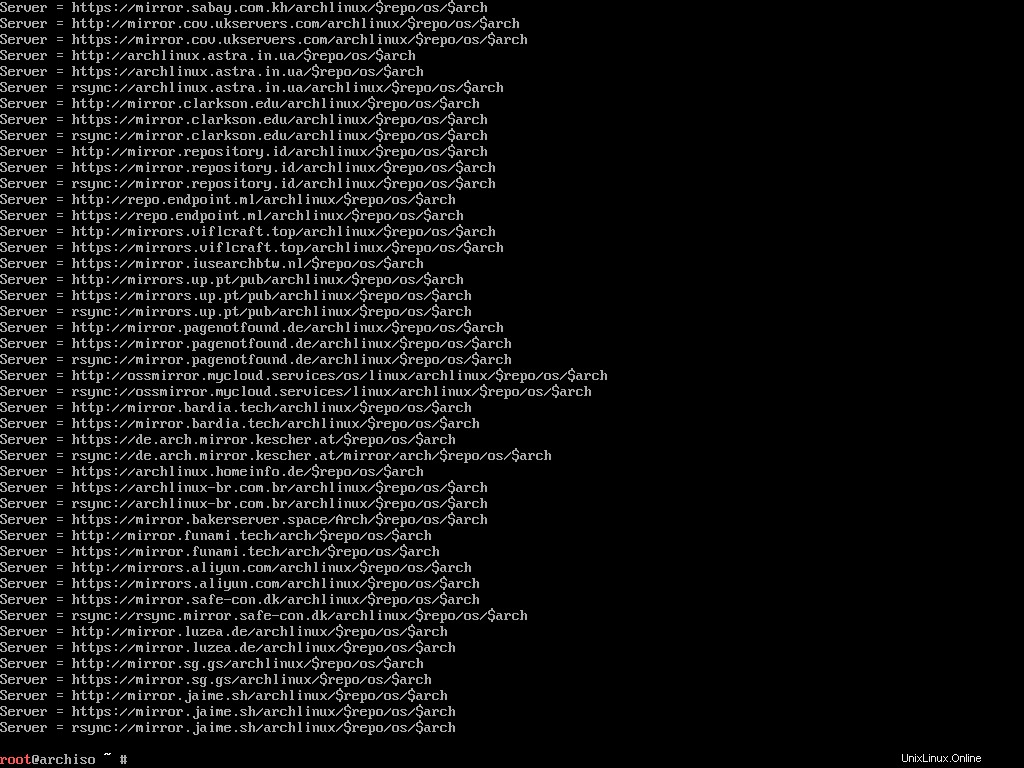
リスト全体を調べて近くのミラーを見つけるのは面倒です。そのため、リフレクターがそれを実行できます。
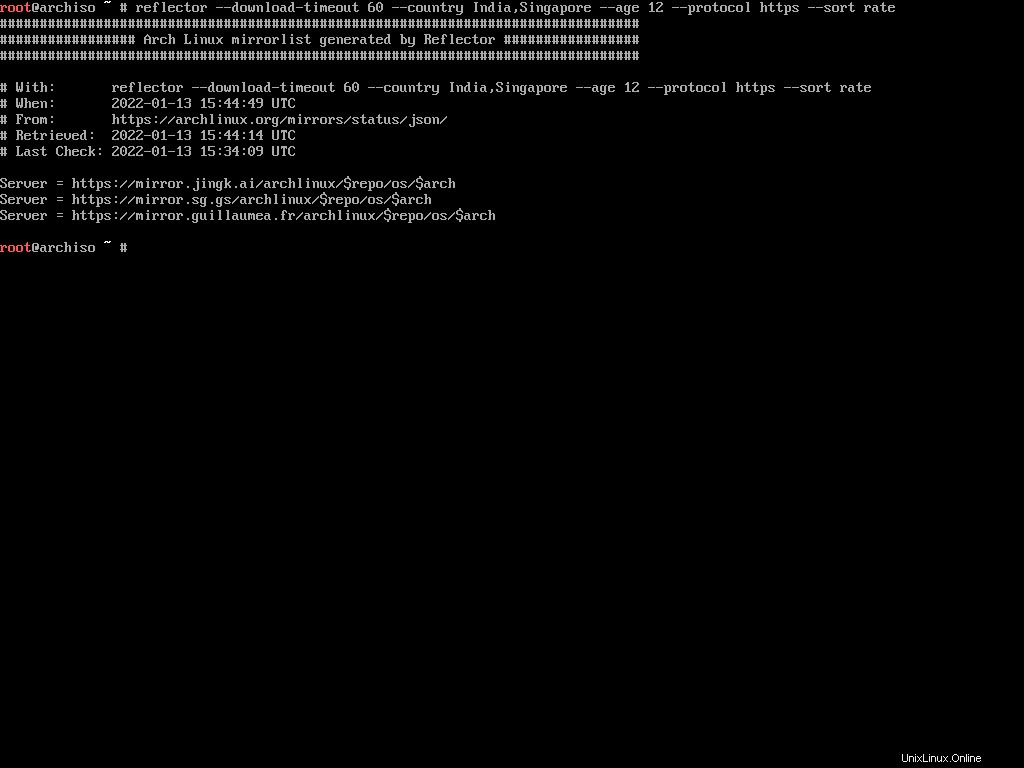
リフレクターは、与えられた多数の制約に基づいてミラーのリストを生成できます。たとえば、過去12時間以内に同期され、インドまたはシンガポール(これら2つは私の場所に最も近い)にあるミラーのリストが必要であり、ダウンロード速度でミラーを並べ替えます。
結局のところ、リフレクターはそれを行うことができます:
reflector --download-timeout 60 --country India,Singapore --age 12 --protocol https --sort rate見つかったサーバーは以前のように一覧表示されます:
このようにミラーリストを印刷するだけでは不十分です。リストを/etc/pacman.d/mirrorlistに保持する必要があります 位置。 Arch LinuxのデフォルトのパッケージマネージャーであるPacmanは、このファイルを使用してミラーについて学習します。
デフォルトのミラーリストを上書きする前に、そのコピーを作成してください:
cp /etc/pacman.d/mirrorlist /etc/pacman.d/mirrorlist.bak
次に、--saveを指定してreflectorコマンドを実行します。 次のオプション:
reflector --download-timeout 60 --country India,Singapore --age 12 --protocol https --sort rate --save /etc/pacman.d/mirrorlistこのコマンドはミラーリストを生成し、デフォルトのリストを上書きします。これで、ベースのArchLinuxシステムをインストールする準備が整いました。
基本システムをインストールする前に、新しいミラーリストに従ってパッケージキャッシュを更新することをお勧めします。これを行うには、次のコマンドを実行します。
pacman -Sy
pacman ArchLinuxへのプログラムはapt Ubuntuまたはdnf Fedoraにあります。 -S オプションは、installと同等の同期を意味します aptで またはdnf パッケージマネージャー。
更新プロセスが終了したら、pacstrapを使用できます ArchLinuxシステムをインストールするためのスクリプト。次のコマンドを実行して、インストールプロセスを開始します。
pacstrap /mnt base base-devel linux linux-firmware sudo nano ntfs-3g networkmanager
pacstrap スクリプトは、指定された新しいルートディレクトリにパッケージをインストールできます。ご存知かもしれませんが、ルートパーティションは/mntにマウントされていました マウントポイント。これをこのスクリプトで使用します。次に、インストールするパッケージ名を渡します。
base–基本的なArchLinuxインストールを定義するための最小限のパッケージセット。-
base-devel–ソースからソフトウェアを構築するために必要なパッケージのグループ。 -
linux–カーネル自体。 -
linux-firmware–一般的なハードウェアのドライバー。 -
sudo–ルートとしてコマンドを実行しますか? -
nano–いくつかの機能が強化されたpicoエディターのクローン。 -
ntfs-3g–NTFSドライブの操作に必要なNTFSファイルシステムドライバとユーティリティ。 -
networkmanager–システムがネットワークに自動的に接続するための検出と構成を提供します。
この7つのパッケージのリストは必須ではないことを明確にしておきたいと思います。 Arch Linuxを機能させるには、baseが必要です。 、linux 、およびlinux-firmware パッケージ。しかし、とにかく他のものが必要になることを考えると、一度にすべてをキャッチしてみませんか。
インターネット接続によっては、インストールに時間がかかる場合があります。 pacstrapまで座って、リラックスしてください そのことをします。完了すると、次のように表示されます。
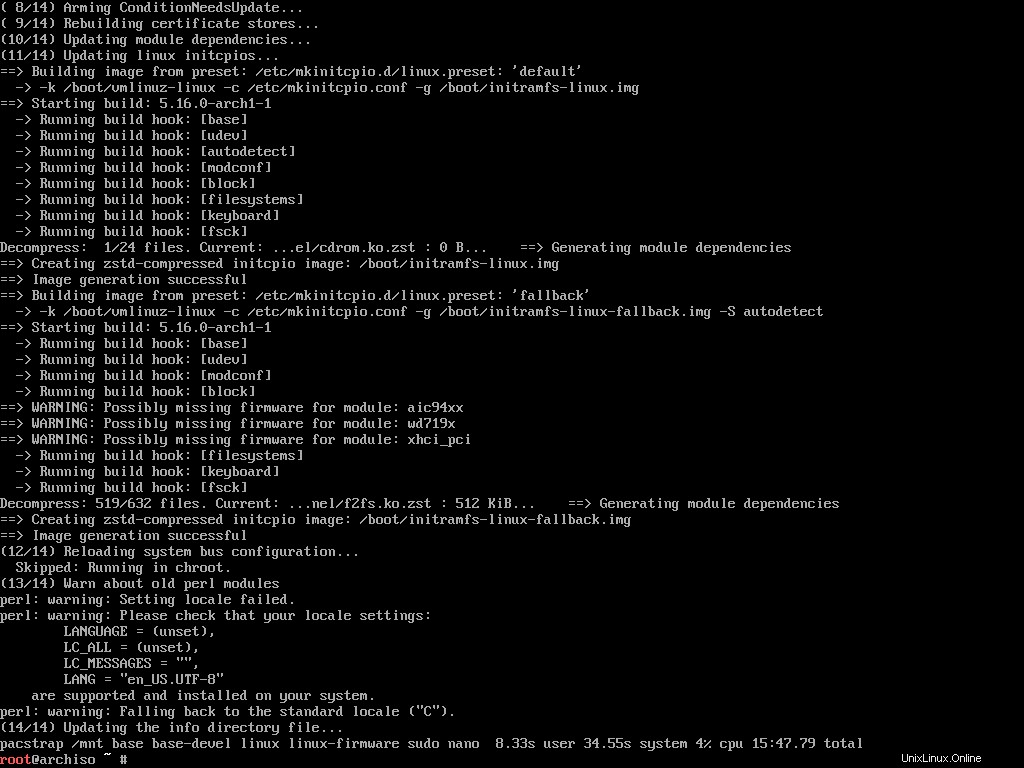
おめでとうございます。コンピューターにArchLinuxが正常にインストールされました。今やるべきことは、システムを構成することだけです。
Arch Linuxのインストールはそれほど難しくありませんでしたか?実際、私の意見では、インストールは構成よりもはるかに簡単です。ここでやるべきことはたくさんあります。それでは始めましょう。
Fstabファイルを生成する方法
ArchWikiによると、
fstab fileを使用して、ディスクパーティション、他のさまざまなブロックデバイス、またはリモートファイルシステムをファイルシステムにマウントする方法を定義できます。 UbuntuやFedoraのような他のディストリビューションでは、これはインストール中に自動的に生成されます。ただし、Archでは手動で行う必要があります。これを行うには、次のコマンドを実行します。
genfstab -U /mnt >> /mnt/etc/fstab
genfstab プログラムは、指定されたマウントポイントより下の現在のすべてのマウントを検出し、それらをfstab互換形式で標準出力に出力できます。したがって、genfstab -U /mnt /mntの下に現在のすべてのマウントを出力します マウントポイント。その出力を/mnt/etc/fstabに保存できます >>を使用したファイル オペレーター。
Arch-Chrootを使用して新しくインストールされたシステムにログインする方法
現在、新しくインストールしたシステムではなく、ライブ環境にログインしています。
新しくインストールしたシステムの構成を続行するには、最初にシステムにログインする必要があります。これを行うには、次のコマンドを実行します。
arch-chroot /mnt
arch-chroot bashスクリプトはarch-install-scriptsの一部です package and lets you change to the newly installed system's root user without any reboot.なんてクールだ!
How To Configure the Time Zone
Once you've switched root, the first thing to configure is the time zone. To see a list of all the available zones, execute the following command:
ls /usr/share/zoneinfoAll the major zones should be in the directory.
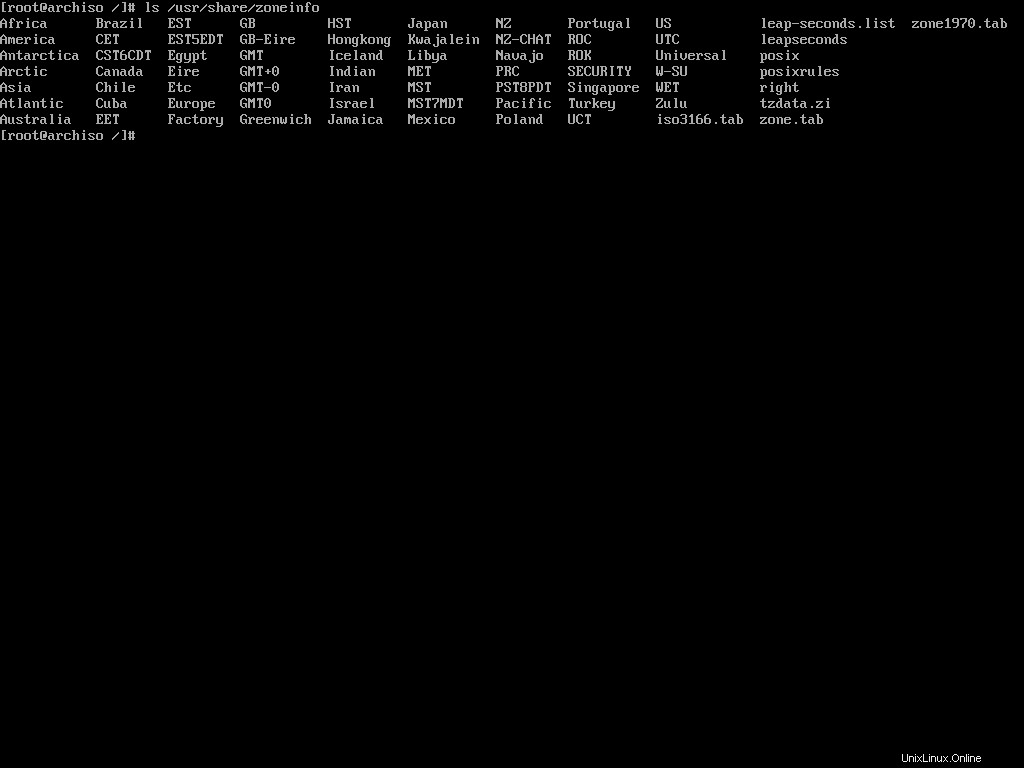
I live in Dhaka, Bangladesh which resides inside the Asia zone. If I list out the content of Asia, I should see Dhaka there:
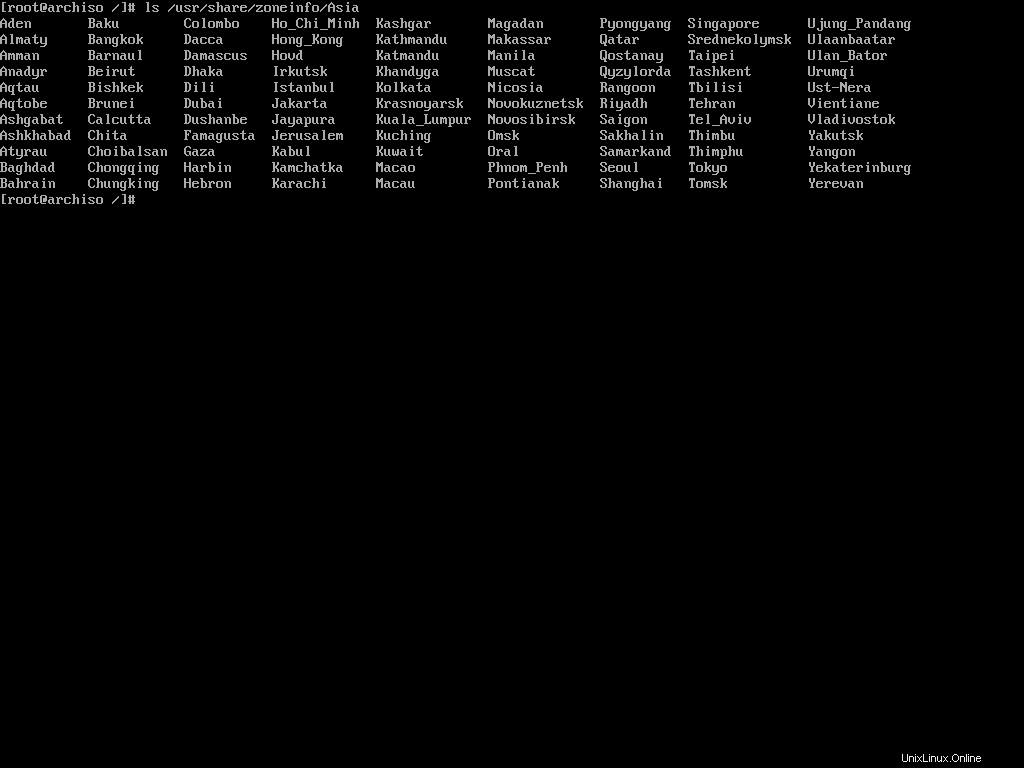
To set Asia/Dhaka as my default time zone, I'll have to make a symbolic link of the file at the /etc/localtime location:
ln -sf /usr/share/zoneinfo/Asia/Dhaka /etc/localtime
The ln command is used for creating symbolic links. The -sf options indicate soft and force, respectively.
How To Configure the Localization
Now you'll have to configure your languages. Arch Linux has an easy way to set that up as well.
First, you'll have to edit the etc/locale.gen file according to your localization. Open the file in the nano text editor:
nano /etc/locale.genYou'll see a long list of languages:
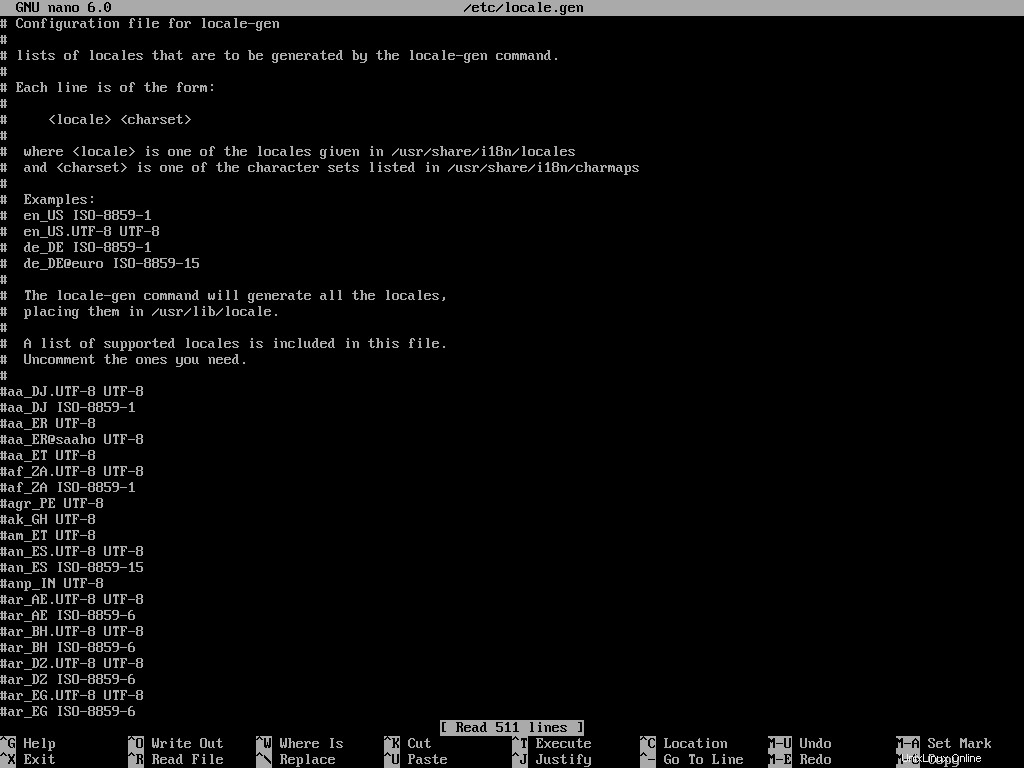
You'll have to uncomment the languages that you want to enable. I usually only need English and Bengali. So I'll locate the en_US.UTF-8 UTF-8 , bn_BD UTF-8 , and bn_IN UTF-8 言語。 Save the file by pressing Ctrl + O and exit nano by pressing the Ctrl + X key combination.
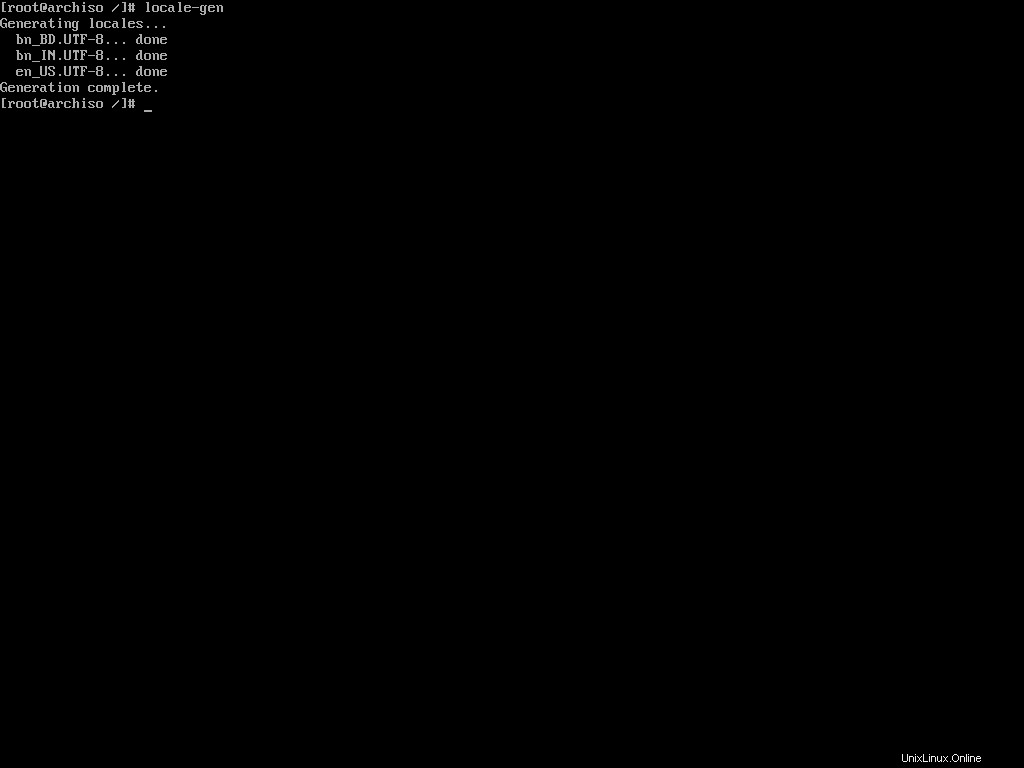
Now you'll have to execute the following command:
locale-gen
The locale-gen command will read your /etc/locale.gen file and generate the locales accordingly.
Now that you've enabled multiple languages, you'll have to tell Arch Linux which one to use by default. To do so, open the /etc/locale.conf file and add the following line to it:
LANG=en_US.UTF-8
That's all you gotta do to configure your locale. You can always go back to the /etc/locale.gen file and add or remove languages from it. Just remember to run locale-gen whenever you do that.
Apart from the locales, if you've made any changes to your console keymaps in the first step of installation, you may want to persist them now. To do so, open the /etc/vconsole.conf file and add your preferred keymaps there.
For example, if you changed the default keymaps to mac-us in the first step, then you may want to add the following line to the vconsole.conf ファイル:
KEYMAP=mac-usNow every time you use the virtual console, it'll have the correct keymap and you will not have to configure it every time.
How To Configure the Network
Configuring a network manually in any Linux distribution can be tricky. That's why I advised you to install the networkmanager package during the system installation. If you did as I said, you're good to go. Otherwise, use pacman to install the package now:
pacman -S networkmanager
Pacman is a package manager. You'll learn more about it later. Let's set the host name for your computer now. A host name is a unique name created to identify a machine on a network, written in the /etc/hostname ファイル。
Open the file with nano and write your host name in it. You can use anything to identify your machine. I usually use my device brand or model as my hostname and as I'm on a legion laptop, I'll simply write the following:
legion
Local host name resolution is provided by nss-myhostname (an NSS module provided by systemd) without having to edit /etc/hosts ファイル。 It is enabled by default.
But some software may still read the /etc/hosts file directly. Open the file in nano and add the following lines to it:
127.0.0.1        localhost
::1              localhost
127.0.1.1        legion
Make sure to replace legion with your host name. Now you may install the aforementioned package:
pacman -S networkmanager
Enable the NetworkManager service by executing the following command:
systemctl enable NetworkManager
Make sure to write NetworkManager and not networkmanager as the service name. If the command succeeds, network manager will start automatically on boot from now on and do its thing.
How To Set the Root Password
You may want to set a password for the root user because why not? To do so, execute the following command:
passwd
The passwd command lets you change the password for a user. By default it affects the current user's password which is the root right now.
It'll ask for a new password and confirmation password. Input them carefully and make sure you don't forget the password.
How To Create a Non-root User
Using your Linux system as the root user for long is not a good idea. So creating a non-root user is important. To create a new user, execute the following command:
useradd -m -G wheel farhan
The useradd command lets you create a new user. Make sure to replace my name with the one you want to use. The -m option indicates that you also want it to create the corresponding home directory. The -G option will add the new user to the wheel group which is the administration user group in Arch Linux.
Now you can use the passwd command once again to set the password for the newly created user:
passwd farhanThe program will prompt you for a new password and a password confirmation. Again, don't forget to replace my name with the one you've used.
Finally, you'll have to enable sudo privilege for this new user. To do so, open the /etc/sudoers file using nano. Once open, locate the following line and uncomment it:
# %wheel ALL=(ALL) ALL
This file essentially means that all users in the wheel group can use sudo by providing their password. Save the file by hitting Ctrl + O and exit nano by hitting Ctrl + X. Now the new user will be able to use sudo when necessary.
How To Install Microcode
According to PCMag,
A set of elementary instructions in a complex instruction set computer (CISC). The microcode resides in a separate high-speed memory and functions as a translation layer between the machine instructions and the circuit level of the computer. Microcode enables the computer designer to create machine instructions without having to design electronic circuits.
Processor manufacturers such as Intel and AMD often release stability and security updates to the processor. These updates are crucial for the system's stability.
In Arch Linux, microcode updates are available through official packages that every user should install on their systems.
# for amd processors
pacman -S amd-ucode

# for intel processors
pacman -S intel-ucode
Just installing these packages is not enough though. You'll have to make sure that your bootloader is loading them. You'll learn about it in the next section.
How To Install and Configure a Boot Loader
According to Wikipedia,
A bootloader, also spelled as boot loader or called boot manager and bootstrap loader, is a computer program that is responsible for booting a computer.
The internals of bootloader is out of scope of this article so I'll just go on with the installation process. If you've used any other Linux distribution in the past you may have encountered the GRUB menu.
GRUB is one of the most popular bootloaders out there. Although there are a number of options available, I'll demonstrate the installation of GRUB because it is what most people will likely use.
To install GRUB, you'll have to first install two packages.
pacman -S grub efibootmgr
If you're installing alongside other operating systems, you'll also need the os-prober package:
pacman -S os-proberThis program will search for already installed operating systems on your system and will make them a part of the GRUB configuration file.
Now, you'll have to mount the EFI system partition you created a few sections ago. To do so, you'll have to first create an efi ディレクトリ:
mkdir /boot/efiAccording to Wikipedia,
In Linux, and other Unix-like operating systems, the /boot/ directory holds files used in booting the operating system.
This directory is present in all Unix-like operating systems. The above mentioned command creates a directory called efi inside the /boot ディレクトリ。 After creating the directory, you'll have to mount your EFI system partition in that directory.
mount /dev/sda1 /boot/efi
I hope you remember that we formatted the /dev/sda1 device as the EFI system partition during the partitioning phase. Make sure to use the correct one for your device.
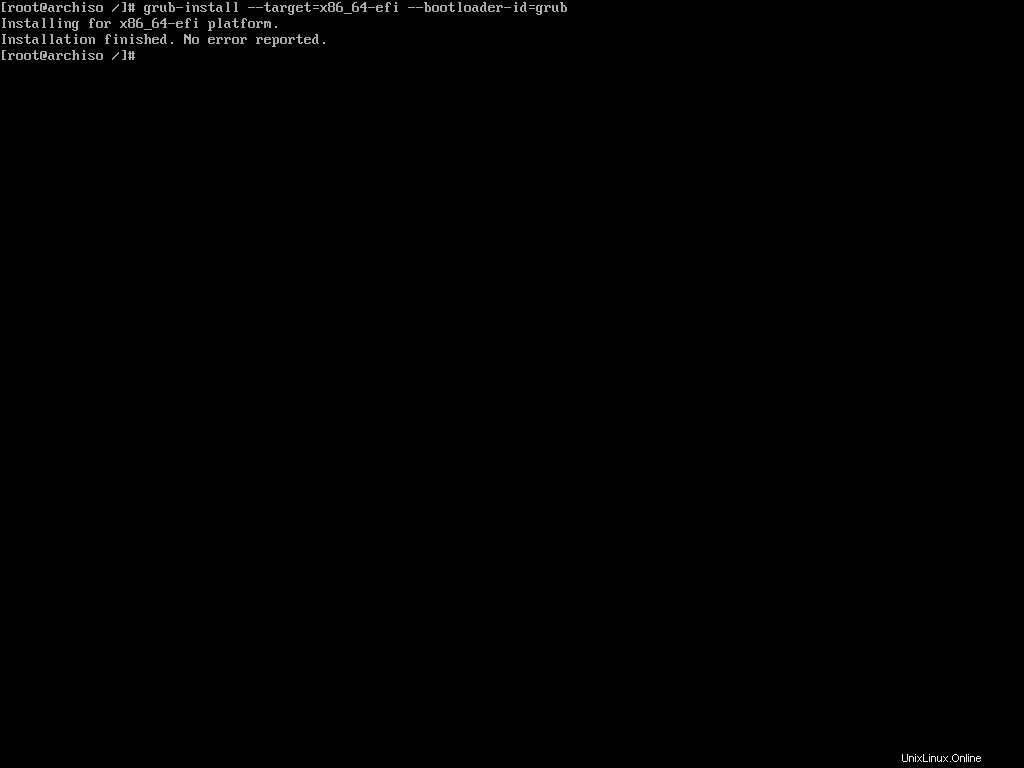
Now, we'll use the grub-install command to install GRUB in the newly mounted EFI system partition:
grub-install --target=x86_64-efi --bootloader-id=grub
You can more or less use this command verbatim. You can change the --bootloader-id to something more expressive like arch or something else. If the installation finishes without any errors, you'll then have to generate the GRUB configuration file.
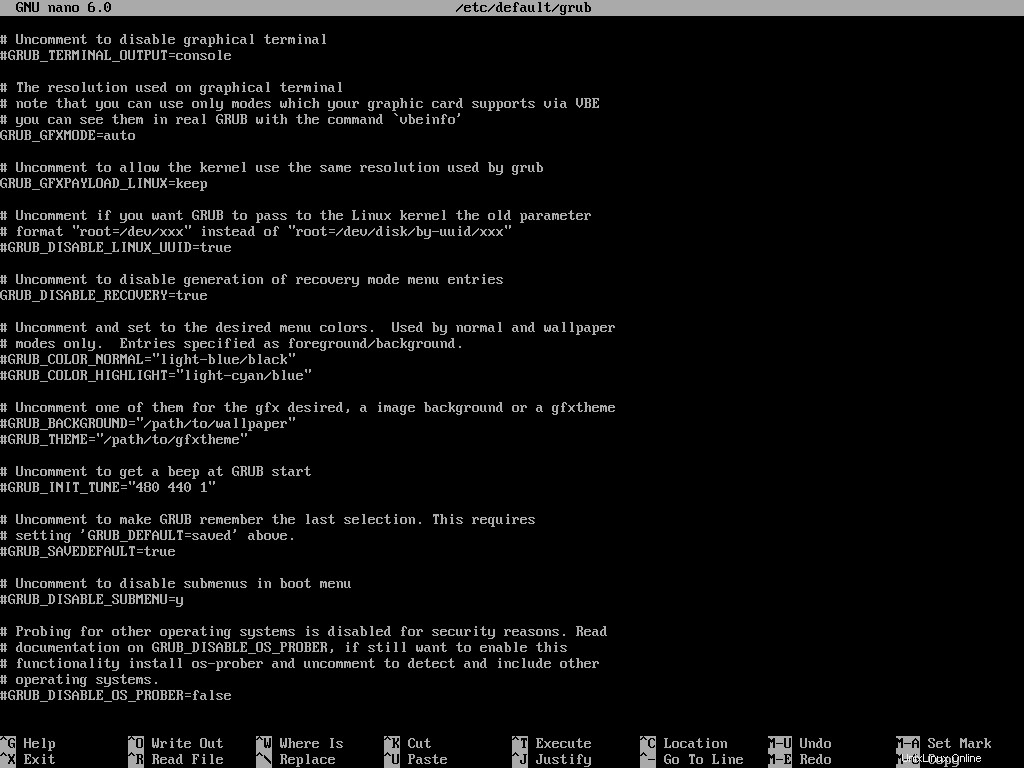
If you're installing alongside other operating systems, you'll have to enable os-prober before generating the configuration file. To do so, open the /etc/default/grub file in nano text editor. Locate the following line and uncomment it:
#GRUB_DISABLE_OS_PROBER=falseThis should be the last line in the aforementioned file so just scroll to the bottom and uncomment it.
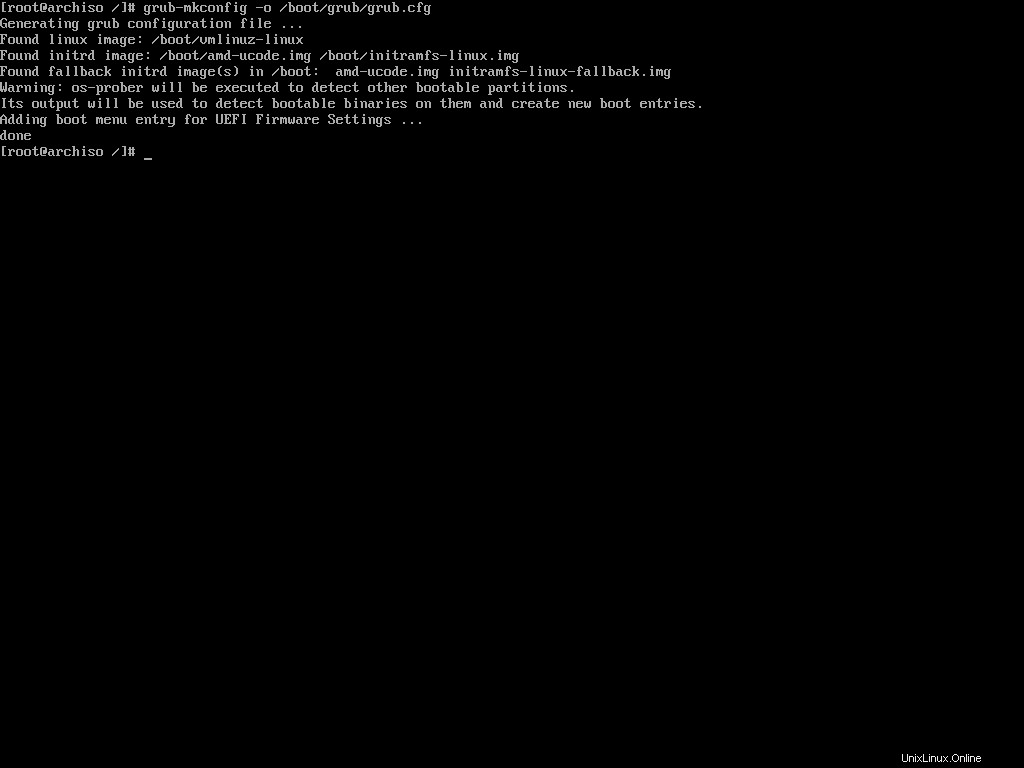
Now execute the following command to generate the configuration file:
grub-mkconfig -o /boot/grub/grub.cfg
The grub-mkconfig command generates the GRUB configuration file and saves it to a given target location. In this case /boot/grub/grub.cfg is the target location.
The command will also take into account the microcode you installed earlier and any other existing operating system on your machine.
Congratulations, you now have a working Arch Linux installation. At this point, you can exit the Arch-Chroot environment, unmount the partition, and reboot. But I would suggest you to stay a bit longer and set-up the graphical user interface as well.
How To Install Xorg
To run programs with graphical user interfaces on your system, you'll have to install an X Window System implementation. The most common one is Xorg.
To install Xorg, execute the following command:
pacman -S xorg-serverWait until the installation is done and then move on to installing the necessary graphics drivers.
How To Install Graphics Drivers
Installing graphics drivers on Arch Linux is very straightforward. You just install the packages required by your graphics processing unit and call it a day.
# for nvidia graphics processing unit
pacman -S nvidia nvidia-utils

# for amd discreet and integrated graphics processing unit
pacman -S xf86-video-amdgpu

# for intel integrated graphics processing unit
pacman -S xf86-video-intel
If you need further assistance, feel free to check the ArchWiki page.
How To Install a Desktop Environment
Now that you've installed Xorg and the necessary graphics drivers, you're ready to install a desktop environment like GNOME, Plasma, or XFCE.
Arch Linux supports a long list of desktop environments but I've only tried out GNOME and Plasma. I'll demonstrate how you can install either of these two.
How To Install GNOME
To install GNOME, you'll have to install the gnome パッケージ。 To do so, execute the following command:
pacman -S gnome
During the installation, you'll be offered multiple choices for pipwire-session-manager and emoji-font パッケージ。 Accept the defaults by hitting Enter in both prompts. The installation may take some time to finish.
The gnome package comes with GDM or Gnome Display Manager. You can enable the service by executing the following command:
systemctl enable gdmThat's all you need to do to get GNOME up and running on your Arch system.
How To Install Plasma
The KDE Plasma installation is not that different from GNOME. You'll need to install Plasma related packages instead of GNOME.
pacman -S plasma plasma-wayland-session
If you have an NVIDIA graphics card, then avoid installing the plasma-wayland-session and use plain old X11. I own two devices with NVIDIA GPUs and both of them have shown instability when using Wayland.
During the installation, you'll get multiple choices for ttf-font , pipwire-session-manager , and phonon-qt5-backend パッケージ。 Make sure to pick noto-fonts as your ttf-font and accept the defaults for the other two.
Like gdm in GNOME, Plasma comes with sddm as the default display manager. Execute the following command to enable the service:
systemctl enable sddmAnd that's all you need to do to get Plasma up and running on your Arch Linux system.
How To Finalize The Installation
Now that you've installed Arch Linux and gone through all necessary configuration steps, you can reboot to your newly installed system. To do so, first come out of the Arch-Chroot environment:
exitNext, unmount the root partition to make sure there are no pending operations:
umount -R /mntNow reboot the machine:
rebootWait until you see the GRUB menu.
Choose Arch Linux from the list and wait until the system finishes booting up.
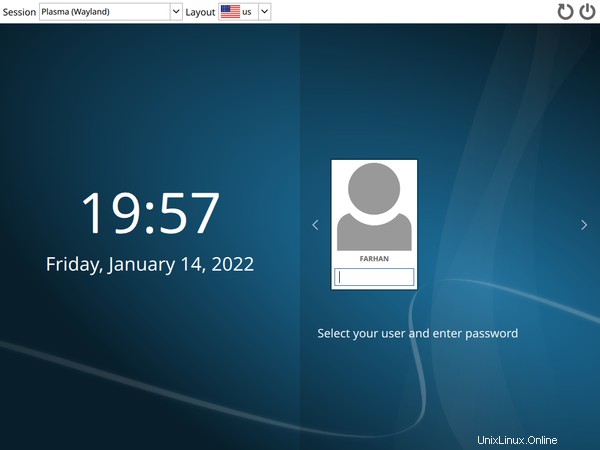
Log in with your user credentials and voilà!
Your shiny new Arch Linux system is ready to do wonders.
How To Switch Between Desktop Environments
Unlike other distributions coupled tightly with their default desktop environment, Arch is flexible. You can switch to another desktop environment whenever you feel like it.
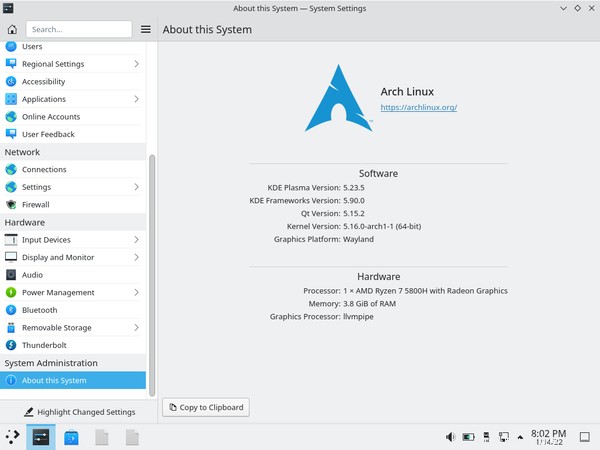
To do so, first logout of your current session.
As you can see, I'm currently using Plasma. Now switch to TTY2 press Ctrl + Alt + F2 key combination. You'll see a console login prompt:
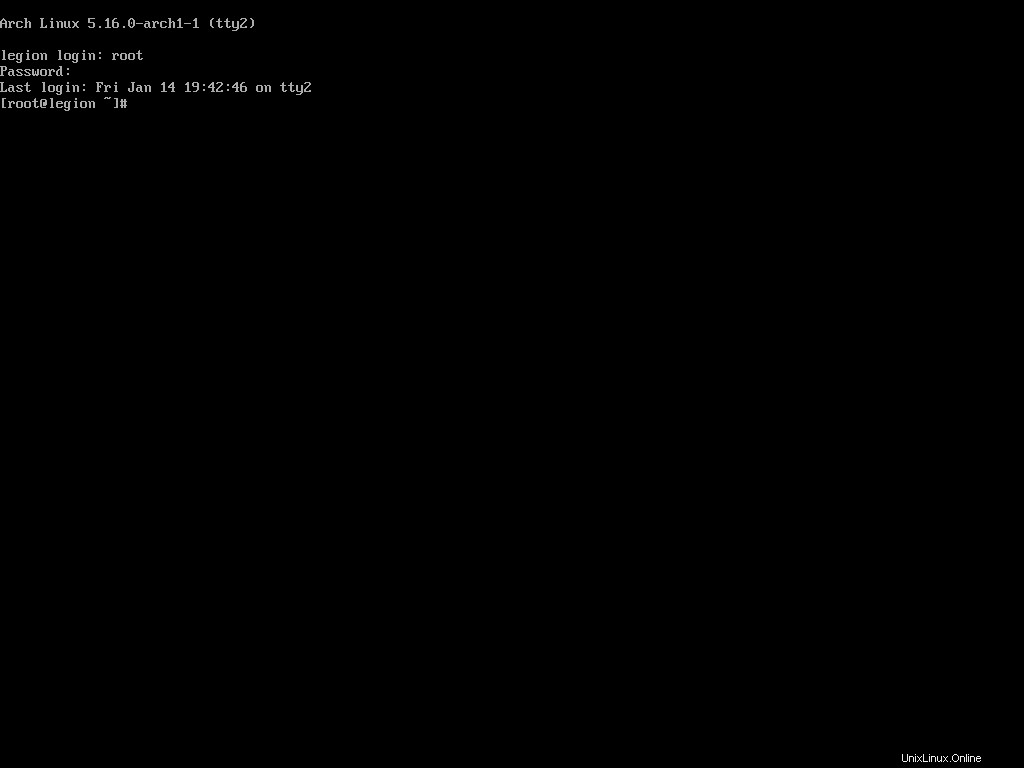
Login with the root credentials and disable the sddm display manager.
systemctl disable sddmThen uninstall the Plasma related packages you installed earlier:
sudo pacman -Rns plasma plasma-wayland-sessionOnce the packages have been uninstalled, install the packages needed for GNOME:
pacman -S gnome
Then perform the installation according to the section you read earlier. After the gnome package has been installed, enable the gdm display manager:
systemctl enable gdmRestart the computer.
rebootWait until the Arch Linux system finishes booting.
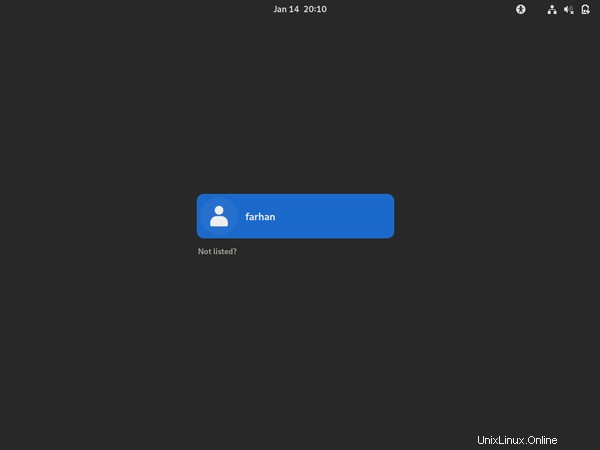
Lo and behold, the gorgeous Gnome Display Manager. Login with your credentials.
You can switch between the desktop environments as much as you want to, but I would suggest on settling down with one of them. Also, I wouldn't recommend having multiples of them installed at the same time.
How To Manage Packages Using Pacman
You've already installed a number of packages using pacman. It's equivalent to package managers like apt in Ubuntu and dnf in Fedora.
In this section, I'll introduce you to some of the common pacman commands that you may need on a daily basis.
How To Install Packages Using Pacman
To install a package using pacman, you can use the following command syntax:
# sudo pacman -S <package name>

sudo pacman -S rust
You can install multiple packages as follows:
# sudo pacman -S <package name> <package name>

sudo pacman -S rust golang
You can also specify the repository you want to install the package from like this:
# sudo pacman -S <package repository>/<package name>

sudo pacman -S extra/rust
In this command, the -S option means synchronize which is equivalent to install in the case of apt or dnf package managers.
How To Remove Packages Using Pacman
To remove a package using pacman you can use the following syntax:
# sudo pacman -R <package name>

sudo pacman -R rust
This will remove the package but will leave the dependencies. You can remove the package with dependencies if they're not required by any other package by executing the following command:
# sudo pacman -Rs <package name>

sudo pacman -Rs rust
Pacman often saves important configuration files when removing certain applications. You can override this behavior by using the following syntax:
# sudo pacman -Rn <package name>

sudo pacman -Rn rust
I usually use sudo pacman -Rns whenever I want to uninstall something. One last thing that I want to show is how to remove orphan packages.
In Ubuntu the sudo apt autoremove command uninstalls any unnecessary package. The equivalent command in Arch is:
sudo pacman -Qdtq | pacman -Rs -This will cleanup any leftover package from previously installed packages.
How To Upgrade Packages Using Pacman
To upgrade all the packages in your system, you can use the following syntax:
sudo pacman -Syu
In this command, the S option synchronizes the packages, y refreshes the local package cache, and u updates the system. This is like the ultimate upgrade command and I run it at least once everyday.
How To Search for Packages Using Pacman
To search for a package in the database, you can use the following syntax:
# sudo pacman -Ss <package name>

sudo pacman -Ss rust
This will print out all the packages found in the database with that search term and will also indicate if any of those are already installed.
If you would like to check if a package is already installed or not, you can use the following command:
# sudo pacman -Qs <package name>

sudo pacman -Qs rust
This is useful when you want to uninstall a package but do not know its exact name.
How To Use AUR in Arch Linux
According to It's FOSS,
AUR stands for Arch User Repository. It is a community-driven repository for Arch-based Linux distributions users. It contains package descriptions named PKGBUILDs that allow you to compile a package from source with makepkg and then install it via pacman (package manager in Arch Linux).
AUR is one of the most attractive features of Arch Linux. It's due to AUR that Arch Linux has a package count almost equal to Debian. You've already used pacman to install various packages. Sadly, you can not use that to install packages from AUR.
You'll have to install one of the AUR helpers instead. Arch Linux doesn't support any of these helpers and advises you to learn how to build packages manually. I'll explain both techniques here. If you understand how a helper works, you'll be able to do it manually as well.
How To Install Packages Using a Helper
Among the available and currently maintained AUR helpers, I like the yay or yet another yogurt package. It's written in Go and is quite solid.
You can not install yay like other packages. You'll have to get the source code and compile the program. You'll need git and the base-devel package to do so. Assuming you've already installed base-devel during Arch Linux installation:
pacman -S git
Clone the yay repository from GitHub and cd into it:
git clone https://aur.archlinux.org/yay.git && cd yayTo build and install yay from source, execute the following command:
makepkg -si
The makepkg script automates the build process of packages. The -si options stand for sync dependencies and install. The first option will install required dependencies (Golang in this case) and the later option will install the built package.
After the build process finishes, makepkg will ask for installation confirmation and your password. Input your password carefully and let the installation finish.
Check if yay has been installed properly or not:
yay --version

# yay v11.1.0 - libalpm v13.0.1
Now let's install something using yay. One of the common packages you may want to install is the visual-studio-code-bin package. To do so, execute the following command:
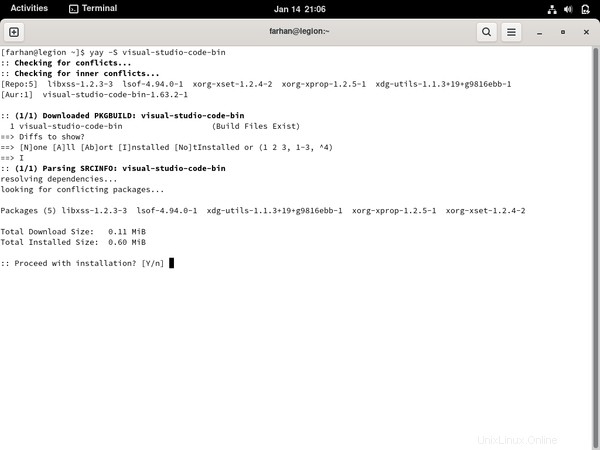
yay -S visual-studio-code-binUnlike pacman, you shouldn't run yay with sudo. Yay will look for the given package and will ask whether you would like to see the diff or not:
All the repositories over at AUR comes with a PKGBUILD file which contains the instructions for building this package. Yay has this nice feature where it shows you what has changed in the PKGBUILD file since the last time.
For now, I'll pick N for none and hit enter. Yay will now look for the dependencies and ask for your password to install them.
Confirm the installation and provide your password. Yay will then install the dependencies and start building the package. Once built, yay will install the package and prompt for your password where necessary.
After the installation finishes, search for Visual Studio Code in the application launcher:
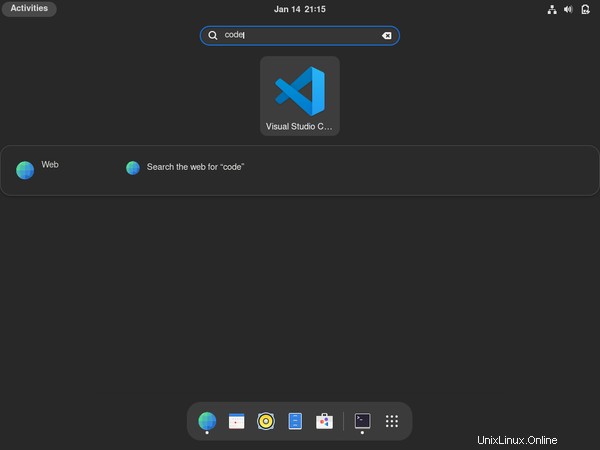
Congratulations on installing your first package from AUR. Yay commands are almost identical to pacman, so if you can do something with pacman, you should be able to do that with yay as well.
In fact, yay can also install packages from official Arch Linux repositories like pacman. But I would suggest you to use yay only for installing packages from AUR when necessary and pacman for everything else.
How To Install Packages Manually
Like I said in the previous section, the ArchWiki suggests avoiding any AUR helper and installing packages from AUR manually. I'll now show you how to do it.
Make sure you have git and base-devel packages installed. If not, use pacman to install them.
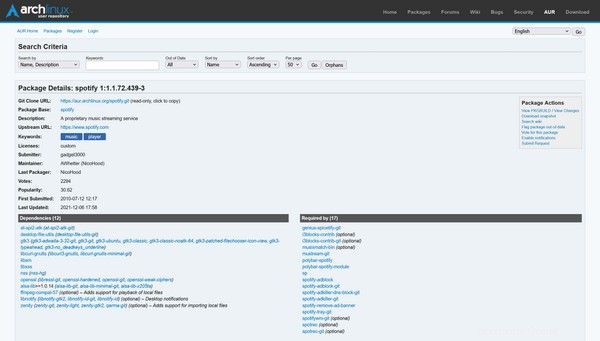
For the demonstration, let's install Spotify this time. First visit the AUR page for the spotify package - https://aur.archlinux.org/packages/spotify/ and copy the "Git Clone URL" from there.
The page even lists all the dependencies you'll need. Clone the repository to your machine:
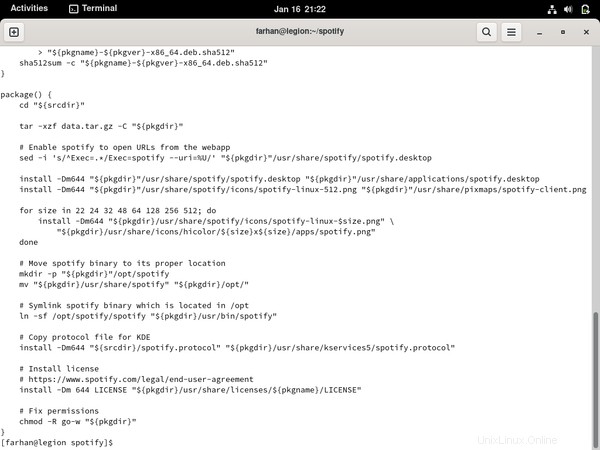
Every AUR repository comes with a PKGBUILD file containing the instructions for building the package. Whenever you're installing a package from AUR, it's a great idea to checkout the PKGBUILD file using something like the cat コマンド:
Make sure there's nothing harmful in the file. Once you're satisfied, use makepkg to install any dependencies, build the package, and install it. Ideally there shouldn't be any issues but sometimes, things can take an unexpected turn.
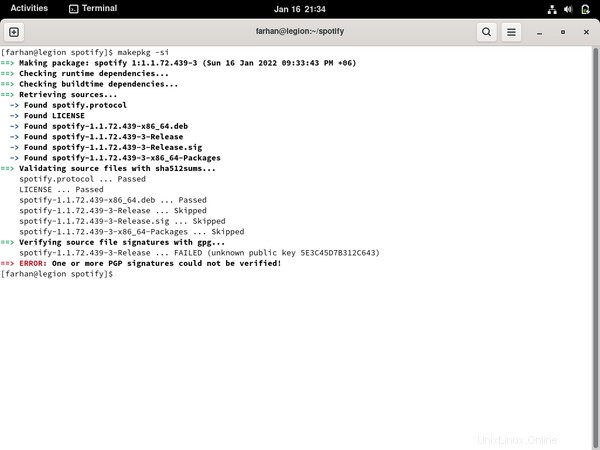
In these cases, go back to the corresponding AUR page and check the user comments. Like in this case, I found the following pinned comment:

Turns out the package requires you to add the Spotify for Linux gpg key to the user kyechain. This command downloads the gpg key using curl and pipes it as the input of the gpg --import コマンド:
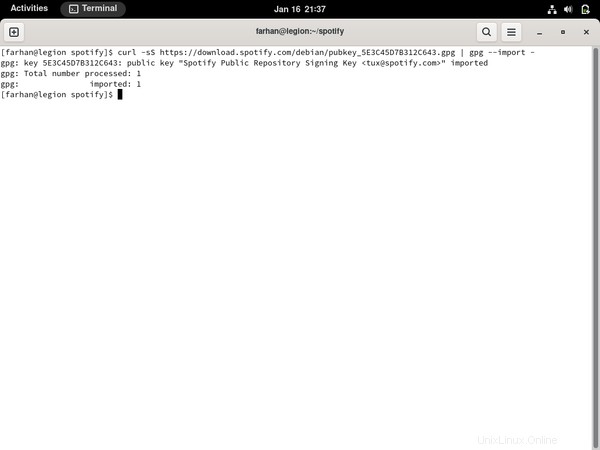
Try executing makepkg -si once again and everything should work fine this time:
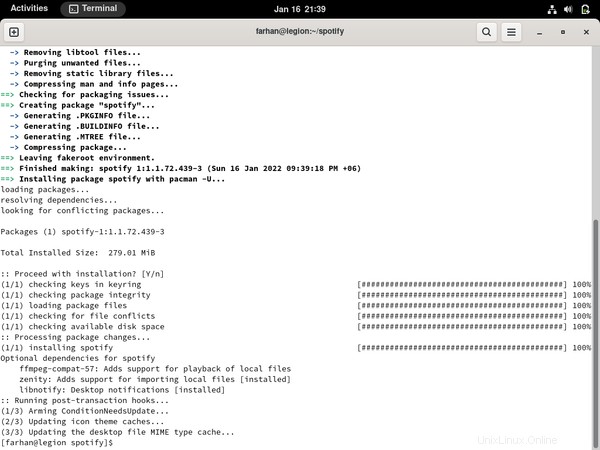
See, told ya! Manually installing packages often involves such troubleshooting but help is almost always around the comment corner. Let's enjoy some music now.
How To Troubleshoot Common Problems
Look, I've been using Arch as my primary on all my devices for some years now but I still run into issues. Fortunately there are some great places to look for help when you're stuck:
- ArchWiki
- Arch Linux Forum
- r/archlinux
For the most part, the wiki should have the information you're looking for. In fact, if you're on a laptop and having difficulty getting something to work, there is an entire wiki category dedicated to different laptops. So look around the wiki.
If the wiki fails to solve your problem, then ask other fellow users at the forum as well as the subreddit. But whenever you're doing that, make sure to do your research first and include as much description as you can in the post. It's really annoying if other users have to keep asking you for more information and it'll also lower the chance that you'll get an answer.
How To Use the Live Arch ISO as a Rescue Media
Whatever people may say, Arch Linux is very stable as long as you know what you're doing. If you go about installing every funky package you come across in the AUR or keep switching different kernels without knowing what they're for, your system may fail to boot.
In those cases, you can use your live USB drive as a rescue media. To do so, reconnect the bootable USB to your computer and boot into the live environment. Once there, configure the time, keymaps, and fonts if you want to.
Then use fdisk to list out all your partitions and locate the one holding your Arch Linux installation. In my case it's the /dev/sda2 partition. Mount the partition like you did before:
mount /dev/sda2 /mntNow use Arch-Chroot to log in as the root user.
arch-chroot /mntNow uninstall the bad package you installed or go back to a kernel version that used to work in the past and so on. Once done, exit the Arch-Chroot environment, unmount the partition, and reboot:
exit
umount -R /mnt
reboot
If the computer boots fine then congratulations. Otherwise try the wiki, forum, or the subreddit. If nothing works, you may have to do a fresh install.
Further Reading
If you've come this far then you've done a lot of reading already – but that's not all. This entire handbook was written by combining information from the wiki, forum, and subreddit. I'm listing out some wiki pages that I think you should read.
- Installation guide
- Network configuration
- General recommendation
- Desktop environment
- pacman
- Arch Build System
- makepkg
- List of applications
Couldn't think of any more at the moment but I'll keep this list updated.
I would like to thank you from the bottom of my heart for the time you've spent on reading this article. I hope you've enjoyed your time and have learned a lot about not only Arch but Linux in general
Apart from this one, I've written full-length handbooks on other complicated topics available for free on freeCodeCamp.
These handbooks are part of my mission to simplify hard to understand technologies for everyone. Each of these handbooks takes a lot of time and effort to write.
If you've enjoyed my writing and want to keep me motivated, consider leaving starts on GitHub and endorse me for relevant skills on LinkedIn.
I'm always open to suggestions and discussions on Twitter or LinkedIn. Hit me with direct messages.
In the end, consider sharing the resources with others, because
In open source, we feel strongly that to really do something well, you have to get a lot of people involved. — Linus Torvalds
Till the next one, stay safe and keep learning.