Lighttpdは、速度が重要な環境向けに設計された、安全で高速な標準準拠のWebサーバーです。このチュートリアルでは、PHPサポート(PHP-FPMを介して)およびMySQLサポートを備えたCentos7サーバーにLighttpdをインストールする方法を示します。 PHP-FPM(FastCGI Process Manager)は、あらゆるサイズのサイト、特に忙しいサイトに役立ついくつかの追加機能を備えた、代替のPHPFastCGI実装です。このチュートリアルでは、Lighttpdのspawn-fcgiの代わりにPHP-FPMを使用しています。
1予備メモ
このチュートリアルでは、ホスト名server1.example.comとIPアドレス192.168.1.100を使用します。これらの設定はユーザーによって異なる場合があるため、必要に応じて置き換える必要があります。
2MySQLドロップイン置換としてMariaDBをインストールする
まず、次のようにMySQLをインストールします。
yum -y install mariadb mariadb-server
次に、MySQLのシステム起動リンクを作成し(システムが起動するたびにMySQLが自動的に起動するように)、MySQLサーバーを起動します。
systemctl enable  mariadb.service
systemctl start  mariadb.service
MarisDBルートアカウントのパスワードを設定します:
mysql_secure_installation
[[email protected] ~]# mysql_secure_installation
/usr/bin/mysql_secure_installation:
NOTE: RUNNING ALL PARTS OF THIS SCRIPT IS RECOMMENDED FOR ALL MariaDB
SERVERS IN PRODUCTION USE! PLEASE READ EACH STEP CAREFULLY!
In order to log into MariaDB to secure it, we'll need the current
password for the root user. If you've just installed MariaDB, and
you haven't set the root password yet, the password will be blank,
so you should just press enter here.
Enter current password for root (enter for none): <-- press enter
OK, successfully used password, moving on...
Setting the root password ensures that nobody can log into the MariaDB
root user without the proper authorisation.
Set root password? [Y/n] <-- y
New password: <-- enter new password
Re-enter new password: <-- enter new password
Password updated successfully!
Reloading privilege tables..
... Success!
By default, a MariaDB installation has an anonymous user, allowing anyone
to log into MariaDB without having to have a user account created for
them. This is intended only for testing, and to make the installation
go a bit smoother. You should remove them before moving into a
production environment.
Remove anonymous users? [Y/n] <-- y
... Success!
Normally, root should only be allowed to connect from 'localhost'. This
ensures that someone cannot guess at the root password from the network.
Disallow root login remotely? [Y/n] <-- y
... Success!
By default, MariaDB comes with a database named 'test' that anyone can
access. This is also intended only for testing, and should be removed
before moving into a production environment.
Remove test database and access to it? [Y/n] <-- y
- Dropping test database...
... Success!
- Removing privileges on test database...
... Success!
Reloading the privilege tables will ensure that all changes made so far
will take effect immediately.
Reload privilege tables now? [Y/n] <-- y
... Success!
Cleaning up...
All done! If you've completed all of the above steps, your MariaDB
installation should now be secure.
Thanks for using MariaDB!
3Lighttpdのインストール
LighttpdとPHP-FPMは公式のCentOSリポジトリからは入手できないため、EPELリポジトリを有効にする必要があります。
yum -y install epel-release
EPEL GPGキーをインポートします:
rpm --import /etc/pki/rpm-gpg/RPM-GPG-KEY-EPEL-7
次に実行します:
yum update
その後、次のようにLighttpdをインストールできます:
yum -y install lighttpd
次に、Lighttpdのシステム起動リンクを作成し(システムが起動するたびにLighttpdが自動的に起動するように)、起動します。
systemctl enable  lighttpd.service
systemctl start  lighttpd.service
Lighttpdが次のエラーメッセージで起動に失敗した場合...
(network.c.203) socket failed: Address family not supported by protocol
.../etc/lighttpd/lighttpd.confを開きます...
nano /etc/lighttpd/lighttpd.conf
...そしてserver.use-ipv6を有効から無効に変更します:
[...]
##
## Use IPv6?
##
server.use-ipv6 = "disable"
[...]
次に、Lighttpdを再起動してみてください。問題なく動作するはずです:
systemctl start lighttpd.service
Lighttpdのドキュメントルートは/var / www /にあります htdocs(ベースディレクトリ / var / www さらに、lighttpd.confファイルによるとサブディレクトリとしてhtdocs)が、デフォルトのファイルを / var / www /にインストールします。 lighttpd。これは一貫性がないため、ディレクトリの名前を次のように変更する必要があります。
mv /var/www/lighttpd /var/www/htdocs
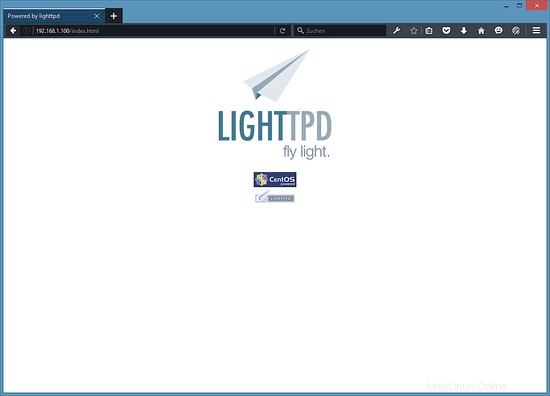
次に、ブラウザをhttp://192.168.1.100に移動すると、次のページが表示されます。

LighttpdのデフォルトのドキュメントルートはCentOS7では/var/ www / htdocs /であり、設定ファイルは/etc/lighttpd/lighttpd.confです。
4PHPのインストール
次のようにインストールするPHP-FPMを使用して、LighttpdでPHPを機能させることができます。
yum -y install php-fpm lighttpd-fastcgi
PHP-FPMは、ポート9000でFastCGIサーバーを実行するデーモンプロセスです。
/etc/php-fpm.d/www.confを開きます...
nano /etc/php-fpm.d/www.conf
...ユーザーとグループをlighttpdに設定します:
[...]
; Unix user/group of processes
; Note: The user is mandatory. If the group is not set, the default user's group
;       will be used.
; RPM: apache Choosed to be able to access some dir as httpd
user = lighttpd
; RPM: Keep a group allowed to write in log dir.
group = lighttpd
[...]
PHP-FPMのシステム起動リンクを作成して起動します:
systemctl enable  php-fpm.service
systemctl start  php-fpm.service