前のチュートリアルでは、Dockerを介してAnsibleAWXをデプロイする方法を説明しました。その間に、AWX用のrpmパッケージをビルドする2つのプロジェクトを見つけました。そのため、このチュートリアルでは、CentOS7のRPMファイルからAnsibleAWXをインストールする方法を説明します。AnsibleAWXは、AnsibleTowerソフトウェアのオープンソースバージョンです。
CentOS7の最小インストールと許容モードのSELinuxで3台のサーバーを使用します。
- 192.168.1.25AWXサーバー
- 192.168.1.21クライアント1
- 192.168.1.22 client2
AWXサーバーの最小システム要件
- 少なくとも4GBのメモリ
- 少なくとも2つのCPUコア
- 少なくとも20GBのスペース
- Docker、Openshift、またはKubernetesの実行
SELinux構成を確認してください。
[[email protected]〜]#sestatusSELinux status:enabledSELinuxfs mount:/ sys / fs / selinuxSELinux root directory:/ etc / selinuxLoaded policy name:targetedCurrent mode:permissiveMode from config file:permissivePolicy MLS status:enabledPolicy deny_unknown status:allowedMaxカーネルポリシーバージョン:28 [[メール保護]〜]#
にホストエントリを追加します
/ etc / hosts
[[email protected]〜]#cat /etc/hosts192.168.1.25 awx.sunil.cc awx192.168.1.21 client1.sunil.cc client1192.168.1.22 client2.sunil.cc client2 [[email protected ]〜]#
ファイアウォールルールを追加する
[[email protected]〜]#systemctl enable FirewalldCreated symlink from /etc/systemd/system/dbus-org.fedoraproject.FirewallD1.service to /usr/lib/systemd/system/firewalld.service.Created symlink from / etc / systemd / system / multi-user.target.wants / firewalld.service to/usr/lib/systemd/system/firewalld.service。[[emailprotected]〜]#systemctl start Firewalld [[email protected]〜]# Firewall-cmd --add-service =http --permanent; firewall-cmd --add-service =https --permanentsuccesssuccess [[email protected]〜]#systemctl restart Firewalld [[email protected]〜]#
CentOSEPELリポジトリを有効にします。
[[email protected]〜]#yum install -y epel-release
AWXのインストールにはpostgresql9.6が必要です。
postgreSQLリポジトリを有効にします。
[[email protected]〜]#yum install -y https://download.postgresql.org/pub/repos/yum/9.6/redhat/rhel-7-x86_64/pgdg-centos96-9.6-3.noarch .rpm
postgreSQLをインストールしています。
[[email protected]〜]#yum install postgresql96-server -y
その他の必要なrpmをインストールします。
[[email protected]〜]#yum install -yrabbitmq-server wget memcached nginx ansible
AnsibleAWXのインストール
AWXリポジトリを追加します。
[[email protected]〜]#wget -O /etc/yum.repos.d/awx-rpm.repo https://copr.fedorainfracloud.org/coprs/mrmeee/awx/repo/epel-7/ mrmeee-awx-epel-7.repo
rpmのインストール
[[email protected]〜]#yum install -y awx
データベースの初期化
[[email protected]〜]#/usr/pgsql-9.6/bin/postgresql96-setup initdbInitializing database ... OK [[email protected]〜]#
Rabbitmqサービスの開始
[[email protected]〜]#systemctl startrabbitmq-server [[emailprotected]〜]#systemctlenablerabbitmq-server/etc/systemd/system/multi-user.target.wants/rabbitmq-serverからsymlinkを作成しました。 /usr/lib/systemd/system/rabbitmq-server.serviceへのサービス。[[emailprotected]〜]#
PostgreSQLサービスの開始
[[email protected]〜]#systemctl enablepostgresql-9.6/etc/systemd/system/multi-user.target.wants/postgresql-9.6.serviceから/usr/lib/systemd/system/postgresqlへのsymlinkを作成しました-9.6.service。[[emailprotected]〜]#systemctl start postgresql-9.6
Memcachedサービスの開始
[[email protected]〜]#systemctl enable memcachedCreated symlink from /etc/systemd/system/multi-user.target.wants/memcached.serviceto/usr/lib/systemd/system/memcached.service。[[メールで保護]〜]#systemctl start memcached
Postgresユーザーの作成
[[email protected]〜]#sudo -u postgres createuser -Sawxはディレクトリを「/root」に変更できませんでした:アクセスが拒否されました[[emailprotected]〜]#
エラーを無視する
データベースの作成
[[email protected]〜]#sudo -u postgres createdb -O awxawxはディレクトリを「/root」に変更できませんでした:アクセスが拒否されました[[emailprotected]〜]#
エラーを無視する
データベースへのデータのインポート
[[メール保護]〜]#sudo -u awx / opt / awx / bin/awx-管理移行
AWXの構成を初期化する
[[email protected]〜]#echo "from django.contrib.auth.models import User; User.objects.create_superuser('admin'、'[email protected]'、'password')" | sudo -u awx / opt / awx / bin / awx-manage shell [[email protected]〜]#sudo -u awx / opt / awx / bin / awx-managecreate_preload_dataデフォルトの組織が追加されました。デモ資格情報、インベントリ、およびジョブテンプレートが追加されました。[[emailprotected]〜]#sudo -u awx / opt / awx / bin / awx-manageprovision_instance --hostname =$(hostname)正常に登録されたインスタンスawx.sunil.cc(changed:True)[[email protected] 〜]#sudo -u awx / opt / awx / bin / awx-manage register_queue --queuename =token --hostnames =$(hostname)インスタンスグループtowerの作成インスタンスawx.sunil.ccをtowerに追加(変更:True)[[メールで保護]〜]#
Nginxを構成する
nginx.confのバックアップを取る
[[email protected]〜]#cd / etc / nginx / [[email protected] nginx]#pwd / etc / nginx [[email protected] nginx]#cp nginx.conf nginx.conf.bkp>
nginxconfファイルを置き換えます
[[email protected] nginx]#wget -O /etc/nginx/nginx.conf https://raw.githubusercontent.com/sunilsankar/awx-build/master/nginx.conf
nginxサービスを有効にして開始します
[[email protected]〜]#systemctl start nginx [[email protected]〜]#systemctl enable nginx
awxサービスを開始します
[[email protected]〜]#systemctl start awx-cbreceiver [[email protected]〜]#systemctl start awx-celery-beat [[email protected]〜]#systemctl start awx-celery-worker [[email protected ]〜]#systemctl start awx-channels-worker [[email protected]〜]#systemctl start awx-daphne [[email protected]〜]#systemctl start awx-web
再起動中にサービスが開始されていることを確認してください
[[email protected]〜]#systemctl enable awx-cbreceiverCreated symlink from /etc/systemd/system/multi-user.target.wants/awx-cbreceiver.service to / usr / lib / systemd / system / awx- cbreceiver.service。[[emailprotected]〜]#systemctl enable awx-celery-beatCreated symlink from /etc/systemd/system/multi-user.target.wants/awx-celery-beat.service to / usr / lib / systemd /system/awx-celery-beat.service。[[emailprotected]〜]#systemctl enable awx-celery-workerCreated symlink from /etc/systemd/system/multi-user.target.wants/awx-celery-worker.service /usr/lib/systemd/system/awx-celery-worker.service。[[emailprotected]〜]#systemctl enable awx-channels-workerCreated symlink from /etc/systemd/system/multi-user.target.wants/ awx-channels-worker.serviceから/usr/lib/systemd/system/awx-channels-worker.service。[[emailprotected]〜]#systemctl enable awx-daphneCreated symlink from / etc / systemd / system / multi-user .target.wants /awx-daphne.serviceから/usr/lib/systemd/system/awx-daphne.service。[[メール保護]〜 ]#systemctl enable awx-webCreated symlink from /etc/systemd/system/multi-user.target.wants/awx-web.serviceto/usr/lib/systemd/system/awx-web.service。[[emailprotected] 〜]#
AWXサーバーからのパスワードなしのログインを構成します
3つのホストすべてにユーザーを作成します。
このチュートリアルでは、ユーザーを ansible作成しています。 3台のサーバーすべてで。
[[email protected]〜]#useradd ansible [[email protected]〜]#useradd ansible [[email protected]〜]#useradd ansible
awxサーバーでsshキーを生成する
[[email protected] nginx]#su --ansible [[email protected]〜] $ ssh-keygen公開/秘密rsaキーペアを生成しています。キーを保存するファイルを入力してください(/home/ansible/.ssh/id_rsa ):作成されたディレクトリ'/home/ansible/.ssh'。パスフレーズを入力(パスフレーズがない場合は空):同じパスフレーズをもう一度入力:IDが/home/ansible/.ssh/id_rsaに保存されました。公開鍵が保存されました/home/ansible/.ssh/id_rsa.pubにあります。キーの指紋は次のとおりです。SHA256:RW / dhTsxcyGicleRI0LpLm + LyhAVinm0xktapodc8gY [メールで保護]キーのランダムアートイメージは次のとおりです:+ --- [RSA 2048] ---- + | 。 。 ..o。 + ooo || =o。 + .oo+*。o|| E@。 ..oo。+o*。||。 #o oo .. o || =*S。 || o。 。 。 || 。 o || o .o || o ..... | + ---- [SHA256] ----- + [[メール保護]〜] $
3つのサーバーすべてにsudoersエントリをファイルの最後のエントリとして追加する
[[email protected] nginx]#visudoansible ALL =(ALL)NOPASSWD:ALL
id_rsa.pubのコンテンツを3つのサーバーすべてのauthorized_keysにコピーします
<前> [[Eメール保護]の.ssh] $猫id_rsa.pubssh-RSA AAAAB3NzaC1yc2EAAAADAQABAAABAQDStB8JGsVsSLppwYWdnEPLE4xwFqRDn7xE / d3hjBQ6A0JGm1t + GtHB3GPIEjANFTnxQwHpR + cRttbL3mlQvpIYqCZOMZds9XA7VI5qgs0aSGUU8cNYKjmmrMpJa9sB4WVtj3M4u2fEXt9FKKCtjMMpOfiQxIkEhYZ + 2GoAX5sHXan7TPcgwb5r7WW6j43aaPc6g9XWN63nonQz6KeMSFZ / y0o2HJMh1FEkktZw6A1HVfn + JNWoQb1glyqGjO1ync + Sok8yXpqakEEWpXNQSQYs4eBEwfkKql5EuolQMIbF9VYhpEcR9LfbMvYdq / RPKWN3mmRMWfPZ2dTZl515XBdV [メール保護] [[Eメール保護]の.ssh] $ [[電子メールの保護]の.ssh] $猫authorized_keysssh-RSA AAAAB3NzaC1yc2EAAAADAQABAAABAQDStB8JGsVsSLppwYWdnEPLE4xwFqRDn7xE / d3hjBQ6A0JGm1t + GtHB3GPIEjANFTnxQwHpR + cRttbL3mlQvpIYqCZOMZds9XA7VI5qgs0aSGUU8cNYKjmmrMpJa9sB4WVtj3M4u2fEXt9FKKCtjMMpOfiQxIkEhYZ + 2GoAX5sHXan7TPcgwb5r7WW6j43aaPc6g9XWN63nonQz6KeMSFZ / y0o2HJMh1FEkktZw6A1HVfn + JNWoQb1glyqGjO1ync + Sok8yXpqakEEWpXNQSQYs4eBEwfkKql5EuolQMIbF9VYhpEcR9LfbMvYdq / RPKWN3mmRMWfPZ2dTZl515XBdV [メール保護] [[Eメール保護]の.ssh] $ chmodの600のauthorized_keysClient1
[[email protected]〜]#su --ansible [[email protected]〜] $ mkdir .ssh [[email protected]〜] $ chmod 700 .ssh [[email protected]〜] $ cat .ssh / authorized_keysssh -rsa AAAAB3NzaC1yc2EAAAADAQABAAABAQDStB8JGsVsSLppwYWdnEPLE4xwFqRDn7xE / d3hjBQ6A0JGm1t + GtHB3GPIEjANFTnxQwHpR + cRttbL3mlQvpIYqCZOMZds9XA7VI5qgs0aSGUU8cNYKjmmrMpJa9sB4WVtj3M4u2fEXt9FKKCtjMMpOfiQxIkEhYZ + 2GoAX5sHXan7TPcgwb5r7WW6j43aaPc6g9XWN63nonQz6KeMSFZ / y0o2HJMh1FEkktZw6A1HVfn + JNWoQb1glyqGjO1ync + Sok8yXpqakEEWpXNQSQYs4eBEwfkKql5EuolQMIbF9VYhpEcR9LfbMvYdq / RPKWN3mmRMWfPZ2dTZl515XBdV [メール保護] [[Eメール保護]〜] $ chmodの600の.ssh / authorized_keysに
Client2
[[email protected]〜]#su --ansible [[email protected]〜] $ mkdir .ssh [[email protected]〜] $ chmod 700 .ssh [[email protected]〜] $ cat .ssh / authorized_keysssh -rsa AAAAB3NzaC1yc2EAAAADAQABAAABAQDStB8JGsVsSLppwYWdnEPLE4xwFqRDn7xE / d3hjBQ6A0JGm1t + GtHB3GPIEjANFTnxQwHpR + cRttbL3mlQvpIYqCZOMZds9XA7VI5qgs0aSGUU8cNYKjmmrMpJa9sB4WVtj3M4u2fEXt9FKKCtjMMpOfiQxIkEhYZ + 2GoAX5sHXan7TPcgwb5r7WW6j43aaPc6g9XWN63nonQz6KeMSFZ / y0o2HJMh1FEkktZw6A1HVfn + JNWoQb1glyqGjO1ync + Sok8yXpqakEEWpXNQSQYs4eBEwfkKql5EuolQMIbF9VYhpEcR9LfbMvYdq / RPKWN3mmRMWfPZ2dTZl515XBdV [メール保護] [[Eメール保護]〜] $ chmodの600の.ssh / authorized_keysに
AWXサーバーからのパスワードなしのログインを確認してください。
[[email protected]〜] $ ssh client1Last login:Sun Mar 11 13:14:06 2018 from 192.168.1.25 [[email protected]〜] $ exitlogoutConnection to client1closed。[[emailprotected]〜] $ ssh client2Last login:Sun Mar 11 12:50:14 2018 from 192.168.1.25 [[email protected]〜] $
ログインを検証する:
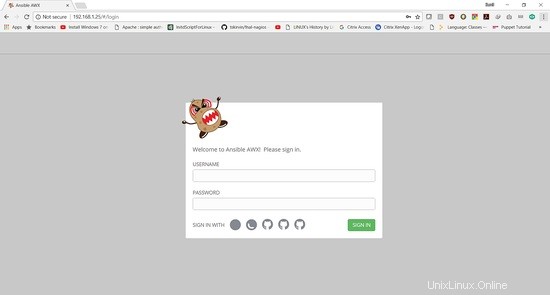
ログインの詳細は次のとおりです。
ユーザー名: " admin "
パスワード:"パスワード "
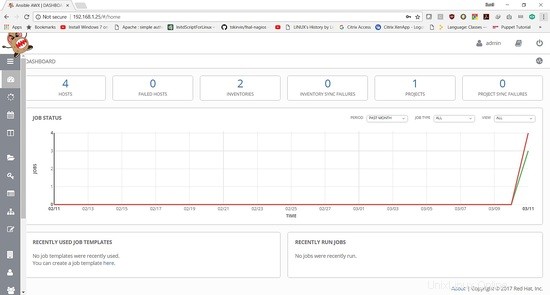
次のチュートリアルでは、プレイブックを追加してジョブを実行する方法を示します。