OwnCloudは、データ同期とファイル共有のためのサーバーソフトウェアであり、オープンソースライセンスの下で利用できる使いやすいウェブベースのフロントエンドを備えています。 OwnCloudはLinuxまたはWindowsWebサーバーにインストールでき、構成が簡単で、包括的なオンラインドキュメントがあります。ネイティブクライアントは、Windows、MacOS、およびLinux(デスクトップアプリケーション)で使用できます。 AndroidとiOS用のモバイルアプリもあります。
このチュートリアルでは、CentOS7サーバーにownCloud9.1をインストールして構成する方法を説明します。 NginxとPHP7(FPMとして)およびデータベースシステムとしてMariaDBを使用してownCloudを構成する方法を紹介します。
- CentOS7サーバー
- ルート特権
Nginxとphp7-fpmのインストールを開始する前に、CentOSベースリポジトリからは利用できない追加のソフトウェアを含むEPELリポジトリを追加する必要があります。このyumコマンドを使用してEPELをインストールします。
yum -y install epel-release
次に、EpelリポジトリからNginxをインストールします。
yum -y install nginx
次に、php7-fpm用に別のリポジトリを追加する必要があります。ネット上で利用可能なPHP7のリポジトリがいくつかあります。ここでは、webtaticリポジトリを使用します。
webtaticリポジトリを追加します:
rpm -Uvh https://mirror.webtatic.com/yum/el7/webtatic-release.rpm
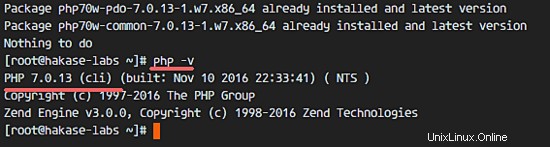
次に、ownCloudインストール用のいくつかの追加パッケージを使用してPHP7-FPMをインストールします。
yum -y install php70w-fpm php70w-cli php70w-gd php70w-mcrypt php70w-mysql php70w-pear php70w-xml php70w-mbstring php70w-pdo php70w-json
サーバーターミナルからPHPのバージョンをチェックして、インストールが成功したことを確認します。
php -v
このステップでは、nginxで実行するようにphp-fpmを構成します。 Php7-fpmはユーザーnginxで実行され、ポート9000でリッスンします。
デフォルトのphp7-fpm構成をvimで編集します。
vim /etc/php-fpm.d/www.conf
8行目と10行目で、ユーザーとグループを「 nginx」に変更します '。
user = nginx
group = nginx
22行目で、php-fpmがサーバーポート9000で実行されていることを確認します。
listen = 127.0.0.1:9000
php-fpmシステム環境変数の366〜370行目のコメントを解除します。
env[HOSTNAME] = $HOSTNAME
env[PATH] = /usr/local/bin:/usr/bin:/bin
env[TMP] = /tmp
env[TMPDIR] = /tmp
env[TEMP] = /tmp
ファイルを保存してエディタを終了します
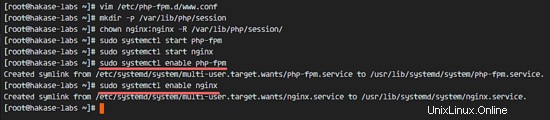
次に、「/ var / lib /」ディレクトリにセッションパス用の新しいディレクトリを作成し、所有者を「nginx」ユーザーに変更します。
mkdir -p /var/lib/php/session
chown nginx:nginx -R /var/lib/php/session/
php-fpmとnginxを起動し、それを追加して起動時に起動します。
sudo systemctl start php-fpm
sudo systemctl start nginx

sudo systemctl enable php-fpm
sudo systemctl enable nginx
PHP7-FPM構成が完了しました。
OwnCloudはPostgreSQLおよびMySQLデータベースをサポートしています。このチュートリアルでは、ownCloudデータベースにMariaDBを使用します。 yumコマンドを使用してCentOSリポジトリからmariadb-serverパッケージをインストールします。
yum -y install mariadb mariadb-server
MariaDBサービスを開始し、MariaDBルートパスワードを構成します。
systemctl start mariadb
mysql_secure_installation
要求されたら、rootパスワードを入力します。
Set root password? [Y/n] Y
New password:
Re-enter new password:

Remove anonymous users? [Y/n] Y
Disallow root login remotely? [Y/n] Y
Remove test database and access to it? [Y/n] Y
Reload privilege tables now? [Y/n] Y
MariaDBのルートパスワードが設定されました。これで、MySQLシェルにログインして、ownCloudの新しいデータベースとユーザーを作成できます。新しいデータベースを作成します'
新しいデータベースを作成します'owncloud_db 'ユーザーの下'ownclouduser 'パスワード付き'[メール保護] '。インストールには別の安全なパスワードを選択してください!
mysql -u root -p
Type Password
以下にMySQLクエリを入力して、新しいデータベースと新しいユーザーを作成します。
create database owncloud_db;
create user [email protected] identified by '[email protected]';
grant all privileges on owncloud_db.* to [email protected] identified by '[email protected]';
flush privileges;
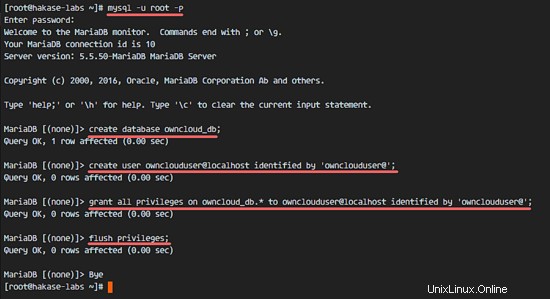
ユーザー「ownclouduser」を持つ「owncloud_dbデータベース」が作成されました。
このチュートリアルでは、クライアントのhttps接続の下でowncloudを実行します。 Let'sEncryptなどの無料のSSL証明書を使用できます。このチュートリアルでは、OpenSSLコマンドを使用して独自のSSL証明書ファイルを作成します。
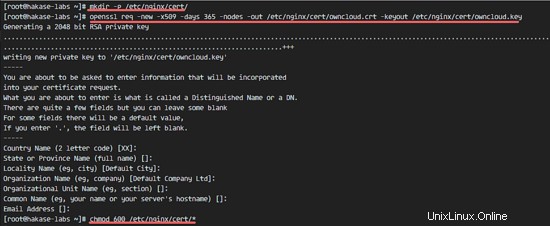
SSLファイル用の新しいディレクトリを作成します。
mkdir -p /etc/nginx/cert/
次に、以下のOpenSSLコマンドを使用して新しいSSL証明書ファイルを生成します。
openssl req -new -x509 -days 365 -nodes -out /etc/nginx/cert/owncloud.crt -keyout /etc/nginx/cert/owncloud.key
OpenSSLコマンドで要求されたSSL証明書の詳細を入力します。次に、chmodを使用してすべての証明書ファイルのアクセス許可を600に変更します。
chmod 600 /etc/nginx/cert/*
wgetコマンドでownCloudをダウンロードするので、最初にwgetパッケージをインストールする必要があります。さらに、パッケージを解凍する必要があります。
yum -y install wget unzip
tmpディレクトリに移動し、ownCloudサイトからwgetを使用して最新の安定したownCloud9.1をダウンロードします。
cd /tmp
wget https://download.owncloud.org/community/owncloud-9.1.2.zip
ownCloud zipファイルを抽出し、「/ usr / share / nginx /html/」ディレクトリに移動します。
unzip owncloud-9.1.2.zip
mv owncloud/ /usr/share/nginx/html/
次に、nginx Webルートディレクトリに移動し、owncloud用の新しい「データ」ディレクトリを作成します。
cd /usr/share/nginx/html/
mkdir -p owncloud/data/
'owncloud'ディレクトリの所有者を'nginx'ユーザーとグループに変更します。
chown nginx:nginx -R owncloud/
ステップ5では、ownCloudソースコードをダウンロードし、NginxWebサーバーで実行するように構成しました。ただし、ownCloud用に仮想ホストを構成する必要があります。
「conf.d」ディレクトリに新しい仮想ホスト構成ファイル「owncloud.conf」を作成します。
cd /etc/nginx/conf.d/
vim owncloud.conf
以下にownCloud仮想ホスト構成を貼り付けます。
upstream php-handler {
    server 127.0.0.1:9000;
    #server unix:/var/run/php5-fpm.sock;
}

server {
    listen 80;
    server_name data.owncloud.co;
    # enforce https
    return 301 https://$server_name$request_uri;
}

server {
    listen 443 ssl;
    server_name data.owncloud.co;

    ssl_certificate /etc/nginx/cert/owncloud.crt;
    ssl_certificate_key /etc/nginx/cert/owncloud.key;

    # Add headers to serve security related headers
    # Before enabling Strict-Transport-Security headers please read into this topic first.
    add_header Strict-Transport-Security "max-age=15552000; includeSubDomains";
    add_header X-Content-Type-Options nosniff;
    add_header X-Frame-Options "SAMEORIGIN";
    add_header X-XSS-Protection "1; mode=block";
    add_header X-Robots-Tag none;
    add_header X-Download-Options noopen;
    add_header X-Permitted-Cross-Domain-Policies none;

    # Path to the root of your installation
    root /usr/share/nginx/html/owncloud/;

    location = /robots.txt {
        allow all;
        log_not_found off;
        access_log off;
    }

    # The following 2 rules are only needed for the user_webfinger app.
    # Uncomment it if you're planning to use this app.
    #rewrite ^/.well-known/host-meta /public.php?service=host-meta last;
    #rewrite ^/.well-known/host-meta.json /public.php?service=host-meta-json last;

    location = /.well-known/carddav {
        return 301 $scheme://$host/remote.php/dav;
    }
    location = /.well-known/caldav {
        return 301 $scheme://$host/remote.php/dav;
    }

    location /.well-known/acme-challenge { }

    # set max upload size
    client_max_body_size 512M;
    fastcgi_buffers 64 4K;

    # Disable gzip to avoid the removal of the ETag header
    gzip off;

    # Uncomment if your server is build with the ngx_pagespeed module
    # This module is currently not supported.
    #pagespeed off;

    error_page 403 /core/templates/403.php;
    error_page 404 /core/templates/404.php;

    location / {
        rewrite ^ /index.php$uri;
    }

    location ~ ^/(?:build|tests|config|lib|3rdparty|templates|data)/ {
        return 404;
    }
    location ~ ^/(?:\.|autotest|occ|issue|indie|db_|console) {
        return 404;
    }

    location ~ ^/(?:index|remote|public|cron|core/ajax/update|status|ocs/v[12]|updater/.+|ocs-provider/.+|core/templates/40[34])\.php(?:$|/) {
        fastcgi_split_path_info ^(.+\.php)(/.*)$;
        include fastcgi_params;
        fastcgi_param SCRIPT_FILENAME $document_root$fastcgi_script_name;
        fastcgi_param PATH_INFO $fastcgi_path_info;
        fastcgi_param HTTPS on;
        fastcgi_param modHeadersAvailable true; #Avoid sending the security headers twice
        fastcgi_param front_controller_active true;
        fastcgi_pass php-handler;
        fastcgi_intercept_errors on;
        fastcgi_request_buffering off;
    }

    location ~ ^/(?:updater|ocs-provider)(?:$|/) {
        try_files $uri $uri/ =404;
        index index.php;
    }

    # Adding the cache control header for js and css files
    # Make sure it is BELOW the PHP block
    location ~* \.(?:css|js)$ {
        try_files $uri /index.php$uri$is_args$args;
        add_header Cache-Control "public, max-age=7200";
        # Add headers to serve security related headers (It is intended to have those duplicated to the ones above)
        # Before enabling Strict-Transport-Security headers please read into this topic first.
        #add_header Strict-Transport-Security "max-age=15552000; includeSubDomains";
        add_header X-Content-Type-Options nosniff;
        add_header X-Frame-Options "SAMEORIGIN";
        add_header X-XSS-Protection "1; mode=block";
        add_header X-Robots-Tag none;
        add_header X-Download-Options noopen;
        add_header X-Permitted-Cross-Domain-Policies none;
        # Optional: Don't log access to assets
        access_log off;
    }

    location ~* \.(?:svg|gif|png|html|ttf|woff|ico|jpg|jpeg)$ {
        try_files $uri /index.php$uri$is_args$args;
        # Optional: Don't log access to other assets
        access_log off;
    }
}
ファイルを保存してエディタを終了します。
最後に、Nginx構成をテストし、エラーがないことを確認してから、サービスを再起動します。
nginx -t
systemctl restart nginx

このチュートリアルでは、SELinuxを強制モードのままにしておくため、SELinux管理ツールパッケージを構成する必要があります。
このyumコマンドを使用してSELinux管理ツールをインストールします。
yum -y install policycoreutils-python
次に、rootとして以下のコマンドを実行して、ownCloudをSELinuxで実行できるようにします。 ownCloudのインストールに別のディレクトリを使用する場合に備えて、ownCloudディレクトリを変更することを忘れないでください。
semanage fcontext -a -t httpd_sys_rw_content_t '/usr/share/nginx/html/owncloud/data(/.*)?'
semanage fcontext -a -t httpd_sys_rw_content_t '/usr/share/nginx/html/owncloud/config(/.*)?'
semanage fcontext -a -t httpd_sys_rw_content_t '/usr/share/nginx/html/owncloud/apps(/.*)?'
semanage fcontext -a -t httpd_sys_rw_content_t '/usr/share/nginx/html/owncloud/assets(/.*)?'
semanage fcontext -a -t httpd_sys_rw_content_t '/usr/share/nginx/html/owncloud/.htaccess'
semanage fcontext -a -t httpd_sys_rw_content_t '/usr/share/nginx/html/owncloud/.user.ini'

restorecon -Rv '/usr/share/nginx/html/owncloud/'
次に、firewalldサービスを有効にして、owncloudのHTTPポートとHTTPSポートを開きます。
Firewalldを起動し、起動時に起動するように設定します。
systemctl start firewalld
systemctl enable firewalld
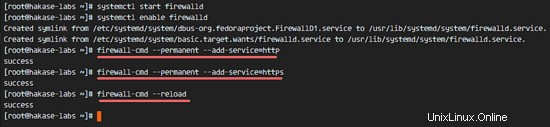
Firewall-cmdコマンドでHTTPポートとHTTPSポートを開き、ファイアウォールをリロードします。
firewall-cmd --permanent --add-service=http
firewall-cmd --permanent --add-service=https
firewall-cmd --reload
サーバー構成部分が終了しました。
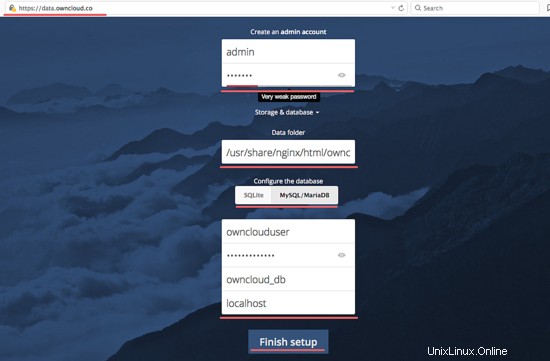
次に、ウェブブラウザを開いて、URLフィールドにownCloudドメイン名を入力します。私の名前はdata.owncloud.coで、安全なHTTPS接続にリダイレクトされます。
新しい管理者のユーザー名とパスワードを入力し、データベースのクレデンシャルを入力して、[セットアップの完了]をクリックします。 '。
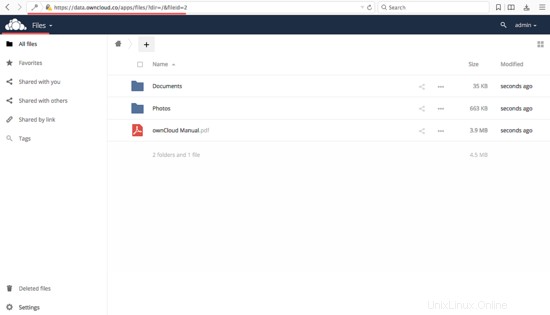
管理ダッシュボードファイルマネージャー。
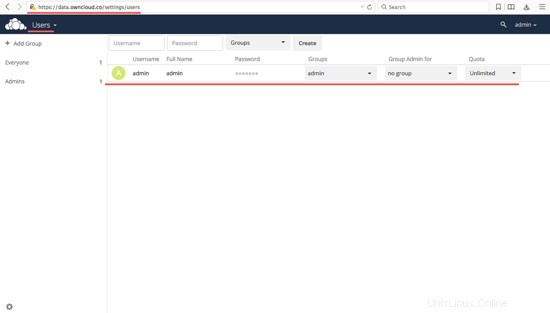
ユーザー設定。
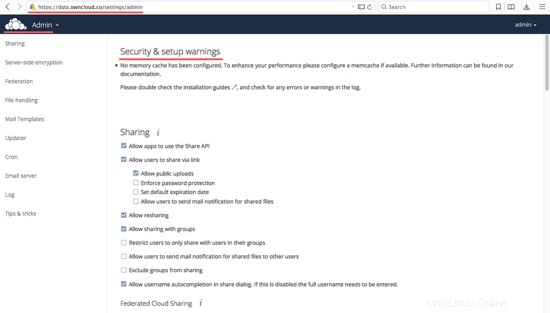
管理者設定。
Owncloudは、CentOS 7サーバーにNginx、PHP7-FPM、MariaDBとともに正常にインストールされました。