このチュートリアルでは、ISPConfig3をインストールするためにUbuntu11.04(Natty Narwhal)サーバーを準備する方法と、ISPConfig3をインストールする方法を示します。ISPConfig3は、Webブラウザーを介して次のサービスを構成できるWebホスティングコントロールパネルです。サーバー、Postfixメールサーバー、MySQL、BINDまたはMyDNSネームサーバー、PureFTPd、SpamAssassin、ClamAV、その他多数。
この設定はISPConfig2では機能しないことに注意してください ! ISPConfig 3でのみ有効です!
これがあなたのために働くという保証はありません!
ISPConfig3マニュアル
ISPConfig 3の使用方法を学ぶために、ISPConfig3マニュアルをダウンロードすることを強くお勧めします。
約300ページで、ISPConfig(管理者、再販業者、クライアント)の背後にある概念をカバーし、ISPConfig 3をインストールおよび更新する方法を説明し、有効な入力の例とともにISPConfigのすべてのフォームとフォームフィールドのリファレンスを含み、 ISPConfig 3で最も一般的なタスクです。また、サーバーをより安全にする方法を示し、最後にトラブルシューティングのセクションがあります。
Android用ISPConfigモニターアプリ
ISPConfig Monitor Appを使用すると、サーバーのステータスを確認し、すべてのサービスが期待どおりに実行されているかどうかを確認できます。 TCPおよびUDPポートを確認し、サーバーにpingを実行できます。さらに、このアプリを使用して、ISPConfigがインストールされているサーバーに詳細を要求できます(ISPConfigモニターアプリをサポートするインストール済みのISPConfig3の最小バージョンは3.0.3.3です! );これらの詳細には、ISPConfigコントロールパネルのモニターモジュールから知っているすべてのもの(サービス、メールとシステムのログ、メールキュー、CPUとメモリの情報、ディスク使用量、クォータ、OSの詳細、RKHunterログなど)が含まれます。 、ISPConfigはマルチサーバー対応であるため、ISPConfigマスターサーバーから制御されているすべてのサーバーを確認できます。
ダウンロードと使用方法については、http://www.ispconfig.org/ispconfig-3/ispconfig-monitor-app-for-android/にアクセスしてください。
1要件
このようなシステムをインストールするには、次のものが必要です。
- Ubuntu 11.04サーバーCD、ここで入手可能:http://releases.ubuntu.com/releases/11.04/ubuntu-11.04-server-i386.iso(i386)またはhttp://releases.ubuntu.com/releases /11.04/ubuntu-11.04-server-amd64.iso(x86_64)
- 高速インターネット接続。
2予備メモ
このチュートリアルでは、ホスト名server1.example.comとIPアドレス192.168.0.100およびゲートウェイ192.168.0.1を使用します。これらの設定はユーザーによって異なる場合があるため、必要に応じて置き換える必要があります。
3ベースシステム
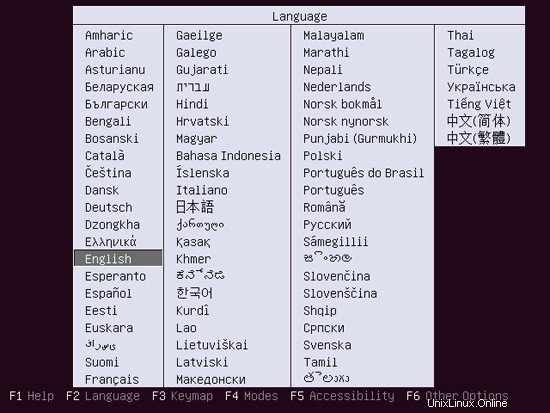
UbuntuインストールCDをシステムに挿入し、そこから起動します。言語を選択してください:
次に、[Ubuntuサーバーのインストール]を選択します:

言語をもう一度選択してください(?):
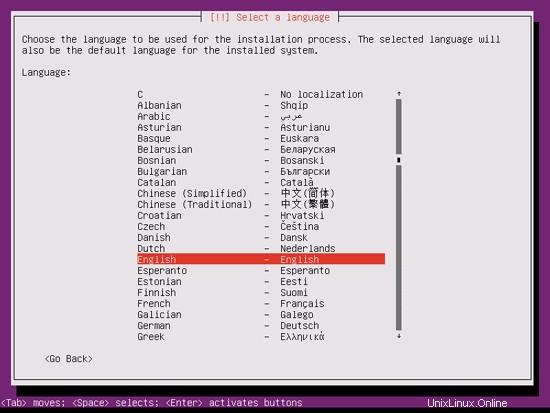
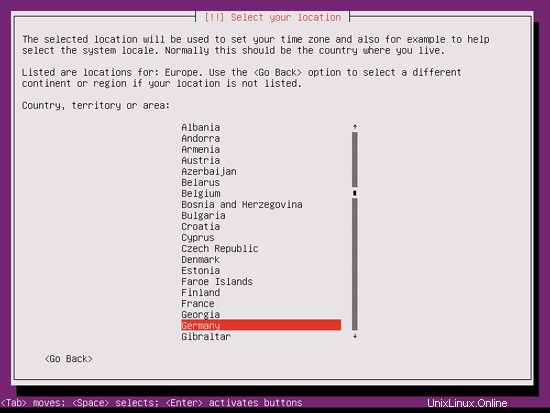
次に、場所を選択します:
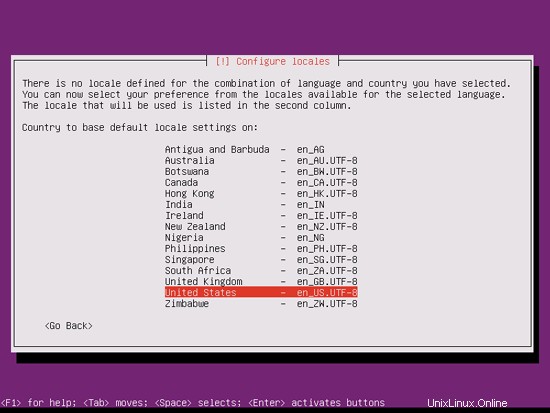
言語と場所の珍しい組み合わせ(私の場合のように、言語として英語、場所としてドイツなど)を選択した場合、インストーラーは、この組み合わせにロケールが定義されていないことを通知する場合があります。この場合、ロケールを手動で選択する必要があります。ここでen_US.UTF-8を選択します:
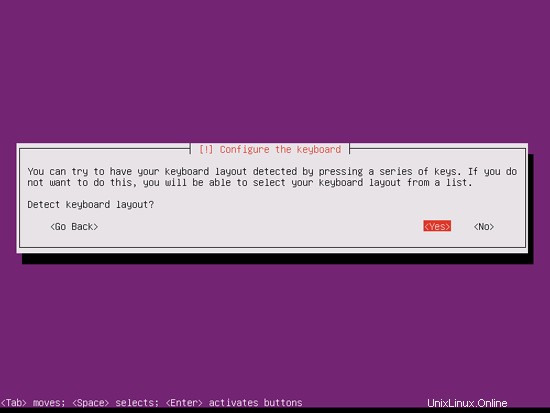
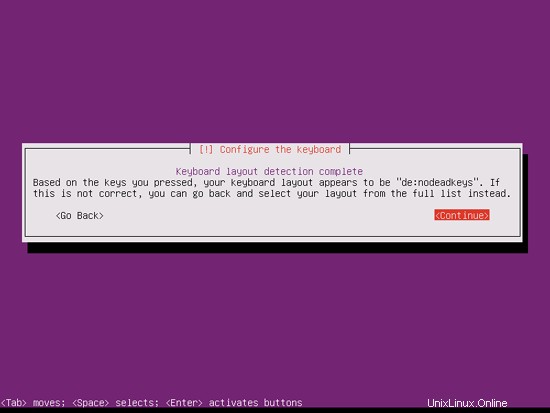
キーボードレイアウトを選択します(いくつかのキーを押すように求められ、インストーラーは押したキーに基づいてキーボードレイアウトを検出しようとします):
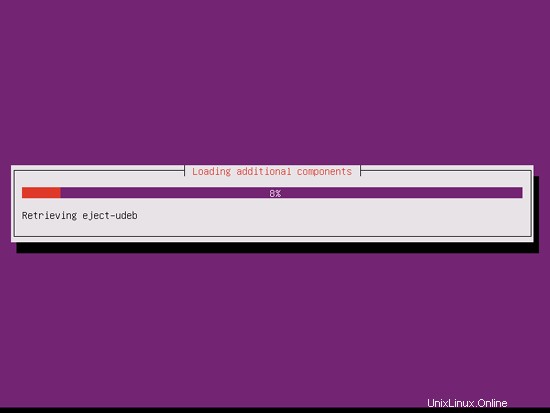
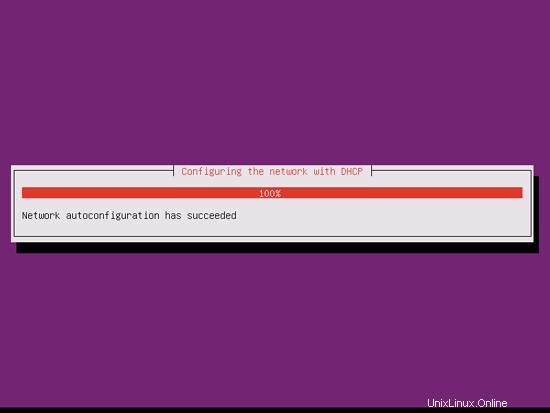
インストーラーはインストールCDとハードウェアをチェックし、ネットワークにDHCPサーバーがある場合はDHCPを使用してネットワークを構成します。
完璧なサーバー-Ubuntu11.04[ISPConfig3]-ページ2
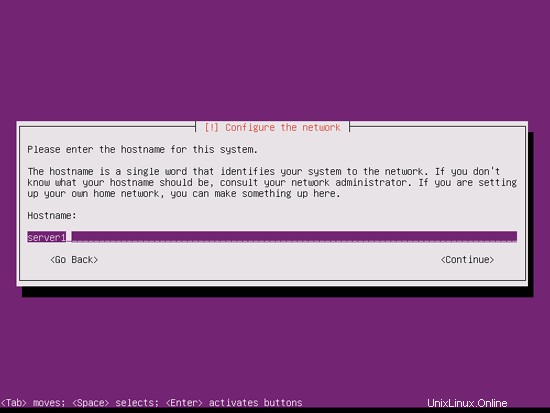
ホスト名を入力します。この例では、私のシステムの名前は server1.example.com です。 、だから私は server1と入力します :
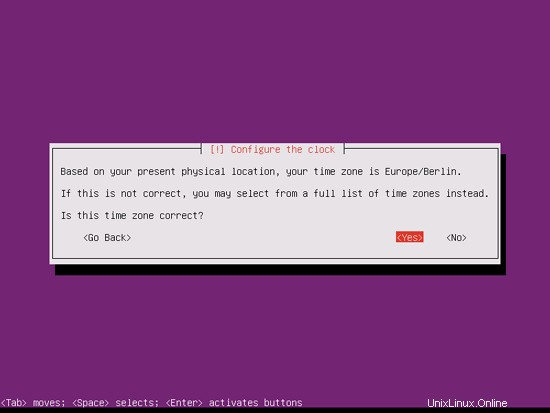
インストーラーがタイムゾーンを正しく検出したかどうかを確認してください。その場合は[はい]を選択し、そうでない場合は[いいえ]を選択します:
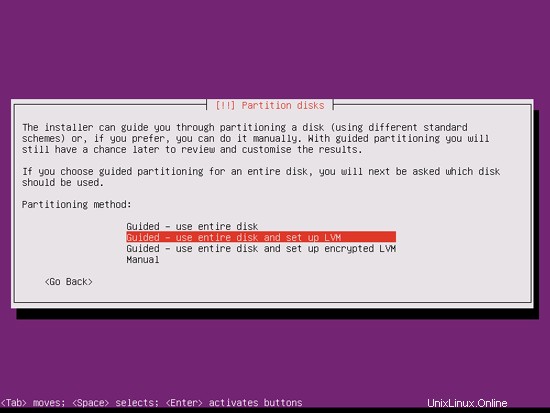
次に、ハードディスクをパーティション分割する必要があります。簡単にするために、ガイド付きを選択します-ディスク全体を使用してLVMをセットアップします-これにより、2つの論理ボリュームを持つ1つのボリュームグループが作成されます.1つは/ファイルシステム用、もう1つはスワップ用です(もちろん、パーティショニングは完全にあなた次第です-もし何をしているのかがわかっているので、パーティションを手動で設定することもできます。
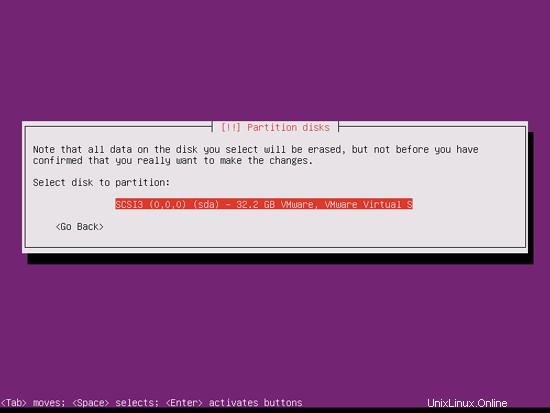
パーティションを作成するディスクを選択します:
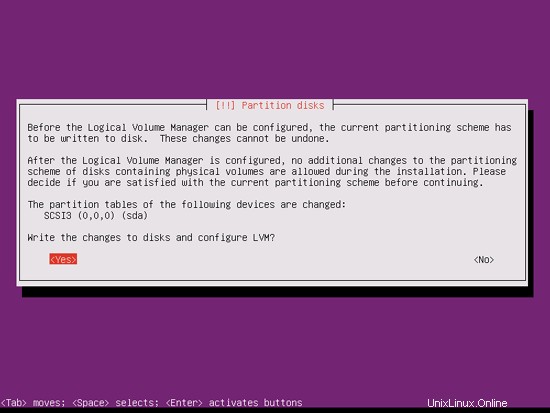
「ディスクに変更を書き込んでLVMを構成しますか?」というメッセージが表示されたら、「はい」を選択します:
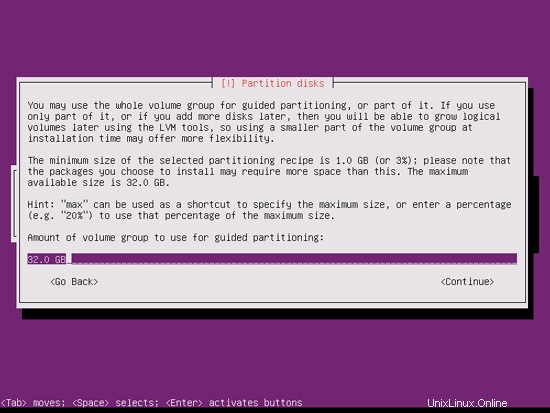
[ガイド付き]を選択した場合-ディスク全体を使用してLVMをセットアップすると、パーティショナーはすべてのディスクスペースを使用する1つの大きなボリュームグループを作成します。これで、/およびスワップの論理ボリュームがそのディスクスペースのどれだけを使用するかを指定できます。後で既存の論理ボリュームを拡張したり、新しい論理ボリュームを作成したりできるように、スペースを未使用のままにしておくことは理にかなっています。これにより、柔軟性が向上します。
終了したら、[ディスクに変更を書き込みますか?:
]というメッセージが表示されたら、[はい]をクリックします。
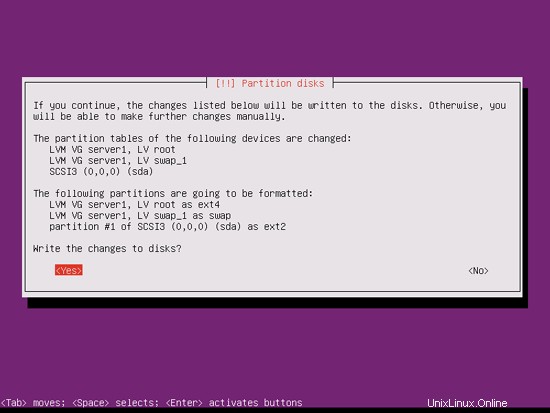
その後、新しいパーティションが作成され、フォーマットされます:
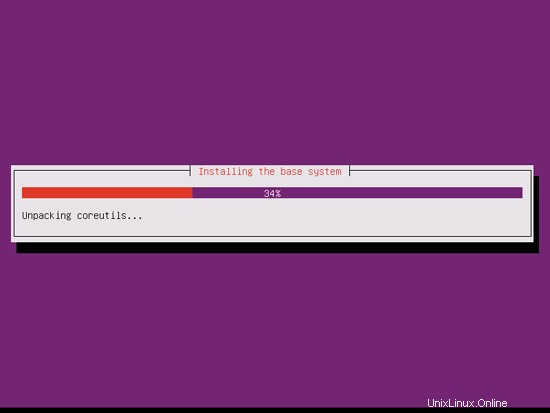
これでベースシステムがインストールされました:
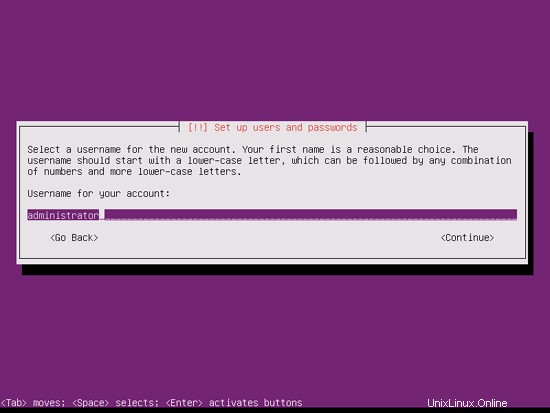
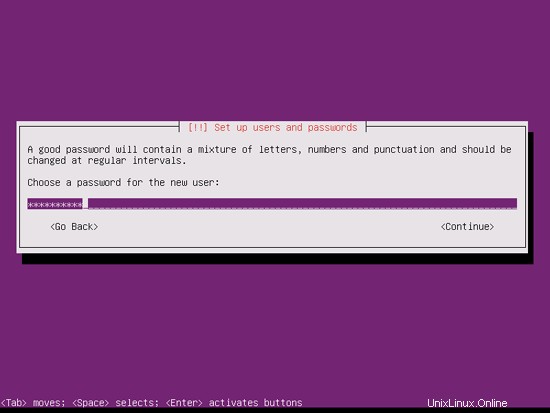
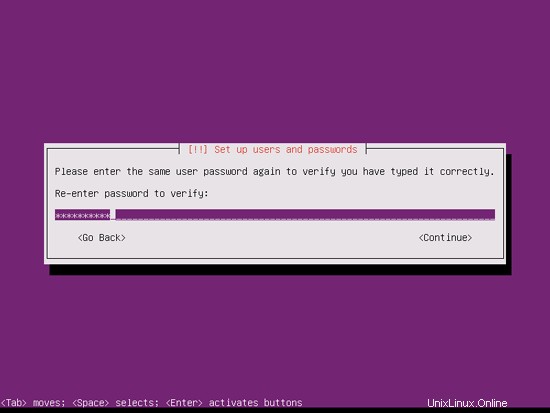
ユーザーを作成します。たとえば、ユーザー名administratorを使用してユーザーAdministratorを作成します(Ubuntu 11.04では予約名であるため、ユーザー名adminは使用しないでください):
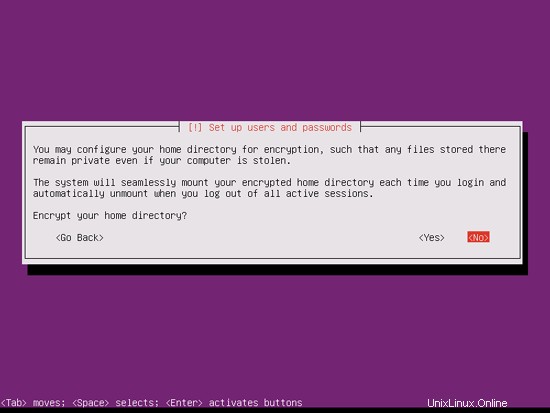
暗号化されたプライベートディレクトリは必要ないので、ここでは[いいえ]を選択します:
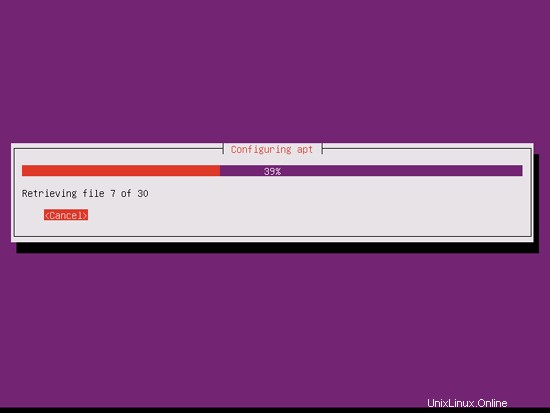
次に、パッケージマネージャーaptが構成されます。プロキシサーバーを使用してインターネットに接続している場合を除き、HTTPプロキシ行は空のままにします。

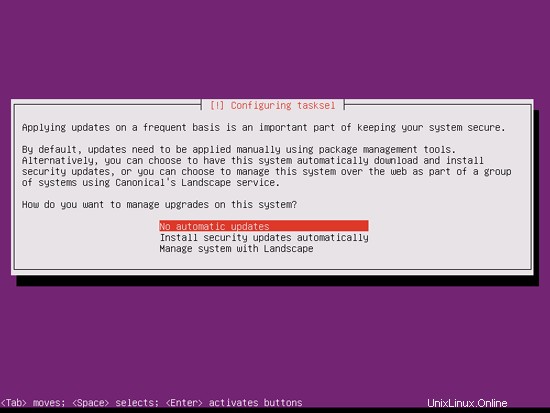
私は少し古風で、サーバーを手動で更新してより詳細に制御するのが好きなので、[自動更新なし]を選択します。もちろん、ここで何を選択するかはあなた次第です:
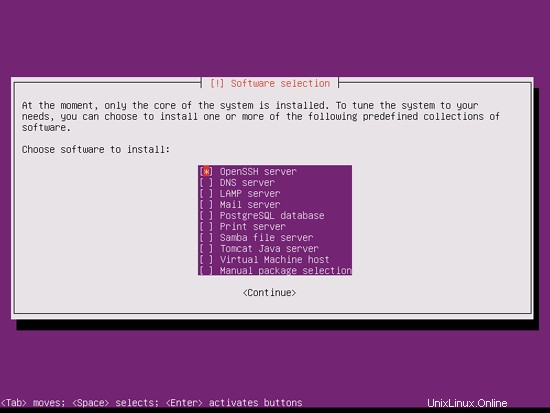
DNS、メール、LAMPサーバーが必要ですが、システムにインストールするものを完全に制御したいので、今はそれらを選択しません。必要なパッケージは後で手動でインストールします。ここで選択するのはOpenSSHサーバーだけなので、インストールが完了したらすぐにPuTTYなどのSSHクライアントを使用してシステムに接続できます。
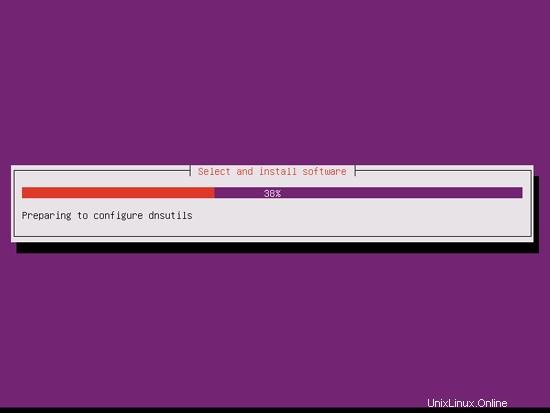
インストールは続行されます:
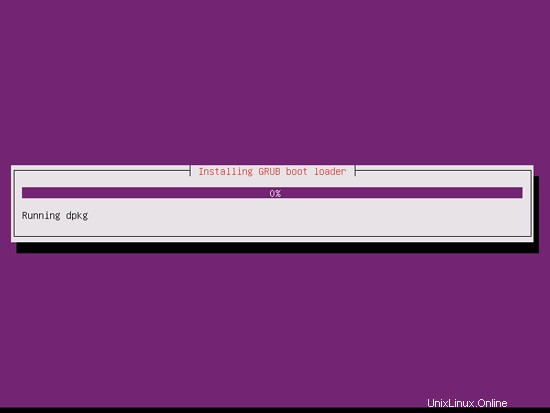
GRUBブートローダーがインストールされます:
GRUBブートローダーをマスターブートレコードにインストールしますか?:
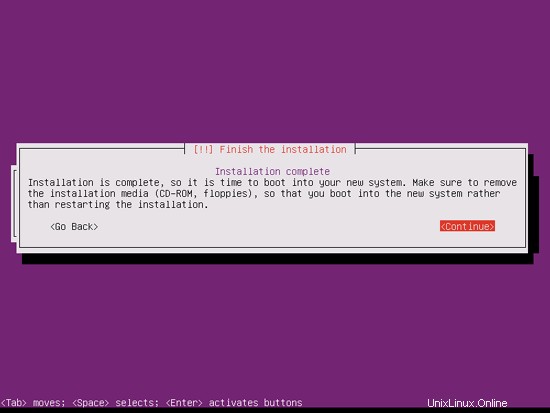
これで基本システムのインストールは完了です。インストールCDをCDドライブから取り出し、[続行]をクリックしてシステムを再起動します。
次のステップに進みます...
完璧なサーバー-Ubuntu11.04[ISPConfig3]-ページ3
4ルート権限を取得する
再起動後、以前に作成したユーザー名(管理者など)でログインできます。このチュートリアルのすべてのステップをroot権限で実行する必要があるため、このチュートリアルのすべてのコマンドの前に文字列sudoを付けるか、「
」と入力して今すぐrootになります。sudo su
(実行してルートログインを有効にすることもできます
sudo passwd root
ルートにパスワードを与えます。その後、rootとして直接ログインできますが、これはさまざまな理由でUbuntu開発者やコミュニティに嫌われています。 http://ubuntuforums.org/showthread.php?t=765414を参照してください。)
5 SSHサーバーのインストール(オプション)
システムのインストール中にOpenSSHサーバーをインストールしなかった場合は、今すぐインストールできます。
apt-get install ssh openssh-server
今後は、PuTTYなどのSSHクライアントを使用して、ワークステーションからUbuntu 11.04サーバーに接続し、このチュートリアルの残りの手順に従うことができます。
6 vim-noxをインストールします(オプション)
このチュートリアルでは、テキストエディタとしてviを使用します。デフォルトのviプログラムは、UbuntuとDebianで奇妙な動作をします。これを修正するには、vim-noxをインストールします:
apt-get install vim-nox
(joeやnanoなどの別のテキストエディタを使用する場合は、これを行う必要はありません。)
7ネットワークの構成
UbuntuインストーラーはDHCP経由でネットワーク設定を取得するようにシステムを構成しているため、サーバーには静的IPアドレスが必要であるため、ここで変更する必要があります。 / etc / network / interfacesを編集します 必要に応じて調整します(このセットアップ例では、IPアドレス 192.168.0.100を使用します ):
vi / etc / network / interfaces
#このファイルには、システムで使用可能なネットワークインターフェイス#とそれらをアクティブ化する方法が記載されています。詳細については、interfaces(5)を参照してください。#ループバックネットワークinterfaceauto loiface lo inet loopback#プライマリネットワークinterfaceauto eth0ifaceeth0inet静的アドレス192.168.0.100ネットマスク255.255.255.0ネットワーク192.168.0.0ブロードキャスト192.168.0.255ゲートウェイ192.168.0.1 |
次に、ネットワークを再起動します:
/etc/init.d/networking restart
次に、/ etc/hostsを編集します。次のようにします:
vi / etc / hosts
127.0.0.1 localhost.localdomain localhost192.168.0.100 server1.example.com server1#IPv6対応ホストには次の行が望ましいです。:1ip6 -localhost ip6-loopbackfe00 ::0 ip6-localnetff00 ::0 ip6-mcastprefixff02 ::1 ip6-allnodesff02 ::2 ip6-allrouters |
今すぐ実行
 echo server1.example.com> / etc / hostname
 /etc/init.d/hostname restart
その後、実行します
 hostname
 hostname -f
両方ともserver1.example.comが表示されるはずです。
8/etc/apt/sources.listを編集してLinuxインストールを更新する
/etc/apt/sources.listを編集します。コメントアウトするか、ファイルからインストールCDを削除し、ユニバースおよびマルチバースリポジトリが有効になっていることを確認します。次のようになります:
vi /etc/apt/sources.list
## deb cdrom:[Ubuntu-Server 11.04 _Natty Narwhal_-リリースamd64(20110426)] / natty mainstricted#deb cdrom:[Ubuntu-Server 11.04 _Natty Narwhal_-リリースamd64(20110426)] / natty mainstricted#distribution.deb http://de.archiveの新しいバージョンにアップグレードする方法についてはhttp://help.ubuntu.com/community/UpgradeNotesを参照してください。 ubuntu.com/ubuntu/ natty mainstricteddeb-src http://de.archive.ubuntu.com/ubuntu/ natty mainstricted##主要なバグ修正アップデートは##distribution.debの最終リリース後に作成されましたhttp:// de.archive.ubuntu.com/ubuntu/ natty-updates mainstricteddeb-src http://de.archive.ubuntu.com/ubuntu/ natty-updates mainstricted ## N.B.このリポジトリのソフトウェアは、Ubuntu##チームによって完全にサポートされていません。また、ユニバースのソフトウェアは、Ubuntuセキュリティチームから##レビューやアップデートを受け取らないことに注意してください。debhttp://de.archive.ubuntu.com/ubuntu/ natty universedeb-src http://de.archive。 ubuntu.com/ubuntu/ natty universedeb http://de.archive.ubuntu.com/ubuntu/ natty-updates universedeb-src http://de.archive.ubuntu.com/ubuntu/ natty-updates universe ## N.B.このリポジトリのソフトウェアは、Ubuntu ##チームによって完全にサポートされておらず、無料のライセンスが適用されていない可能性があります。 ##ソフトウェアを使用する権利についてご満足ください。また、## multiverseのソフトウェアは、Ubuntu##セキュリティチームからレビューやアップデートを受け取らないことに注意してください。debhttp://de.archive.ubuntu.com/ubuntu/ natty multiversedeb-src http://de。 archive.ubuntu.com/ubuntu/ natty multiversedeb http://de.archive.ubuntu.com/ubuntu/ natty-updates multiversedeb-src http://de.archive.ubuntu.com/ubuntu/ natty-updates multiverse ##次の2行のコメントを解除して、「バックポート」##リポジトリからソフトウェアを追加します。## N.B.このリポジトリのソフトウェアは、メインリリースに含まれているものほど広範囲にテストされていない可能性がありますが、##便利な機能を提供する可能性のある一部のアプリケーションの新しいバージョンが含まれています。##また、バックポートのソフトウェアは受信しないことに注意してくださいレビュー##またはUbuntuセキュリティチームからの更新。 / ubuntu/natty-バックポートメイン制限付きユニバースmultiversedebhttp://security.ubuntu.com/ubuntunatty-securityメインrestricteddeb-srchttp://security.ubuntu.com/ubuntunatty-securityメインrestricteddebhttp://security。 ubuntu.com/ubuntu natty-security universedeb-src http://security.ubuntu.com/ubuntu natty-security universedeb http://security.ubuntu.com/ubuntu natty-security multiversedeb-src http://security.ubuntu .com / ubuntu natty-security multiverse ##次の2行のコメントを解除して、Canonicalの##'パートナー'リポジトリからソフトウェアを追加しますory。##このソフトウェアはUbuntuの一部ではありませんが、Canonicalと##それぞれのベンダーによってUbuntuユーザーへのサービスとして提供されています。#deb http://archive.canonical.com/ubuntu natty Partner#deb-src http ://archive.canonical.com/ubuntu nattypartner ##次の2行のコメントを解除して、Ubuntuの##'extras'リポジトリからソフトウェアを追加します。##このソフトウェアはUbuntuの一部ではありませんが、サードパーティによって提供されています##最新のソフトウェアを出荷したい開発者。#deb http://extras.ubuntu.com/ubuntu natty main#deb-src http://extras.ubuntu.com/ubuntu natty main |
次に実行します
apt-get update
aptパッケージデータベースを更新するには
apt-get upgrade
最新のアップデートをインストールします(ある場合)。更新の一部として新しいカーネルがインストールされていることがわかった場合は、後でシステムを再起動する必要があります。
再起動
9デフォルトのシェルを変更する
/ bin/shは/bin/ dashへのシンボリックリンクですが、/ bin/dashではなく/bin/bashが必要です。したがって、これを行います:
dpkg-reconfigure dash
デフォルトのシステムシェル(/ bin / sh)としてダッシュを使用しますか? <-いいえ
これを行わないと、ISPConfigのインストールが失敗します。
10AppArmorを無効にする
AppArmorは、拡張セキュリティを提供するセキュリティ拡張機能(SELinuxと同様)です。私の意見では、安全なシステムを構成するためにそれを必要とせず、通常、利点よりも多くの問題を引き起こします(一部のサービスが期待どおりに機能しなかったため、1週間のトラブルシューティングを行った後、それを考えてください。すべてが問題ないことを確認してください。AppArmorだけが問題を引き起こしていました)。したがって、無効にします(後でISPConfigをインストールする場合は必須です)。
次のように無効にできます:
 /etc/init.d/apparmor stop
 update-rc.d -f apparmor remove
 apt-get remove apparmor apparmor-utils
11システム時計を同期する
システムクロックをNTPと同期することをお勧めします( n etwork t ime p rotocol)インターネット上のサーバー。実行するだけです
apt-get install ntp ntpdate
システム時刻は常に同期されます。
完璧なサーバー-Ubuntu11.04[ISPConfig3]-4ページ
12 Postfix、Courier、Saslauthd、MySQL、rkhunter、binutilsをインストールします
Postfix、Courier、Saslauthd、MySQL、rkhunter、binutilsを1つのコマンドでインストールできます:
apt-get install postfix postfix-mysql postfix-doc mysql-client mysql-server courier-authdaemon courier-authlib-mysql courier-pop courier-pop-ssl courier-imap courier-imap-ssl libsasl2-2 libsasl2-modules libsasl2-modules-sql sasl2-bin libpam-mysql openssl getmail4 rkhunter binutils maildrop
次の質問があります:
MySQL「root」ユーザーの新しいパスワード:<-yourrootsqlpassword
MySQL「root」ユーザーの繰り返しパスワード:<-yourrootsqlpassword
メール構成の一般的なタイプ:<-インターネットサイト
システムメール名:<-server1.example.com
Webベースの管理用のディレクトリを作成しますか? <-いいえ
SSL証明書は必要ありません<-OK
MySQLがローカルホストだけでなくすべてのインターフェースでリッスンするようにしたいので、/ etc / mysql / my.cnfを編集して、bind-address =127.0.0.1:
の行をコメントアウトします。vi /etc/mysql/my.cnf
[...]#スキップネットワークの代わりに、デフォルトでは、互換性が高く安全性が低くないローカルホストでのみリッスンするようになりました。 #bind-address =127.0.0.1 [...] |
次に、MySQLを再起動します:
/etc/init.d/mysql restart
次に、ネットワーキングが有効になっていることを確認します。実行
netstat -tap | grep mysql
出力は次のようになります。
[email protected]:〜#netstat -tap | grep mysql
tcp 0 0 *:mysql *:* LISTEN 9990 / mysqld
[email protected]:〜インストール中に、IMAP-SSLおよびPOP3-SSLのSSL証明書がホスト名localhostで作成されます。これを正しいホスト名(このチュートリアルではserver1.example.com)に変更するには、証明書を削除します...
cd /etc/courier
rm -f /etc/courier/imapd.pem
rm -f /etc/courier/pop3d.pem...そして次の2つのファイルを変更します。 CN=localhostをCN=server1.example.comに置き換えます(必要に応じて他の値を変更することもできます):
vi /etc/courier/imapd.cnf
[...] CN =server1.example.com [...] |
vi /etc/courier/pop3d.cnf
[...] CN =server1.example.com [...] |
次に、証明書を再作成します...
 mkimapdcert
 mkpop3dcert
...そしてCourier-IMAP-SSLとCourier-POP3-SSLを再起動します:
 /etc/init.d/courier-imap-ssl restart
 /etc/init.d/courier-pop-ssl restart
13 Amavisd-new、SpamAssassin、およびClamavをインストールします
amavisd-new、SpamAssassin、およびClamAVをインストールするには、
を実行します。apt-get install amavisd-new spamassassin clamav clamav-daemon zoo unzip bzip2 arj nomarch lzop cabextract apt-listchanges libnet-ldap-perllibauthen-sasl-perlclamav-docsデーモンlibio-string-perllibio-socket-ssl- perl libnet-ident-perl zip libnet-dns-perl
ISPConfig 3のセットアップでは、SpamAssassinフィルターライブラリを内部的にロードするamavisdを使用するため、SpamAssassinを停止してRAMを解放できます。
 /etc/init.d/spamassassin stop
 update-rc.d -f spamassassin remove
14 Apache2、PHP5、phpMyAdmin、FCGI、suExec、Pear、およびmcryptをインストールします
Apache2、PHP5、phpMyAdmin、FCGI、suExec、Pear、およびmcryptは、次のようにインストールできます。
apt-get install apache2 apache2.2-common apache2-doc apache2-mpm-prefork apache2-utils libexpat1 ssl-cert libapache2-mod-php5 php5 php5-common php5-gd php5-mysql php5-imap phpmyadmin php5-cli php5-cgi libapache2-mod-fcgid apache2-suexec php-pear php-auth php5-mcrypt mcrypt php5-imagick imagemagick libapache2-mod-suphp libruby libapache2-mod-ruby
次の質問が表示されます:
自動的に再構成するWebサーバー:<-apache2
dbconfig-commonを使用してphpmyadminのデータベースを構成しますか? <-いいえ
次に、次のコマンドを実行して、Apacheモジュールのsuexec、rewrite、ssl、actions、およびinclude(さらに、WebDAVを使用する場合はdav、dav_fs、およびauth_digest)を有効にします。
a2enmod suexecrewritesslアクションには次のものが含まれます
a2enmod dav_fs dav auth_digest
その後、Apacheを再起動します:
/etc/init.d/apache2再起動
ISPConfigを介して作成されたWebサイトで拡張子.rbのRubyファイルをホストする場合は、/ etc/mime.typesのapplication/x-rubyrb行をコメントアウトする必要があります。
vi /etc/mime.types
[...]#application / x-ruby rb [...] |
(これは.rbファイルにのみ必要です。拡張子が.rbxのRubyファイルはそのまま使用できます。)
その後、Apacheを再起動します:
/etc/init.d/apache2再起動
15PureFTPdとクォータのインストール
PureFTPdとquotaは、次のコマンドでインストールできます:
apt-get install pure-ftpd-common pure-ftpd-mysqlquotaquotatool
ファイル/etc/ default / pure-ftpd-common ...
を編集しますvi / etc / default / pure-ftpd-common
...そして、開始モードがスタンドアロンに設定されていることを確認し、VIRTUALCHROOT =trueを設定します:
[...] STANDALONE_OR_INETD =Standalone [...] VIRTUALCHROOT =true [...] |
次に、FTPおよびTLSセッションを許可するようにPureFTPdを構成します。 FTPは、すべてのパスワードとすべてのデータがクリアテキストで転送されるため、非常に安全でないプロトコルです。 TLSを使用することで、通信全体を暗号化できるため、FTPの安全性が大幅に向上します。
FTPおよびTLSセッションを許可する場合は、
を実行します。echo 1> / etc / pure-ftpd / conf / TLS
TLSを使用するには、SSL証明書を作成する必要があります。 / etc / ssl / private /に作成するので、最初にそのディレクトリを作成します:
mkdir -p / etc / ssl / private /
その後、次のようにSSL証明書を生成できます。
openssl req -x509 -nodes -days 7300 -newkey rsa:2048 -keyout /etc/ssl/private/pure-ftpd.pem -out /etc/ssl/private/pure-ftpd.pem
国名(2文字のコード)[AU]:<-国名を入力します(例:「DE」)。
州名または州名(フルネーム)[一部の州]:<-州を入力しますまたは州名。
地域名(例:市)[]:<-市区町村を入力してください。
組織名(例:会社)[Internet Widgits Pty Ltd]:<-組織名を入力してください(例:会社名)
組織単位名(例:セクション)[]:<-組織単位名(例:「IT部門」)を入力します。
一般名(例:あなたの名前)[]:<-システムの完全修飾ドメイン名を入力します(例: "server1.example.com")。
メールアドレス[]:<-メールアドレスを入力します。
SSL証明書の権限を変更します:
chmod 600 /etc/ssl/private/pure-ftpd.pem
次に、PureFTPdを再起動します:
/etc/init.d/pure-ftpd-mysql restart
/ etc/fstabを編集します。私の場合は次のようになります(マウントポイントのあるパーティションに、usrjquota =quote.user、grpjquota =quote.group、jqfmt =vfsv0を追加しました/):
vi / etc / fstab
#/ etc / fstab:静的ファイルシステム情報。##'blkid -o value -s UUID'を使用して、ユニバーサル一意識別子#を出力します。デバイス;これは、ディスクが追加および削除された場合でも機能するデバイスに名前を付けるためのより堅牢な方法として、UUID=とともに使用できます。 fstab(5)を参照してください。##<ファイルシステム><マウントポイント><タイプ><オプション><ダンプ><パス>proc / proc proc nodev、noexec、nosuid 0 0 / dev / mapper / server1-root/ext4エラー=remount-ro、usrjquota =quote.user、grpjquota =quote.group、jqfmt =vfsv0 0 1#/bootはインストール中に/dev/sda1にありましたUUID=deae7cd1-b106-47aa-9a7c-512f046d2ebf /bootext2デフォルト02/ dev / mapper / server1-swap_1 none swap sw 0 0 / dev / fd0 / media / floppy0 auto rw、user、noauto、exec、utf8 0 0 |
クォータを有効にするには、次のコマンドを実行します。
mount -o remount /
 quotecheck -avugm
quotaon-avug
16BINDDNSサーバーのインストール
BINDは次のようにインストールできます:
apt-get install bind9 dnsutils
17 Vlogger、Webalizer、およびAWstatsをインストールします
Vlogger、webalizer、AWstatsは次のようにインストールできます:
apt-get install vlogger webalizer awstats geoip-database
その後、/ etc / cron.d/awstatsを開きます...
vi /etc/cron.d/awstats
...そしてそのファイル内の両方のcronジョブをコメントアウトします:
#* / 10 * * * * www-data [-x /usr/share/awstats/tools/update.sh] &&/ usr / share / awstats / tools / update.sh#静的レポートを生成します:#10 03 * * * www-data [-x /usr/share/awstats/tools/buildstatic.sh] &&/usr/share/awstats/tools/buildstatic .sh |
18Jailkitをインストールする
Jailkitは、SSHユーザーをchrootする場合にのみ必要です。次のようにインストールできます(重要:JailkitはISPConfigの前にインストールする必要があります-後でインストールすることはできません!):
apt-get install build-essential autoconf automake1.9 libtool flex bison debhelper
 cd / tmp
 wget http://olivier.sessink.nl/jailkit/jailkit-2.14.tar.gz
 tar xvfz jailkit-2.14.tar.gz
 cd jailkit- 2.14
 ./debian/rules binary
 cd ..
 dpkg -i jailkit_2.14-1_*。deb
 rm -rf jailkit-2.14 *
完璧なサーバー-Ubuntu11.04[ISPConfig3]-5ページ
19fail2banをインストール
これはオプションですが、ISPConfigモニターがfail2banログを表示しようとするため推奨されます:
apt-get install fail2ban
fail2banでPureFTPd、SASL、およびCourierを監視するには、ファイル/etc/fail2ban/jail.local:
を作成します。vi /etc/fail2ban/jail.local
[pureftpd] enabled =trueport =ftpfilter =pureftpdlogpath =/ var / log / syslogmaxretry =3 [sasl] enabled =trueport =smtpfilter =sasllogpath =/ var / log / mail.logmaxretry =5 [courierpop3] enabled =trueport =pop3filter =courierpop3logpath =/var/log/mail.logmaxretry =5 [courierpop3s] enabled =trueport =pop3sfilter =courierpop3slogpath =/var/log/mail.logmaxretry =5 [courierimap] enabled =trueport =imap2filter =courierimaplogpath =/var/log/mail.logmaxretry =5 [courierimaps] enabled =trueport =imapsfilter =courierimapslogpath =/var/log/mail.logmaxretry =5 |
次に、次の5つのフィルターファイルを作成します。
vi /etc/fail2ban/filter.d/pureftpd.conf
[Definition] failregex=。*pure-ftpd:\(。* @ |
vi /etc/fail2ban/filter.d/courierpop3.conf
#Fail2Ban構成ファイル## $ Revision:100 $#[Definition]#オプション:failregex#注:次のパスワード失敗メッセージに一致する正規表現ログファイル。 #ホストは、「host」という名前のグループと一致する必要があります。タグ「 |
vi /etc/fail2ban/filter.d/courierpop3s.conf
#Fail2Ban構成ファイル## $ Revision:100 $#[Definition]#オプション:failregex#注:次のパスワード失敗メッセージに一致する正規表現ログファイル。 #ホストは、「host」という名前のグループと一致する必要があります。タグ「 |
vi /etc/fail2ban/filter.d/courierimap.conf
#Fail2Ban構成ファイル## $ Revision:100 $#[Definition]#オプション:failregex#注:次のパスワード失敗メッセージに一致する正規表現ログファイル。 #ホストは、「host」という名前のグループと一致する必要があります。タグ「 |
vi /etc/fail2ban/filter.d/courierimaps.conf
#Fail2Ban構成ファイル## $ Revision:100 $#[Definition]#オプション:failregex#注:次のパスワード失敗メッセージに一致する正規表現ログファイル。 #ホストは、「host」という名前のグループと一致する必要があります。タグ「 |
その後、fail2banを再起動します:
/etc/init.d/fail2ban再起動
20SquirrelMailをインストール
SquirrelMailウェブメールクライアントをインストールするには、
を実行しますapt-get install squirrelmail
Then create the following symlink...
ln -s /usr/share/squirrelmail/ /var/www/webmail
... and configure SquirrelMail:
squirrelmail-configure
We must tell SquirrelMail that we are using Courier-IMAP/-POP3:
SquirrelMail Configuration : Read: config.php (1.4.0)
---------------------------------------------------------
Main Menu --
1. Organization Preferences
2. Server Settings
3. Folder Defaults
4. General Options
5. Themes
6. Address Books
7. Message of the Day (MOTD)
8. Plugins
9. Database
10. Languages
D. Set pre-defined settings for specific IMAP servers
C Turn color on
S Save data
Q Quit
Command >> <-- D
SquirrelMail Configuration : Read: config.php
---------------------------------------------------------
While we have been building SquirrelMail, we have discovered some
preferences that work better with some servers that don't work so
well with others. If you select your IMAP server, this option will
set some pre-defined settings for that server.
Please note that you will still need to go through and make sure
everything is correct. This does not change everything. There are
only a few settings that this will change.
Please select your IMAP server:
bincimap = Binc IMAP server
courier = Courier IMAP server
cyrus = Cyrus IMAP server
dovecot = Dovecot Secure IMAP server
exchange = Microsoft Exchange IMAP server
hmailserver = hMailServer
macosx = Mac OS X Mailserver
mercury32 = Mercury/32
uw = University of Washington's IMAP server
gmail = IMAP access to Google mail (Gmail) accounts
quit = Do not change anything
Command >> <-- courier
SquirrelMail Configuration : Read: config.php
---------------------------------------------------------
While we have been building SquirrelMail, we have discovered some
preferences that work better with some servers that don't work so
well with others. If you select your IMAP server, this option will
set some pre-defined settings for that server.
Please note that you will still need to go through and make sure
everything is correct. This does not change everything. There are
only a few settings that this will change.
Please select your IMAP server:
bincimap = Binc IMAP server
courier = Courier IMAP server
cyrus = Cyrus IMAP server
dovecot = Dovecot Secure IMAP server
exchange = Microsoft Exchange IMAP server
hmailserver = hMailServer
macosx = Mac OS X Mailserver
mercury32 = Mercury/32
uw = University of Washington's IMAP server
quit = Do not change anything
Command >> courier
imap_server_type = courier
default_folder_prefix = INBOX.
trash_folder = Trash
sent_folder = Sent
draft_folder = Drafts
show_prefix_option = false
default_sub_of_inbox = false
show_contain_subfolders_option = false
optional_delimiter = .
delete_folder = true
Press any key to continue... <-- ENTER
SquirrelMail Configuration : Read: config.php (1.4.0)
---------------------------------------------------------
Main Menu --
1. Organization Preferences
2. Server Settings
3. Folder Defaults
4. General Options
5. Themes
6. Address Books
7. Message of the Day (MOTD)
8. Plugins
9. Database
10. Languages
D. Set pre-defined settings for specific IMAP servers
C Turn color on
S Save data
Q Quit
Command >> <-- S
SquirrelMail Configuration : Read: config.php (1.4.0)
---------------------------------------------------------
Main Menu --
1. Organization Preferences
2. Server Settings
3. Folder Defaults
4. General Options
5. Themes
6. Address Books
7. Message of the Day (MOTD)
8. Plugins
9. Database
10. Languages
D. Set pre-defined settings for specific IMAP servers
C Turn color on
S Save data
Q Quit
Command >> S
Data saved in config.php
Press enter to continue... <-- ENTER
SquirrelMail Configuration : Read: config.php (1.4.0)
---------------------------------------------------------
Main Menu --
1. Organization Preferences
2. Server Settings
3. Folder Defaults
4. General Options
5. Themes
6. Address Books
7. Message of the Day (MOTD)
8. Plugins
9. Database
10. Languages
D. Set pre-defined settings for specific IMAP servers
C Turn color on
S Save data
Q Quit
Command >> <-- Q
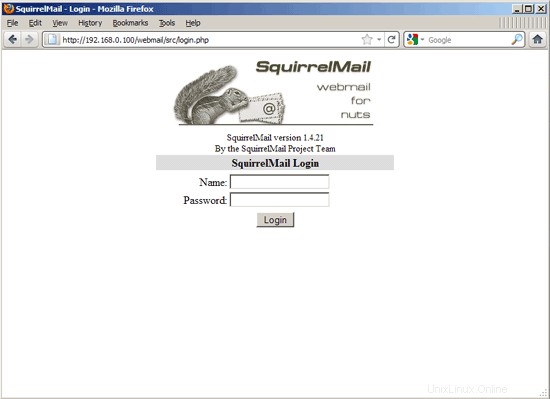
Afterwards you can access SquirrelMail under http://server1.example.com/webmail or http://192.168.0.100/webmail:
The Perfect Server - Ubuntu 11.04 [ISPConfig 3] - Page 6
21 Install ISPConfig 3
To install ISPConfig 3 from the latest released version, do this:
cd /tmp
 wget http://www.ispconfig.org/downloads/ISPConfig-3-stable.tar.gz
 tar xfz ISPConfig-3-stable.tar.gz
 cd ispconfig3_install/install/
The next step is to run
php -q install.php
This will start the ISPConfig 3 installer. The installer will configure all services like Postfix, SASL, Courier, etc. for you. A manual setup as required for ISPConfig 2 (perfect setup guides) is not necessary.
[email protected]:/tmp/ispconfig3_install/install# php -q install.php
--------------------------------------------------------------------------------
_____ ___________ _____ __ _ ____
|_ _/ ___| ___ \ / __ \ / _(_) /__ \
| | \ `--.| |_/ / | / \/ ___ _ __ | |_ _ __ _ _/ /
| | `--. \ __/ | | / _ \| '_ \| _| |/ _` | |_ |
_| |_/\__/ / | | \__/\ (_) | | | | | | | (_| | ___\ \
\___/\____/\_| \____/\___/|_| |_|_| |_|\__, | \____/
__/ |
|___/
--------------------------------------------------------------------------------
>> Initial configuration
Operating System: Debian 6.0 (Squeeze/Sid) or compatible
Following will be a few questions for primary configuration so be careful.
Default values are in [brackets] and can be accepted with
Tap in "quit" (without the quotes) to stop the installer.
Select language (en,de) [en]: <-- ENTER
Installation mode (standard,expert) [standard]: <-- ENTER
Full qualified hostname (FQDN) of the server, eg server1.domain.tld [server1.example.com]: <-- ENTER
MySQL server hostname [localhost]: <-- ENTER
MySQL root username [root]: <-- ENTER
MySQL root password []: <-- yourrootsqlpassword
MySQL database to create [dbispconfig]: <-- ENTER
MySQL charset [utf8]: <-- ENTER
Generating a 2048 bit RSA private key
....+++
..+++
writing new private key to 'smtpd.key'
-----
You are about to be asked to enter information that will be incorporated
into your certificate request.
What you are about to enter is what is called a Distinguished Name or a DN.
There are quite a few fields but you can leave some blank
For some fields there will be a default value,
If you enter '.', the field will be left blank.
-----
Country Name (2 letter code) [AU]: <-- ENTER
State or Province Name (full name) [Some-State]: <-- ENTER
Locality Name (eg, city) []: <-- ENTER
Organization Name (eg, company) [Internet Widgits Pty Ltd]: <-- ENTER
Organizational Unit Name (eg, section) []: <-- ENTER
Common Name (eg, YOUR name) []: <-- ENTER
Email Address []: <-- ENTER
Configuring Jailkit
Configuring SASL
Configuring PAM
Configuring Courier
Configuring Spamassassin
Configuring Amavisd
Configuring Getmail
Configuring Pureftpd
Configuring BIND
Configuring Apache
Configuring Vlogger
Configuring Apps vhost
Configuring Firewall
Installing ISPConfig
ISPConfig Port [8080]: <-- ENTER
Configuring DBServer
Installing ISPConfig crontab
no crontab for root
no crontab for getmail
Restarting services ...
Rather than invoking init scripts through /etc/init.d, use the service(8)
utility, e.g. service mysql restart
Since the script you are attempting to invoke has been converted to an
Upstart job, you may also use the stop(8) and then start(8) utilities,
e.g. stop mysql ; start mysql. The restart(8) utility is also available.
mysql stop/waiting
mysql start/running, process 27585
* Stopping Postfix Mail Transport Agent postfix
...done.
* Starting Postfix Mail Transport Agent postfix
...done.
* Stopping SASL Authentication Daemon saslauthd
...done.
* Starting SASL Authentication Daemon saslauthd
...done.
Stopping amavisd: amavisd-new.
Starting amavisd: amavisd-new.
* Stopping ClamAV daemon clamd
...done.
* Starting ClamAV daemon clamd
...done.
* Stopping Courier authentication services authdaemond
...done.
* Starting Courier authentication services authdaemond
...done.
* Stopping Courier IMAP server imapd
...done.
* Starting Courier IMAP server imapd
...done.
* Stopping Courier IMAP-SSL server imapd-ssl
...done.
* Starting Courier IMAP-SSL server imapd-ssl
...done.
* Stopping Courier POP3 server...
...done.
* Starting Courier POP3 server...
...done.
* Stopping Courier POP3-SSL server...
...done.
* Starting Courier POP3-SSL server...
...done.
* Restarting web server apache2
... waiting . ...done.
Restarting ftp server: Running: /usr/sbin/pure-ftpd-mysql-virtualchroot -l mysql:/etc/pure-ftpd/db/mysql.conf -l pam -E -Y 1 -8 UTF-8 -H -A -O clf:/var/log/pure-ftpd/transfer.log -D -b -u 1000 -B
Installation completed.
[email protected]:/tmp/ispconfig3_install/install#
The installer automatically configures all underlying services, so no manual configuration is needed.
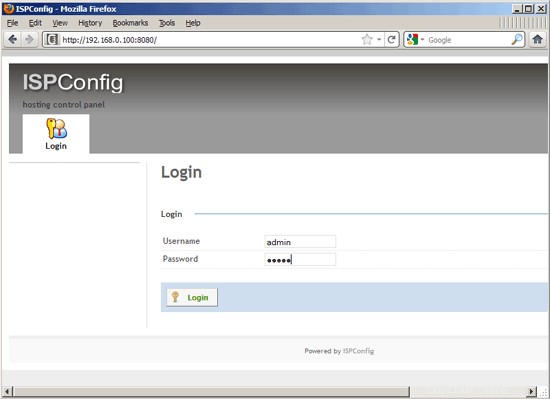
Afterwards you can access ISPConfig 3 under http://server1.example.com:8080/ or http://192.168.0.100:8080/. Log in with the username admin and the password admin (you should change the default password after your first login):
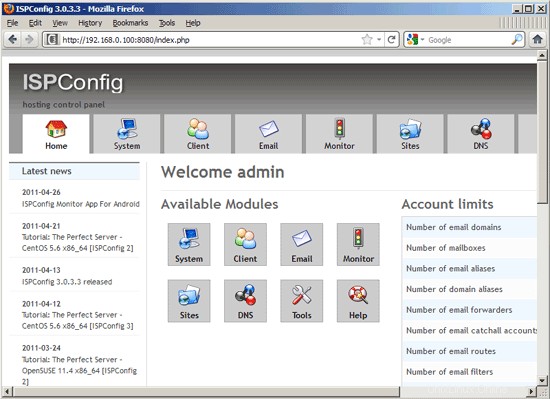
The system is now ready to be used.
21.1 ISPConfig 3 Manual
In order to learn how to use ISPConfig 3, I strongly recommend to download the ISPConfig 3 Manual.
On about 300 pages, it covers the concept behind ISPConfig (admin, resellers, clients), explains how to install and update ISPConfig 3, includes a reference for all forms and form fields in ISPConfig together with examples of valid inputs, and provides tutorials for the most common tasks in ISPConfig 3. It also lines out how to make your server more secure and comes with a troubleshooting section at the end.
21.2 ISPConfig Monitor App For Android
With the ISPConfig Monitor App, you can check your server status and find out if all services are running as expected. You can check TCP and UDP ports and ping your servers. In addition to that you can use this app to request details from servers that have ISPConfig installed (please note that the minimum installed ISPConfig 3 version with support for the ISPConfig Monitor App is 3.0.3.3! ); these details include everything you know from the Monitor module in the ISPConfig Control Panel (e.g. services, mail and system logs, mail queue, CPU and memory info, disk usage, quota, OS details, RKHunter log, etc.), and of course, as ISPConfig is multiserver-capable, you can check all servers that are controlled from your ISPConfig master server.
For download and usage instructions, please visit http://www.ispconfig.org/ispconfig-3/ispconfig-monitor-app-for-android/.
22 Additional Notes
22.1 OpenVZ
If the Ubuntu server that you've just set up in this tutorial is an OpenVZ container (virtual machine), you should do this on the host system (I'm assuming that the ID of the OpenVZ container is 101 - replace it with the correct VPSID on your system):
VPSID=101
 for CAP in CHOWN DAC_READ_SEARCH SETGID SETUID NET_BIND_SERVICE NET_ADMIN SYS_CHROOT SYS_NICE CHOWN DAC_READ_SEARCH SETGID SETUID NET_BIND_SERVICE NET_ADMIN SYS_CHROOT SYS_NICE
 do
   vzctl set $VPSID --capability ${CAP}:on --save
 done
22.2 SquirrelMail
Lots of people have reported problems (such as getting 404 Not Found errors) using the SquirrelMail webmail package in their web sites created through ISPConfig 3. This guide explains how to configure SquirrelMail on an Ubuntu 11.04 server so that you can use it from within your web sites (created through ISPConfig).
SquirrelMail's Apache configuration is in the file /etc/squirrelmail/apache.conf, but this file isn't loaded by Apache because it is not in the /etc/apache2/conf.d/ directory. Therefore we create a symlink called squirrelmail.conf in the /etc/apache2/conf.d/ directory that points to /etc/squirrelmail/apache.conf and reload Apache afterwards:
cd /etc/apache2/conf.d/
 ln -s ../../squirrelmail/apache.conf squirrelmail.conf
 /etc/init.d/apache2 reload
Now open /etc/apache2/conf.d/squirrelmail.conf...
vi /etc/apache2/conf.d/squirrelmail.conf
... and add the following lines to the
[...] |
Create the directory /var/lib/squirrelmail/tmp...
mkdir /var/lib/squirrelmail/tmp
... and make it owned by the user www-data:
chown www-data /var/lib/squirrelmail/tmp
Reload Apache again:
/etc/init.d/apache2 reload
That's it already - /etc/apache2/conf.d/squirrelmail.conf defines an alias called /squirrelmail that points to SquirrelMail's installation directory /usr/share/squirrelmail.
You can now access SquirrelMail from your web site as follows:
http://www.example.com/squirrelmail
You can also access it from the ISPConfig control panel vhost as follows (this doesn't need any configuration in ISPConfig):
http://server1.example.com:8080/squirrelmail
If you'd like to use the alias /webmail instead of /squirrelmail, simply open /etc/apache2/conf.d/squirrelmail.conf...
vi /etc/apache2/conf.d/squirrelmail.conf
... and add the line Alias /webmail /usr/share/squirrelmail:
Alias /squirrelmail /usr/share/squirrelmailAlias /webmail /usr/share/squirrelmail[...] |
Then reload Apache:
/etc/init.d/apache2 reload
Now you can access Squirrelmail as follows:
http://www.example.com/webmail
 http://server1.example.com:8080/webmail
If you'd like to define a vhost like webmail.example.com where your users can access SquirrelMail, you'd have to add the following vhost configuration to /etc/apache2/conf.d/squirrelmail.conf:
vi /etc/apache2/conf.d/squirrelmail.conf
[...] |
Make sure you replace 1.2.3.4 with the correct IP address of your server. Of course, there must be a DNS record for webmail.example.com that points to the IP address that you use in the vhost configuration. Also make sure that the vhost webmail.example.com does not exist in ISPConfig (otherwise both vhosts will interfere with each other!).
Now reload Apache...
/etc/init.d/apache2 reload
... and you can access SquirrelMail under http://webmail.example.com!
23 Links
- Ubuntu:http://www.ubuntu.com/
- ISPConfig:http://www.ispconfig.org/