Bugzillaは、無料のオープンソースのバグ追跡システムであり、バグを追跡し、組織内の開発者や他のチームと協力することができます。これは、製品のバグ、問題、およびその他の変更要求を効果的に追跡するのに役立ちます。その堅牢な機能により、世界中の何千もの組織に採用されました。 Perlで記述されており、MySQL/MariaDBをデータベースバックエンドとして使用します。
この記事では、Debian11にBugzillaをインストールする方法を説明します。
- Debian11を実行しているサーバー。
- サーバーIPで指定された有効なドメイン名。
- ルートパスワードはサーバーで構成されています。
まず、次のコマンドを使用して、すべてのシステムパッケージを更新されたバージョンに更新します。
apt-get update -y
次に、次のコマンドを使用して、必要なすべてのPerlモジュールをインストールします。
apt-get install build-essential libdatetime-timezone-perl libappconfig-perl libdate-calc-perl libtemplate-perl libmime-tools-perl libdatetime-perl libemail-sender-perl libemail-mime-perl libemail-mime-perl libdbi-perl libdbd-mysql-perl libcgi-pm-perl libmath-random-isaac-perl libmath-random-isaac-xs-perl libapache2-mod-perl2 libapache2-mod-perl2-dev libchart-perl libxml-perl libxml-twig-perl perlmagick libgd-graph-perl libtemplate-plugin-gd-perl libsoap-lite-perl libhtml-scrubber-perl libjson-rpc-perl libdaemon-generic-perl libtheschwartz-perl libtest-taint-perl libauthen-radius-perl libhtml-formattext-withlinks-perl libgd-dev graphviz sphinx-common rst2pdf libemail-address-perl libemail-reply-perl libfile-slurp-perl libencode-detect-perl libmodule-build-perl libnet-ldap-perl libfile-which-perl libauthen-sasl-perl libfile-mimeinfo-perl -y
完了したら、次のステップに進むことができます。
ApacheとMariaDBをインストールする
次に、次のコマンドを実行して、ApacheおよびMariaDBデータベースサーバーをインストールします。
apt-get install apache2 mariadb-server mariadb-client -y
両方のパッケージがインストールされたら、次のコマンドを使用してApacheおよびMariaDBサービスを開始します。
systemctl start apache2
systemctl start mariadb
終了したら、次のステップに進むことができます。
MariaDBデータベースを構成する
次に、Bugzillaのデータベースとユーザーを作成する必要があります。
まず、以下のコマンドを使用してMariaDBシェルにログインします。
mysql
ログインしたら、次のコマンドを使用してデータベースとユーザーを作成します。
MariaDB [(none)]> CREATE DATABASE bugzilla;
MariaDB [(none)]> CREATE USER 'buguser'@'localhost' IDENTIFIED BY 'password';
次に、次のコマンドを使用して、Bugzillaデータベースにすべての権限を付与します。
MariaDB [(none)]> GRANT ALL PRIVILEGES ON bugzilla.* TO 'buguser'@'localhost';
次に、特権をフラッシュし、次のコマンドを使用してMariaDBシェルを終了します。
MariaDB [(none)]> FLUSH PRIVILEGES;
MariaDB [(none)]> EXIT;
次に、MariaDBのデフォルトの構成ファイルを編集し、いくつかの構成を微調整します。
nano /etc/mysql/mariadb.conf.d/50-server.cnf
[mysqld]内に次の行を追加します:
max_allowed_packet=16M
ft_min_word_len=2
フィールドを保存して閉じ、MariaDBサービスを再起動して変更を適用します。
systemctl restart mariadb
Bugzillaのインストールと構成
まず、次のコマンドを使用して最新バージョンのBugzillaをダウンロードします。
wget https://ftp.mozilla.org/pub/mozilla.org/webtools/bugzilla-5.0.6.tar.gz
ダウンロードが完了したら、Bugzillaのディレクトリを作成し、ダウンロードしたファイルをBugzillaディレクトリに抽出します。
mkdir /var/www/html/bugzilla
tar xf bugzilla-5.0.6.tar.gz -C /var/www/html/bugzilla --strip-components=1
次に、Bugzillaディレクトリ内のlocalconfigファイルを編集します:
cd /var/www/html/bugzilla
nano localconfig
次の変更を行います:
$create_htaccess = 1;
$webservergroup = 'www-data';
$use_suexec = 1;
$db_driver = 'mysql';
$db_host = 'localhost';
$db_name = 'bugzilla';
$db_user = 'buguser';
$db_pass = 'password';
ファイルを保存して閉じてから、次のコマンドを実行してBugzillaをセットアップします。
./checksetup.pl
Enter the e-mail address of the administrator: [email protected]
Enter the real name of the administrator: Hitesh Jethva
Enter a password for the administrator account:
Please retype the password to verify:
[email protected] is now set up as an administrator.
Creating initial dummy product 'TestProduct'...

Now that you have installed Bugzilla, you should visit the 'Parameters'
page (linked in the footer of the Administrator account) to ensure it
is set up as you wish - this includes setting the 'urlbase' option to
the correct URL.
checksetup.pl complete.
次に、次のコマンドを実行して、必要なすべてのPerlモジュールをインストールします。
/usr/bin/perl install-module.pl --all
次に、Bugzillaディレクトリの所有権を www-dataに変更します :
chown -R www-data:www-data /var/www/html/bugzilla/
次に、次のコマンドを使用してBugzillaのセットアップを確認します。
./checksetup.pl
すべてが正常であれば、次の出力が得られます:
* APACHE MODULES                                                      *
***********************************************************************
* Some Apache modules allow to extend Bugzilla functionalities.       *
* These modules can be enabled in the Apache configuration file       *
* (usually called httpd.conf or apache2.conf).                        *
* - mod_headers, mod_env and mod_expires permit to automatically      *
*   refresh the browser cache of your users when upgrading Bugzilla.  *
* - mod_rewrite permits to write shorter URLs used by the REST API.   *
* - mod_version permits to write rules in .htaccess specific to       *
*   Apache 2.2 or 2.4.                                                *
* The modules you need to enable are:                                 *
*                                                                     *
*    mod_expires, mod_headers, mod_rewrite                            *
*                                                                     *
***********************************************************************
Reading ./localconfig...

OPTIONAL NOTE: If you want to be able to use the 'difference between two
patches' feature of Bugzilla (which requires the PatchReader Perl module
as well), you should install patchutils from:

    http://cyberelk.net/tim/software/patchutils/

Checking for            DBD-mysql (v4.001)    ok: found v4.050
Checking for                MySQL (v5.0.15)   ok: found v10.5.12-MariaDB-0+deb11u1

Removing existing compiled templates...
Precompiling templates...done.
Fixing file permissions...

Now that you have installed Bugzilla, you should visit the 'Parameters'
page (linked in the footer of the Administrator account) to ensure it
is set up as you wish - this includes setting the 'urlbase' option to
the correct URL.
checksetup.pl complete.
終了したら、次のステップに進むことができます。
ApacheをBugzilla用に設定
次に、Bugzilla用のApache仮想ホスト構成ファイルを作成する必要があります。
nano /etc/apache2/sites-available/bugzilla.conf
次の行を追加します:
<VirtualHost *:80>
ServerName bugzilla.example.com
DocumentRoot /var/www/html/bugzilla/

<Directory /var/www/html/bugzilla/>
AddHandler cgi-script .cgi
Options +Indexes +ExecCGI
DirectoryIndex index.cgi
AllowOverride Limit FileInfo Indexes Options AuthConfig
</Directory>

ErrorLog /var/log/apache2/bugzilla.error_log
CustomLog /var/log/apache2/bugzilla.access_log common
</VirtualHost>
ファイルを保存して閉じてから、Bugzilla仮想ホストをアクティブ化し、次のコマンドを使用して他の必要なモジュールを有効にします。
a2ensite bugzilla.conf
a2enmod headers env rewrite expires cgi
次に、Apacheサービスを再起動して、構成の変更を適用します。
systemctl restart apache2
次のコマンドを使用して、Apacheのステータスを確認できます。
systemctl status apache2
次の出力が得られます:
? apache2.service - The Apache HTTP Server
     Loaded: loaded (/lib/systemd/system/apache2.service; enabled; vendor preset: enabled)
     Active: active (running) since Sun 2021-12-19 08:57:08 UTC; 7s ago
       Docs: https://httpd.apache.org/docs/2.4/
    Process: 43005 ExecStart=/usr/sbin/apachectl start (code=exited, status=0/SUCCESS)
   Main PID: 43011 (apache2)
      Tasks: 56 (limit: 4679)
     Memory: 13.5M
        CPU: 46ms
     CGroup: /system.slice/apache2.service
             ??43011 /usr/sbin/apache2 -k start
             ??43012 /usr/sbin/apache2 -k start
             ??43013 /usr/sbin/apache2 -k start
             ??43014 /usr/sbin/apache2 -k start

Dec 19 08:57:08 taiga systemd[1]: Starting The Apache HTTP Server...
終了したら、次のステップに進むことができます。
BugzillaWebインターフェイスにアクセス
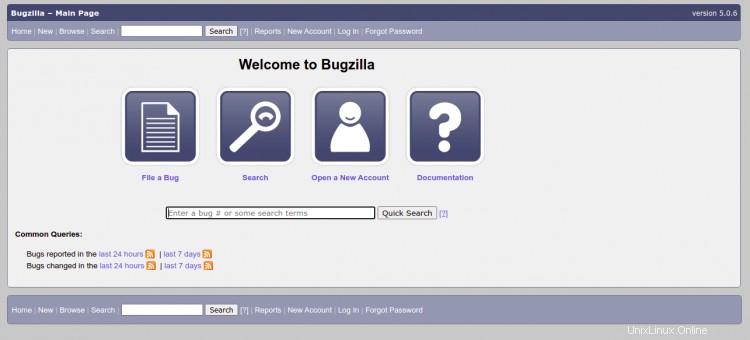
次に、Webブラウザーを開き、URL http://bugzilla.example.comを使用してBugzillaWebインターフェースにアクセスします。 。次の画面が表示されます。
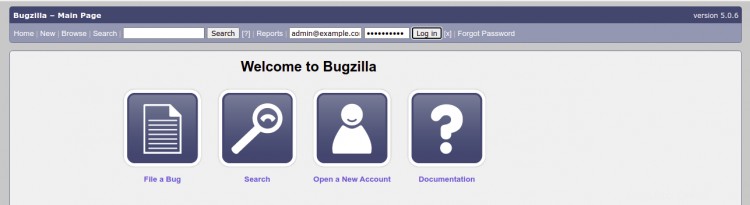
ログインをクリックします ボタン。次の画面が表示されます。
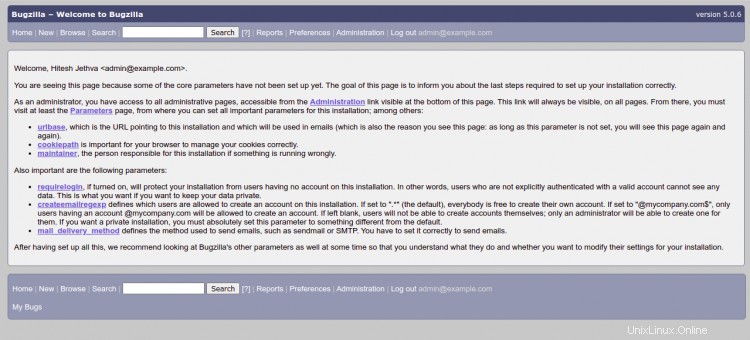
管理者のメールアドレスとパスワードを入力し、ログインをクリックします ボタン。次の画面にBugzillaダッシュボードが表示されます。
おめでとう!これで、Debian 11にApacheを使用してBugzillaが正常にインストールされました。これで、開発環境にBugzillaを実装して、プロジェクトを管理および追跡できます。ご不明な点がございましたら、お気軽にお問い合わせください。